Table of Contents
This updated guide explains how to Create a Professional Gmail Signature 2020 through clear steps, practical examples, and important checks that help prevent common errors.
If you have to use Gmail regularly to send electronic messages, creating a professional signature with full information and style of yourself or the collective you represent is essential.
A professional Gmail signature is not only aesthetically pleasing, but also contains enough information or contact that you may need to show off. In this article, let's learn TipsMake. vn learn how to create a professional Gmail signature.
1. Manually Create a Professional Gmail Signature Manually
Gmail allows you to create a signature under each outgoing letter and your signature and the content of the message will be separated by a '-' dash. The maximum number of characters you can use for your signature is 10,000 characters.
The first thing you need to do is open up Gmail . In the interface of Gmail , in the right corner icon Settings gear. Click the gear icon and choose Settings .

You continue to scroll down the bar, find Signature . This is the item we need to be interested in in this article. Remember to put a checkmark in the dot before the sign indicating box so you can add the signature you are about to create to all letters sent.

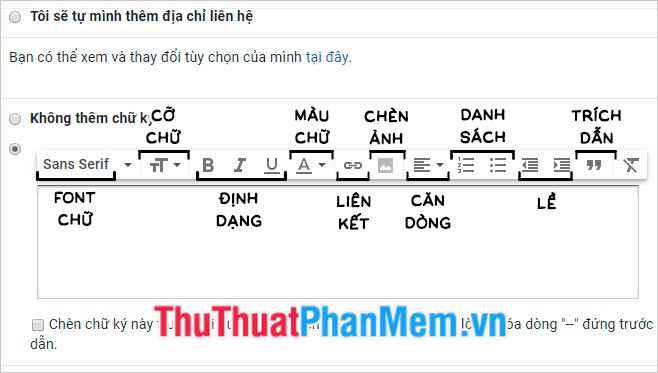
In this signature box, there are functions that can be used in the process of creating a professional signature:
- Font: used to create signatures with different fonts
- Font size: used to change the size of the characters in the signature
- Format: there are three basic formats used here: bold (B) , italic (I) and underline (U)
- Font color: used to change the color of characters in the signature
- Links: used to insert links into signatures
- Tea photo: used to add photos to the signature
- Align line: use to align left, center or right for signatures
- List: used to create bulleted or numbered lists in the signature
- Quote: create a quote line for the signature
- Clear formatting: the T-shaped slash at the end to delete the formatting you just set for your signature characters
Start creating a signature, you click the space in the signature display box. The type of characters you need to include in your Gmail signature, such as your name or the name of the organization you are representing.
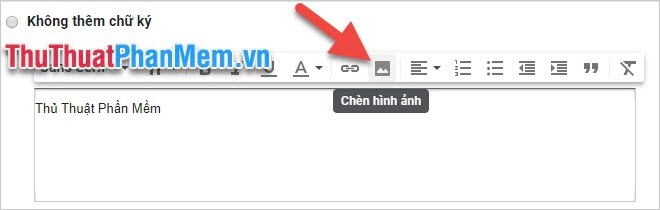
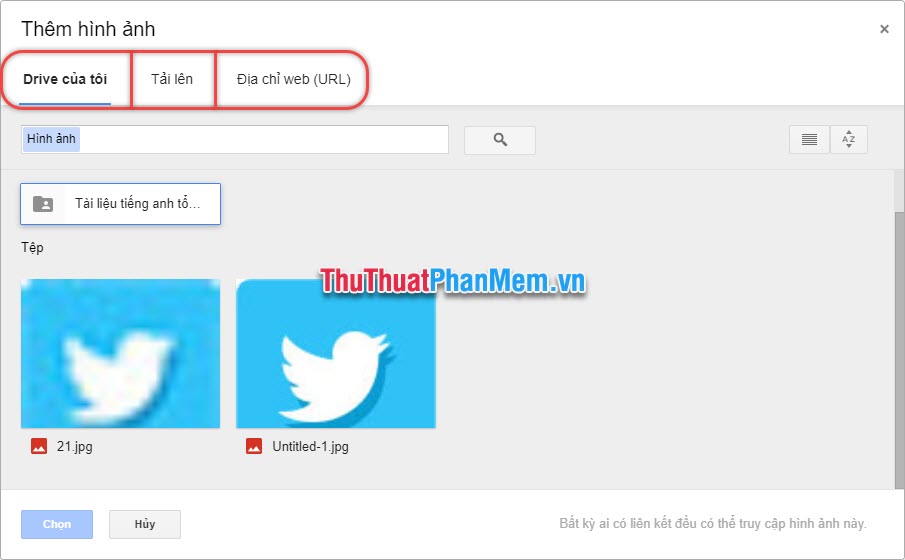
Insert images into a signature by clicking the Insert image icon in the format bar. You can insert images into signatures from 3 sources: Drive, your computer or by URL.
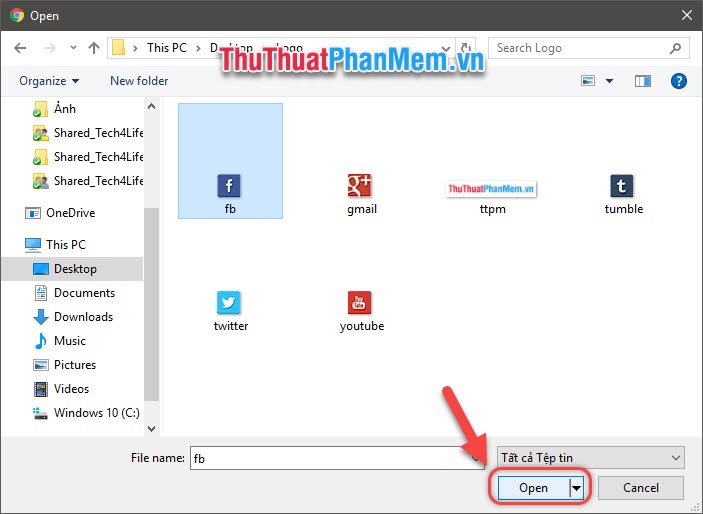
If you choose to get photos from your computer, you need to open the folder containing the images you need to insert and then select the image and click Open to perform inserting images into the signature frame.
It may take a few seconds for the image to finish uploading.
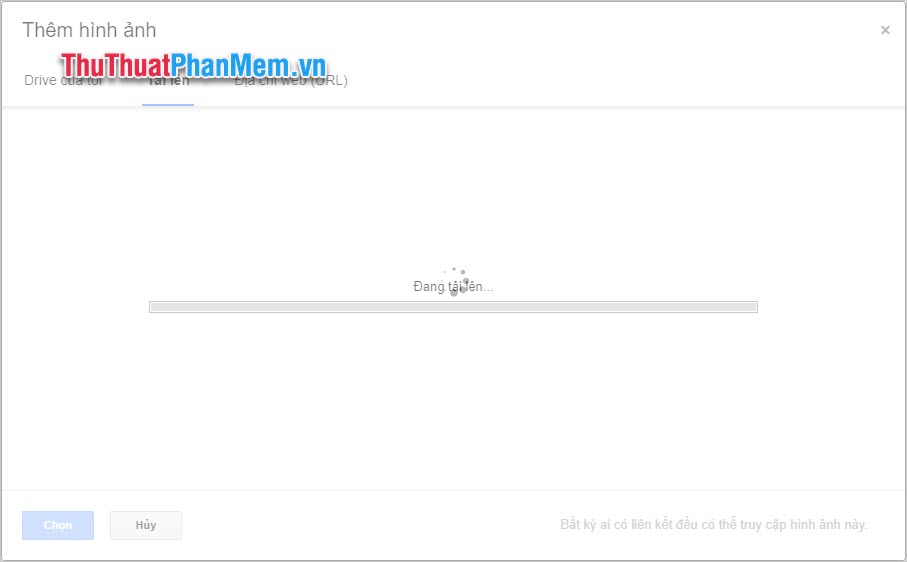
You can insert many different pictures and choose the right size for your photos.
Next, you can also insert the link for the image you just inserted. When inserting a link into a photo, your email recipient just needs to click the image to open the link.
This is suitable for creating shortcuts to open the social networking sites you or the collective you are representing.
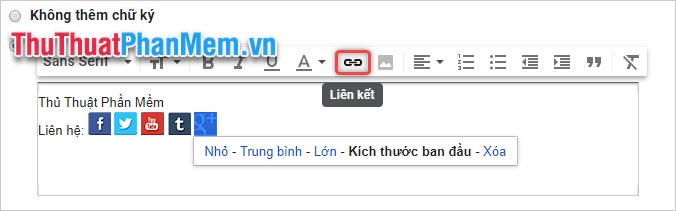
Highlight the image you may need to insert a link and then click the Link icon in the format bar.
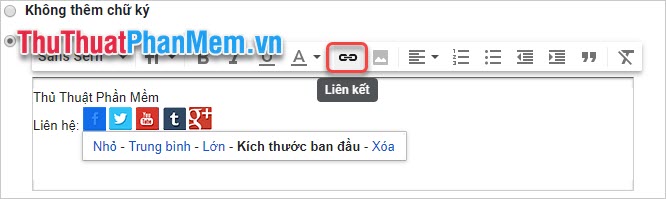
At this point, your photo will be temporarily assigned a URL:
You need to change this address to the link you may need to link. click Change .
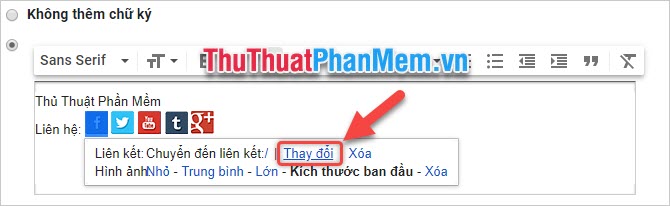
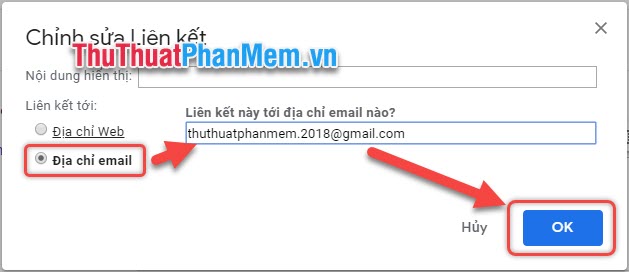
Put a tick in the Web Address . Delete the / go and then copy the link to be empty. Finally click OK to confirm the link insert.
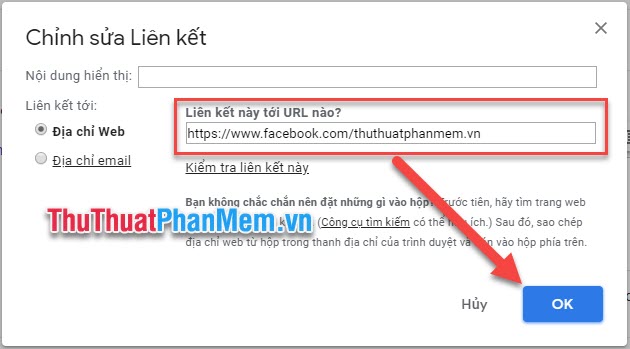
As the picture below shows, the blue icon of Facebook has been linked to the Facebook page of TipsMake. vn .
You can do the same with the other photos using the above method.
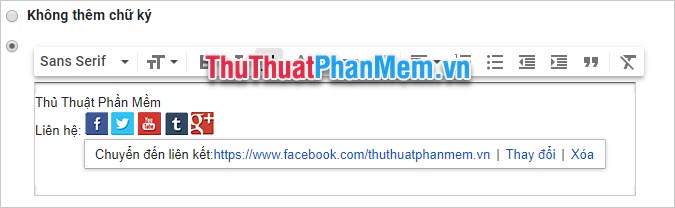
You can also insert your email address in the same way as above. Highlight the image icon to insert an email address and then click the Link icon.
Instead of leaving a tick at the Web Address , this time you change the tick to Email Address .
Add your email address in the blank box and then click OK to confirm.
The logo used for linking links should be images that are small in size only about 25x25 px so as not to occupy a position that is too big to lose the aesthetics of your signature.
Here are some popular icon images shared by TipsMake. vn . You can use it to create your own Gmail signature:


You can now edit the format for the characters in the signature. The rules for using these formats are quite simple, just highlight the characters to change the format and choose the type of format you want.
For example, below, highlight the name 'Software Tips' and then select the B icon to bold this character.
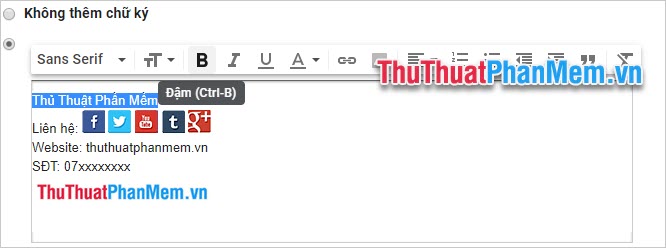
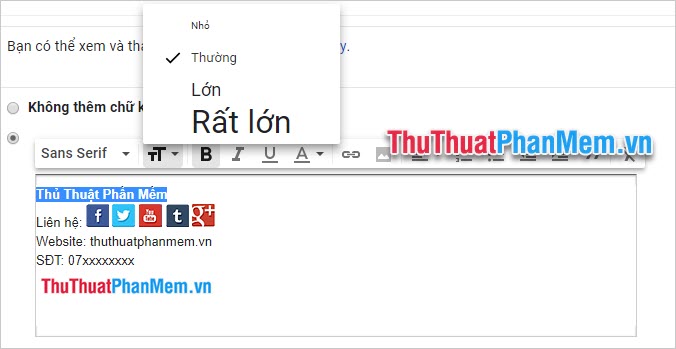
You can also change the size of a character with the size of a letter with two big and small T letters standing next to each other. There are 4 sizes for you to choose from: Small, Normal, Large, Very Large.
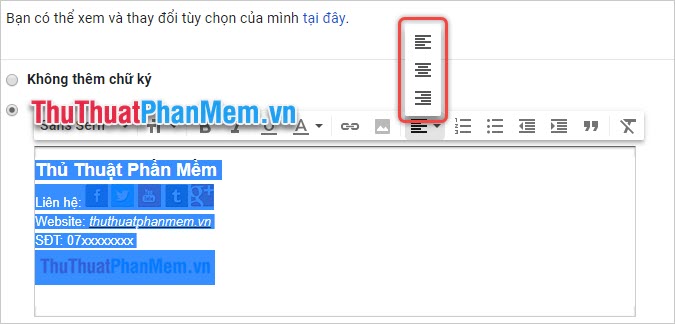
After formatting the characters, you can line up your signature. Aligning will rely on the width of the letter to move the signature position horizontally.
If left unchecked, it will default to left alignment.
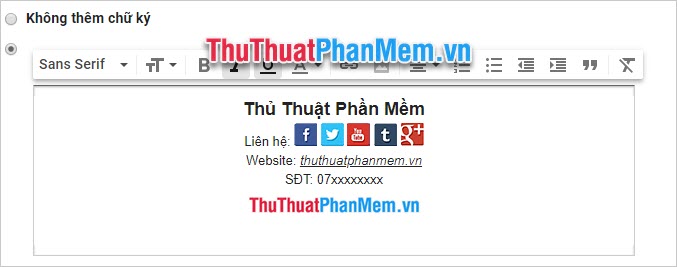
After editing is complete, you can look at your signature again to see if it fits. If not satisfied then you can customize it again.
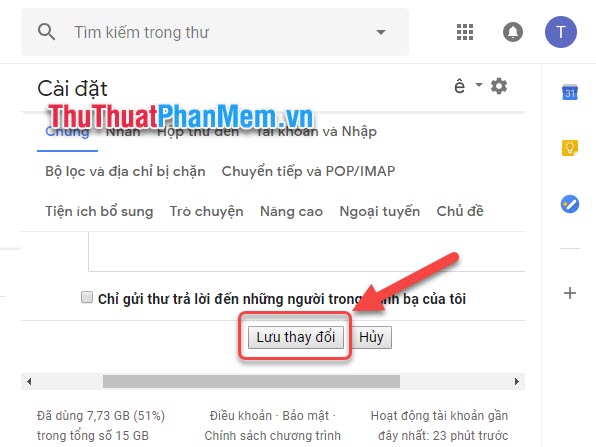
Finally, drag the mouse pointer to the end and click Save changes to save the signature you have just created.
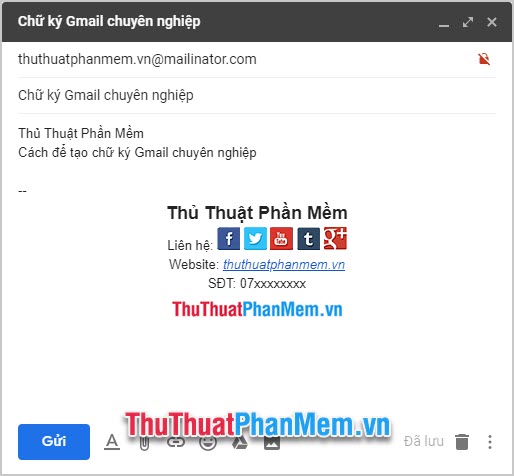
After creating a signature, each of your new messages will be assigned a signature similar to the image below.
Note that this signature, as well as the characters added to the email you drafted, can be deleted or edited right in the letter you are editing.
2. the Website Supports Creating Professional Signatures for Gmail
If you do not feel confident in your aesthetics, you can also use a few intermediary sites to help you create a signature for Gmail . They will have the form available, all you need to do is fill out the information you need to indicate only.
2.1. HTLMSig
Link link: https://htmlsig. com/
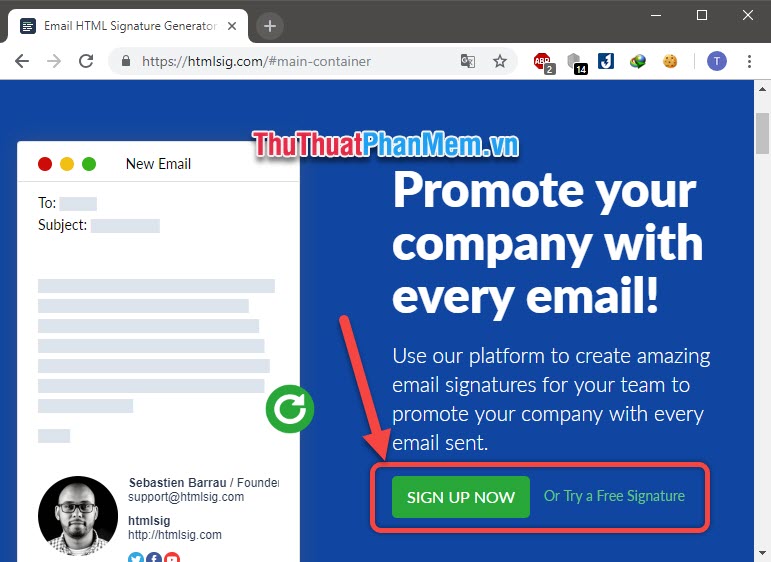
This site allows you to create a simple, yet eye-catching signature. You can sign up for the SIGN UP NOW account package if you may need to use the site's fuller service.
If not, you can try the site's free service, by clicking Or Try a Free Signature .
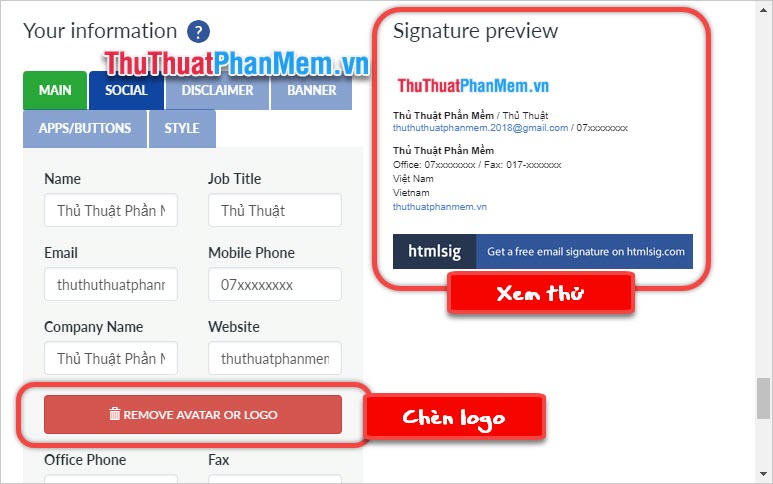
The screen will appear the signature creation interface of this website. The right hand side is filled with the information to be inserted into the signature and the left side will be the last one that you will receive and you can preview it first.
Fill in all the required information in the Main section such as name (Name), job title (Job Title), email, phone number (Mobile Phone), company name (Company Name), Website.
Next to Main is Social, this section is the place to fill information associated with the social network you use such as Facebook, Twitter, YouTube, Instagram.
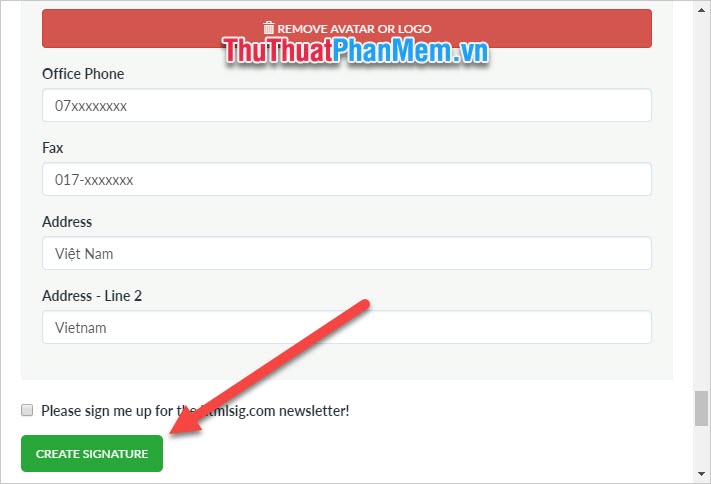
Finally, after completing all the information, you can click Create Signature to start initializing the signature.
Then when the signature is created at the top of the web page, simply copy the signature with the shortcut Ctrl C or right-click and select Copy .
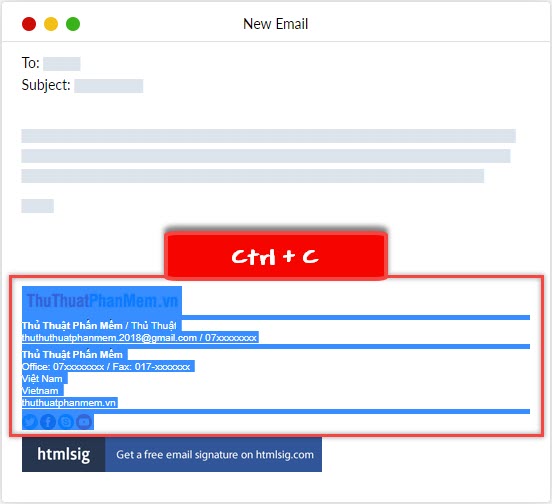
Then you copy that signature to the Signature Settings section (the way outlined in Part 1) and then Save changes to complete.
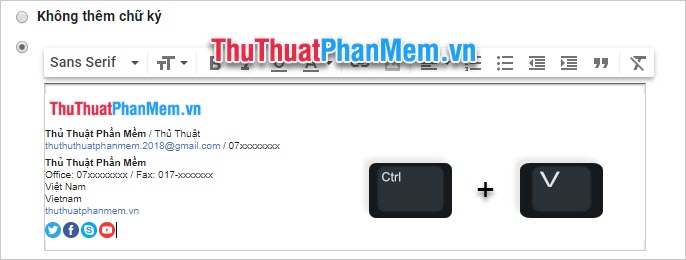
2.2. Newoldstamp
Link link: https://newoldstamp. com/editor/
Like HTLMSig, this site also allows you to create a signature for email but with different design styles and more options such as font, font size, format and font color.
You can enter the information you may need to insert in the signature in the SIGNATURE DETAILS section .
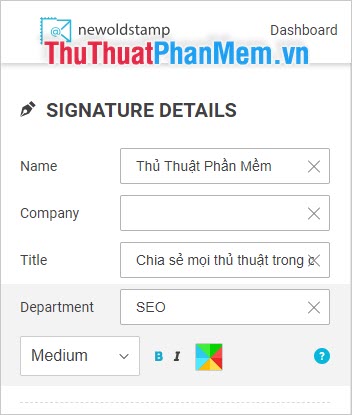
You can insert pictures or logos in PHOTO OR LOGO .
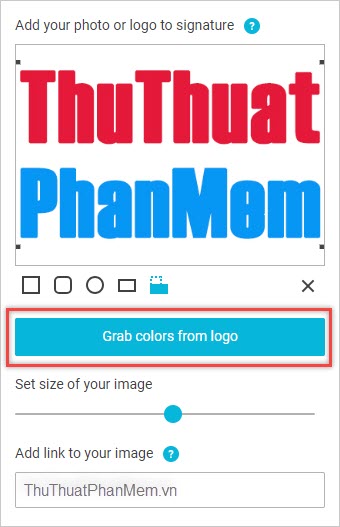
Finally, information on how to contact your social networking sites with SOCIAL ICONS .
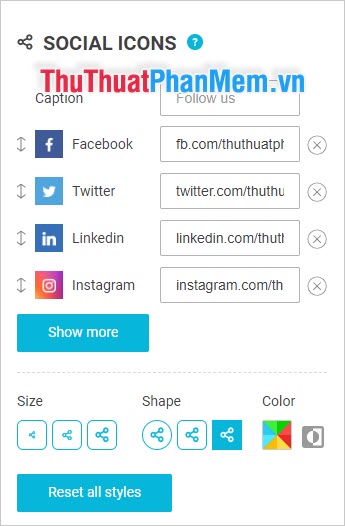
After the installation is complete, click Save and install in the PREVIEW section (preview).
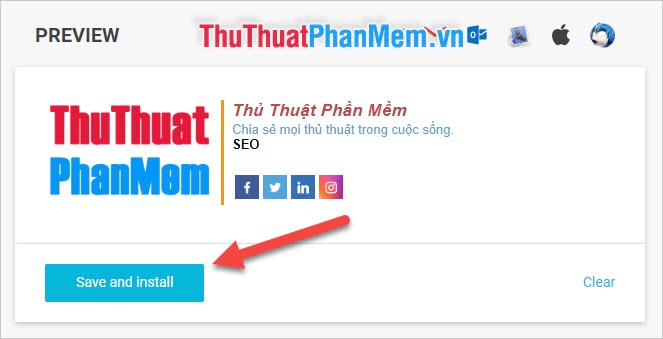
You will be able to preview your signature in the Gmail interface or other email delivery facilities.

If you feel your signature is okay, select Copy and proceed .
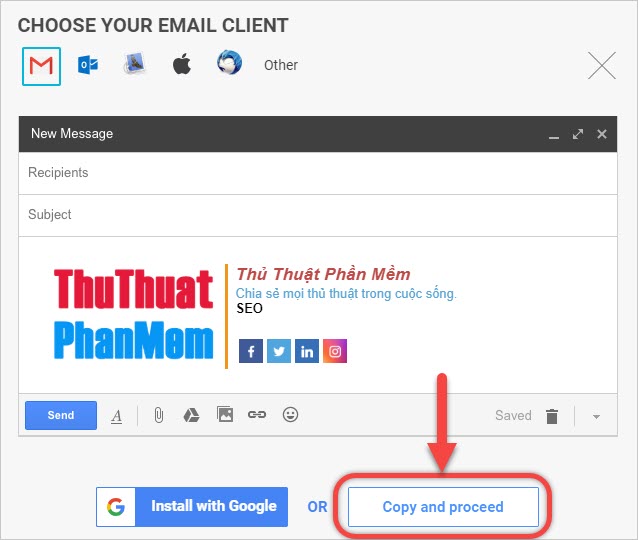
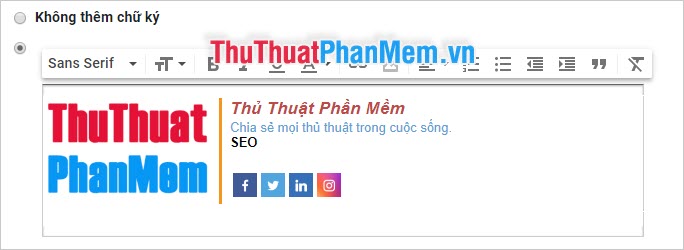
The signature you just created has been copied to the Clipboard, then you just need to paste it into the Gmail signature box and save and you have a professional signature created by Newoldstamp site.
Have you currently created a professional Gmail signature for yourself or your organization? Thank you for following the article of TipsMake. vn on How to create professional Gmail signatures, wish you success.
FAQ
What is the easiest way to Create a Professional Gmail Signature 2020?
Start with the requirements in this guide, then follow each step in order. Check the result after every major change so problems are easier to identify.
Can beginners follow these instructions?
Yes. The process is organized into practical steps, and you can repeat any step before moving forward.
What should I check if the method does not work?
Confirm your software or device version, permissions, settings, file format, and internet connection when the task depends on online services.
Related Articles
 Instructions for Creating Professional Gmail Signatures9 minutes read
 How to Create an Email Signature Generator Using ChatGPT8 minutes read
 How to Use Mailbum to Create a Professional Signature3 minutes read
 Instructions on How to Convert Signatures in Gmail: Gmail Signatures4 minutes read
 How to Create a Signature for Gmail and Insert Photos7 minutes read
 How to Create a Signature in Gmail: Step-by-Step Guide6 minutes read
Reader Comments 0
Sign in with email or Google to join the discussion.