How to bring applications to the computer screen Windows 11
Shortcuts are useful little icons that you can place on your desktop to eliminate having to open and re-open folders on your computer to launch applications.
Besides, some third-party apps don't integrate well with the Start menu and you won't be able to find them even in Windows search. In such cases, you will need to create desktop shortcuts for quick access.
If you're used to Windows 10 or earlier versions, you may find it difficult to bring apps to your desktop in the new Windows 11 interface. The following article will show you how to add an application or icon to the desktop in Windows 11.
There are several ways you can create or add desktop application shortcuts in Windows 11.
Add application icons to the desktop by dragging and dropping
The easiest and simplest way to add app shortcuts to the desktop in Windows 11 is to drag and drop apps from the Windows Start menu. Follow these steps to add application icons to the desktop:
First, click the Start button on the taskbar to open the Start menu. Then, click the All apps button in the top right corner of the Start menu.

In All apps , locate the app for which you want to create a desktop shortcut. Now, click on the application and drag it to the desktop.

Now the application shortcut will appear on the desktop.
Add application shortcuts from Start menu folder
When you install a third-party application from any external source other than the Windows Store, the application is created in the Windows Start-up folder. You can create desktop shortcuts from here. Follow these instructions to create a shortcut from the Start-up folder:
To get started, click the Start button on the taskbar. Then, search for the application you want to add to the Windows 11 desktop, right-click the application on Best match and select Open file location . For example, the article is looking for Notepad++ here.
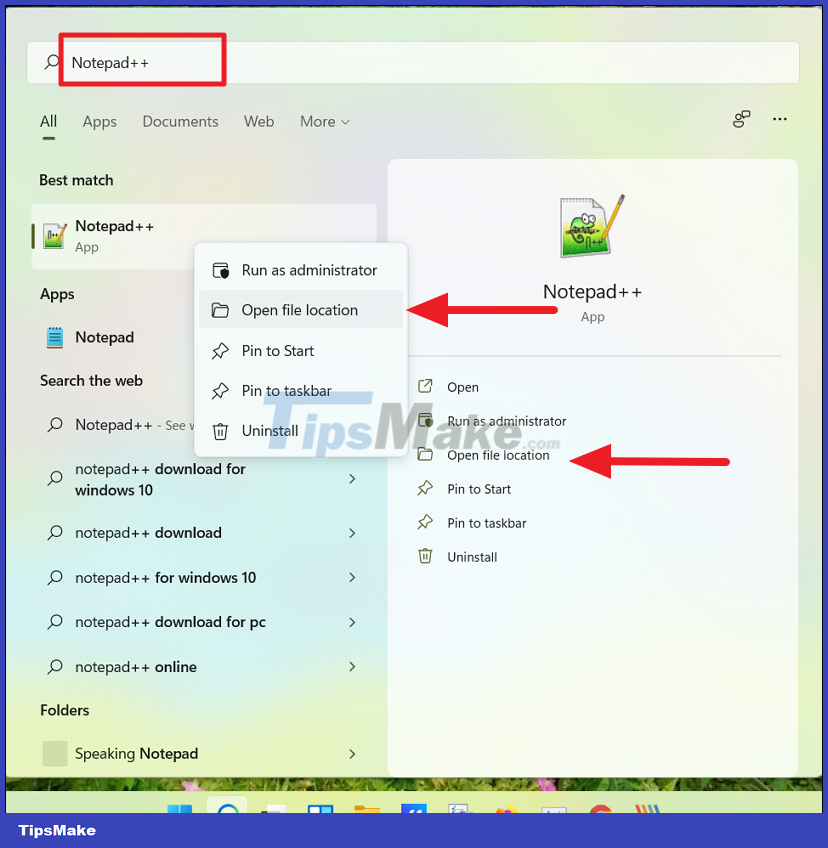
Alternatively, you can also click All apps in the top right corner.

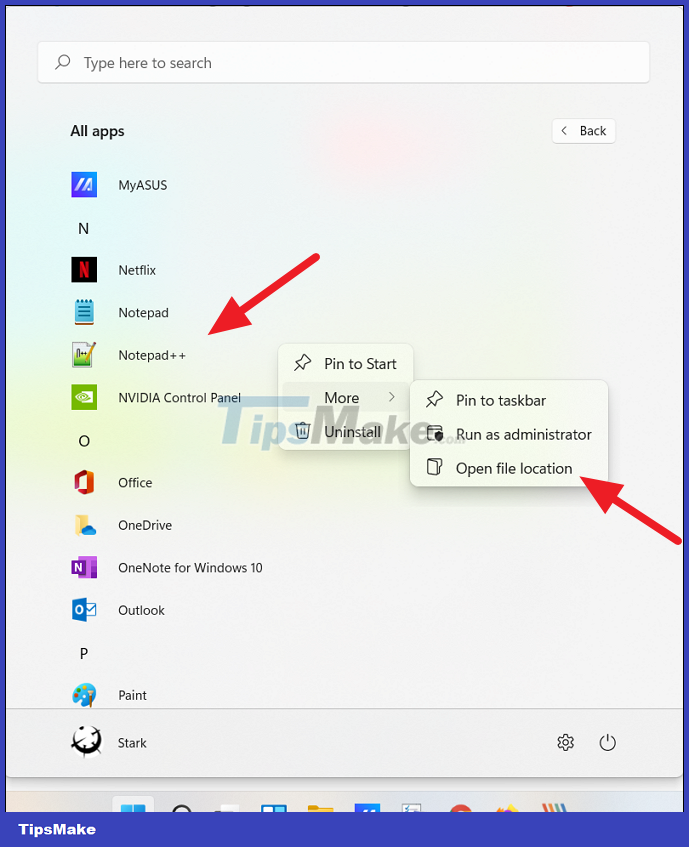
Now, from the application list, find the application for which you want to create a shortcut on the desktop. Then, right-click the app, expand More , and select Open file location from the submenu.
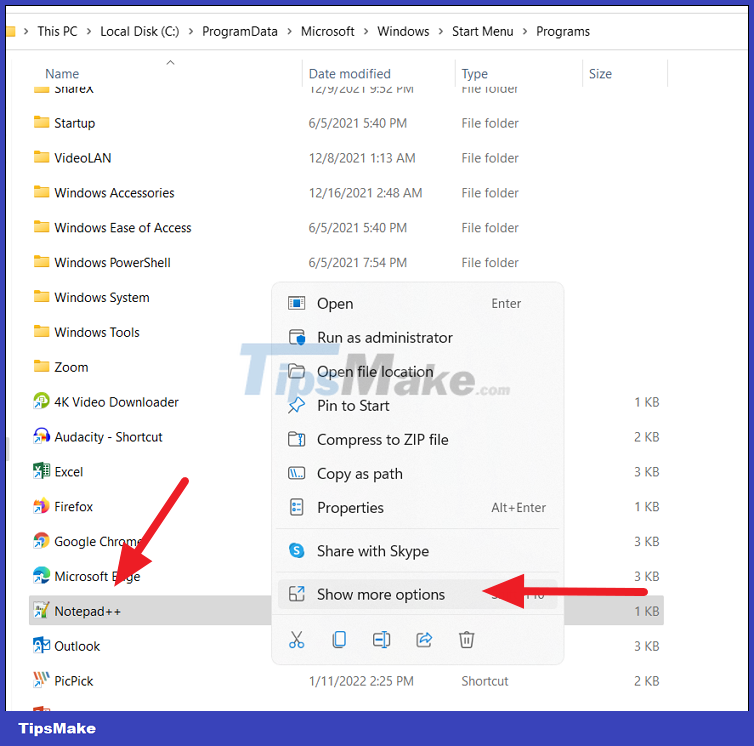
This will open the Start Menu folder. Now right click on the program icon and select the option Show more options to expand the classic context menu.
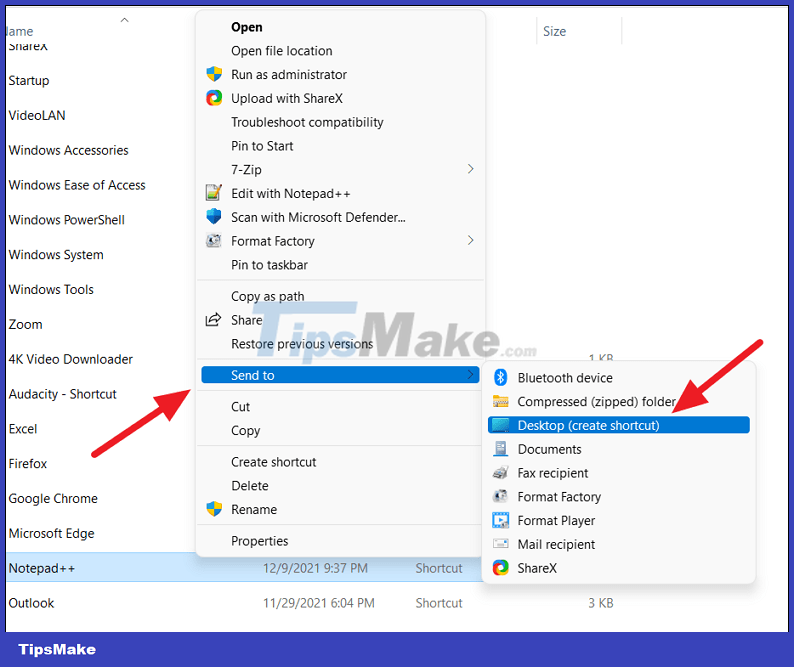
You should now see an old classic context menu. Here, click Send to and then choose Desktop (create shortcut ) from the submenu. You can also click the Copy button in the new context menu or press Ctrl + C to copy the file and paste it on the desktop.
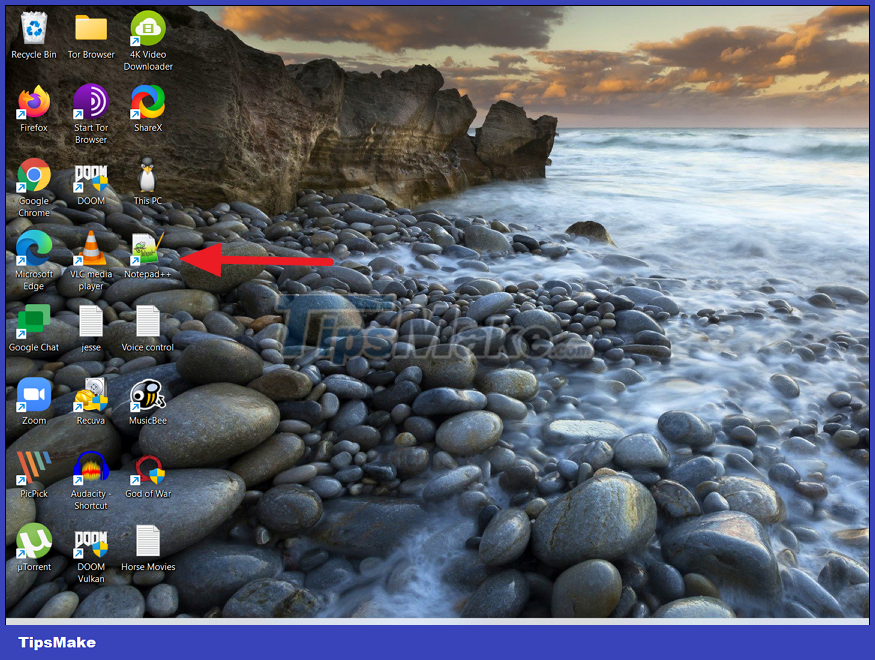
This will add the selected application icon (shortcut) to your Windows 11 desktop.
Add application shortcuts via Application folder
The above methods can help you create shortcuts for third-party apps and not for Windows Store programs or built-in Windows apps. This third method will help you create shortcuts for both third-party apps as well as Windows Store programs. Here's how you do this:
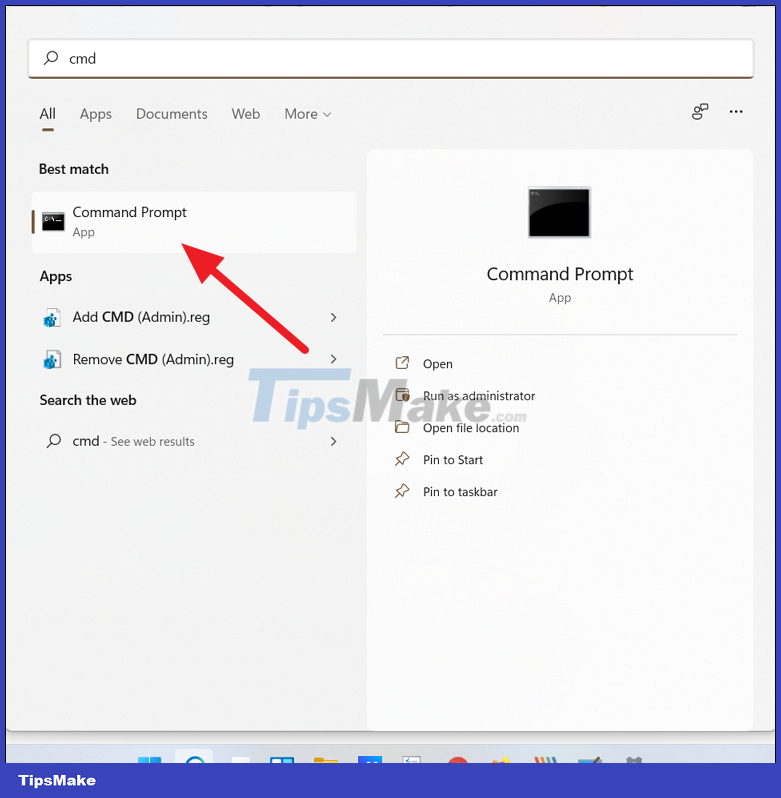
Open Windows search, type CMD and click Command Prompt from the search results. Alternatively, press Win + R then type CMD and press Enter to open Command Prompt.
In the Command Prompt, type the following command and press Enter to run it:
explorer shell:AppsFolder 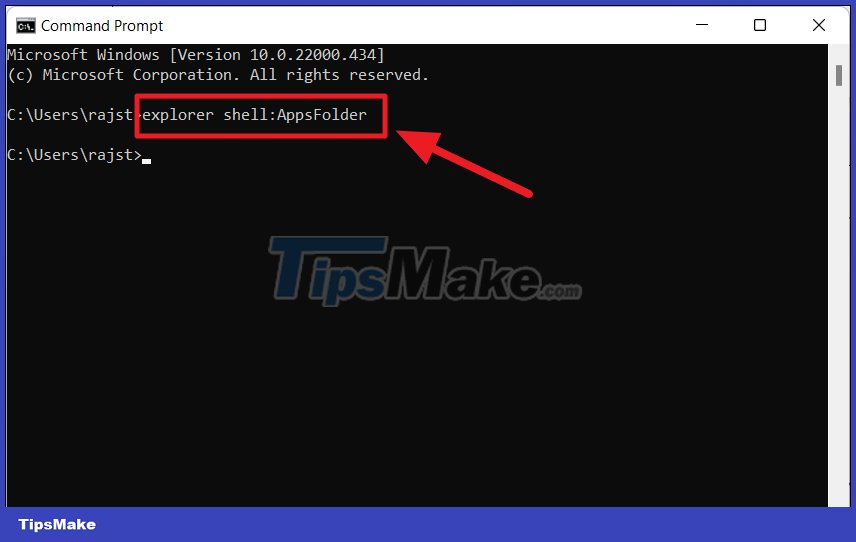
This will open the Applications folder, where you can find all the preloaded Windows apps, Windows Store apps, and third-party programs. Now, find the application for which you want to create a desktop shortcut. Then, right-click on the application and select the Create shortcut option.
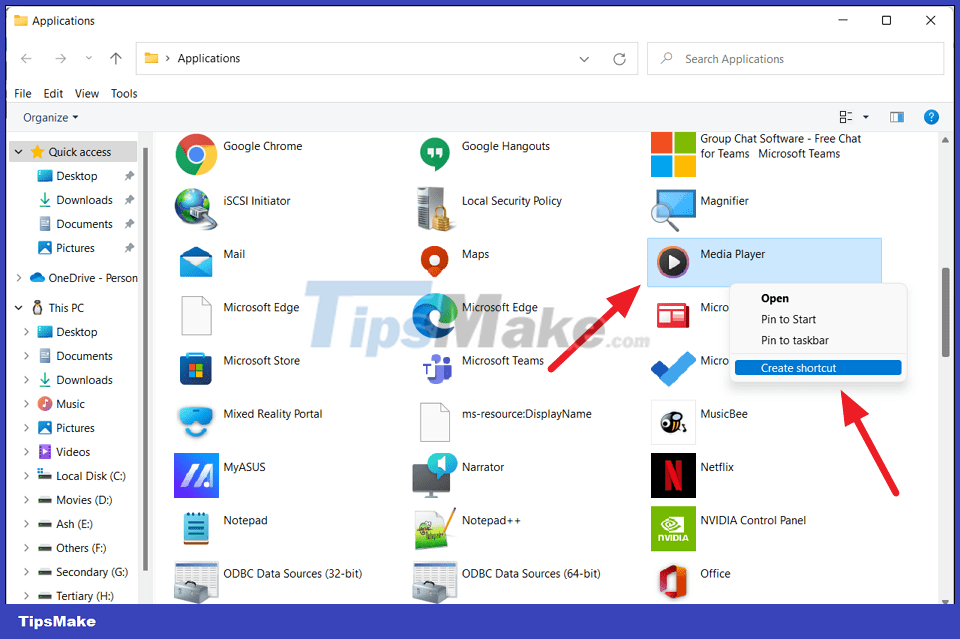
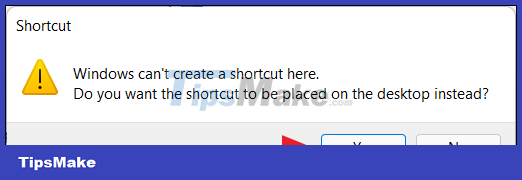
Now, click Yes to get to the shortcut confirmation window.
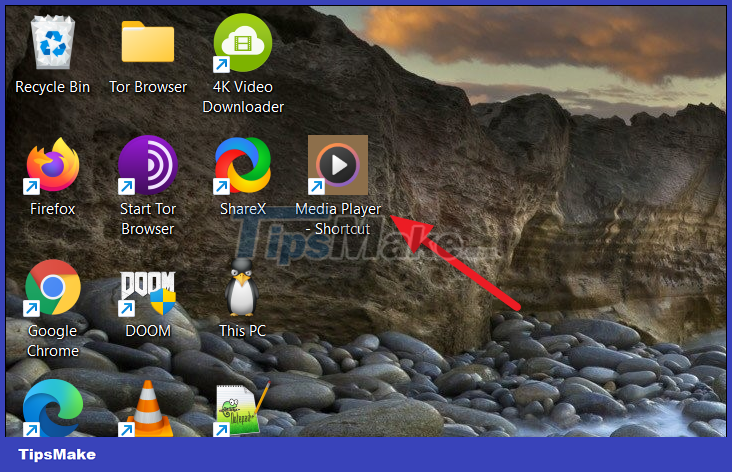
Now, your shortcut will show up on the Windows 11 desktop.
Create application shortcut from installation folder
However, for some apps like mobile apps, test apps or others, you can't create shortcuts using any of the methods above. For those applications, you must add the application to the desktop from the installation directory.
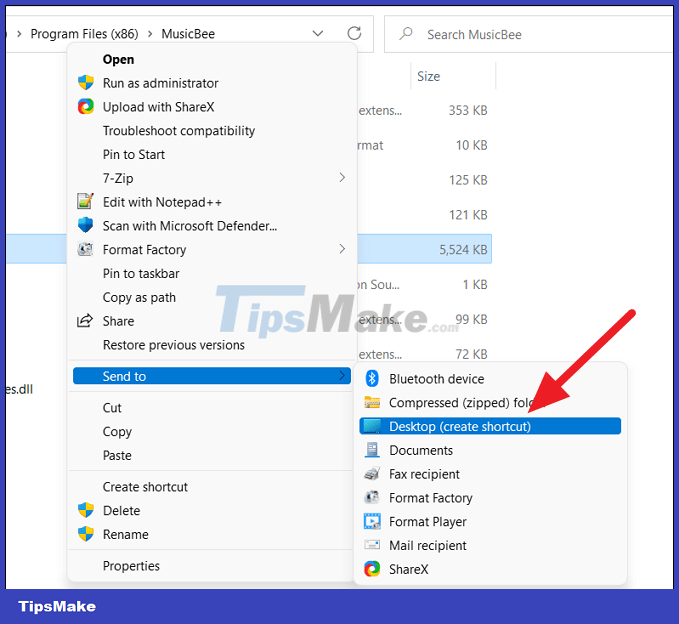
First, navigate to the folder where the app is installed or stored (for portable apps), right click on the app (.exe) and select Show more options .

Then, select Send to and click the Desktop (create shortcut) option . By default, most applications are installed in the Program Files or Program Files (x86) folder in the C drive. You can find your applications there.
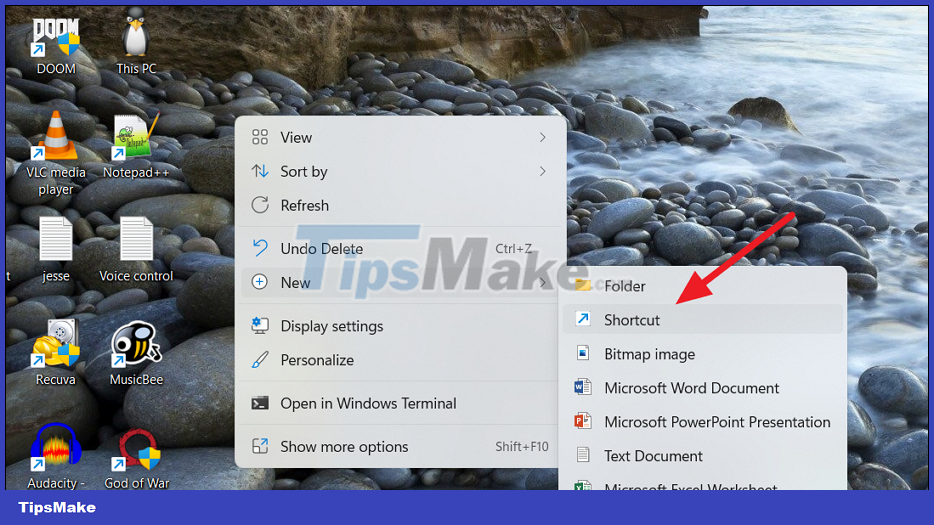
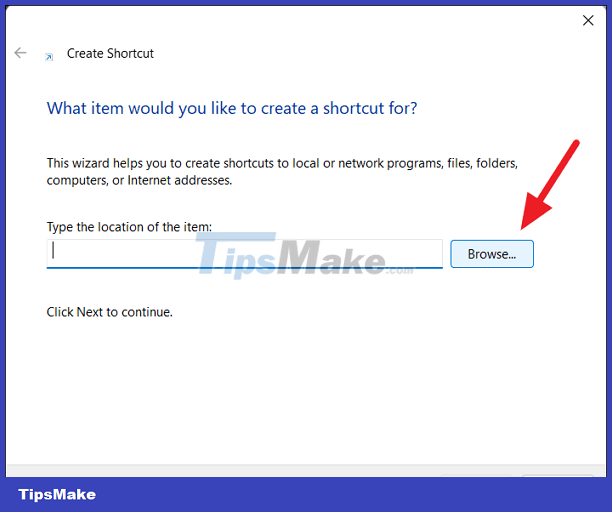
Alternatively, you can right-click an empty area of the desktop, click New , and select Shortcut.
In the Create Shortcut dialog window , click the Browse button.
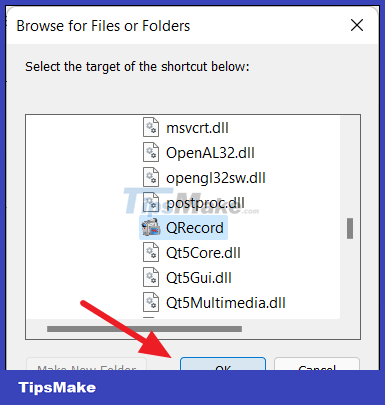
Then navigate to your software installation location and select the application (.exe file) and click OK.
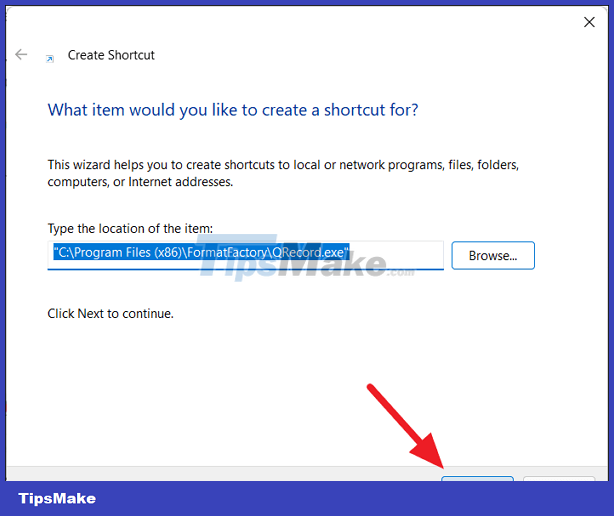
Then, click the Next button to continue.
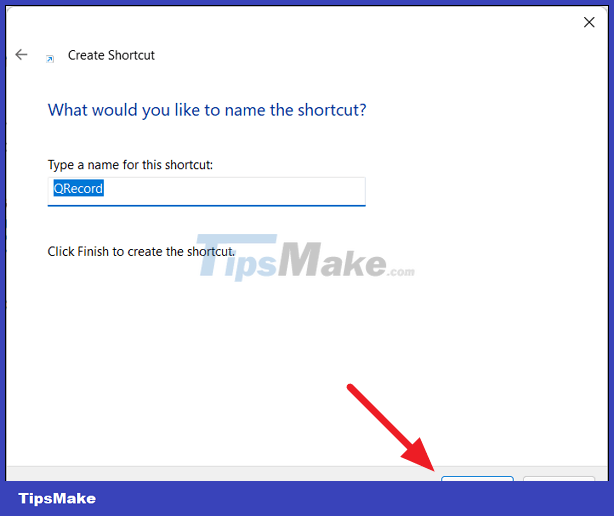
Next, you can rename the shortcut to your desired name or leave the default name and click Finish.
Your new shortcut is now available on the desktop to use.
You should read it
- ★ How to bring This PC to Desktop Windows 11
- ★ How to bring the calendar and clock to the Windows 10 Desktop screen
- ★ Instructions on how to bring This PC to Desktop on Windows 11
- ★ How to bring Icon to the desktop in Win 10
- ★ How to bring This PC (Computer), Network, Control Panel icon to the Desktop screen on Windows 10