Instructions on how to bring This PC to Desktop on Windows 11
Many people are used to this PC being placed on the Desktop by default, but in the Windows 11 version, this software is hidden. Refer to the article immediately to understand how to bring This PC to Desktop on Windows 11.
This PC acts as a place to store all your local drives including hard disks, CD drives and any USB devices connected to your machine. On some versions of Windows, This PC is also known as My Computer. Normally this application will appear on the Desktop by default, but from Windows 11 you will no longer see it appearing on the Desktop.
This will make many Windows 11 users feel uncomfortable and uncomfortable during use. However, there is still a way for you to "regain" This PC (My Computer) to return to the Desktop on Windows 11. Here are a few ways for you to apply.
Bring This PC to Desktop on Windows 11 with Windows Settings
Step 1: Open the Settings section through the Start menu. You can also press Windows + I on your keyboard to quickly open it.
Step 2: Select Personalization in the left toolbar of the new window that appears, then select Themes in the right section.
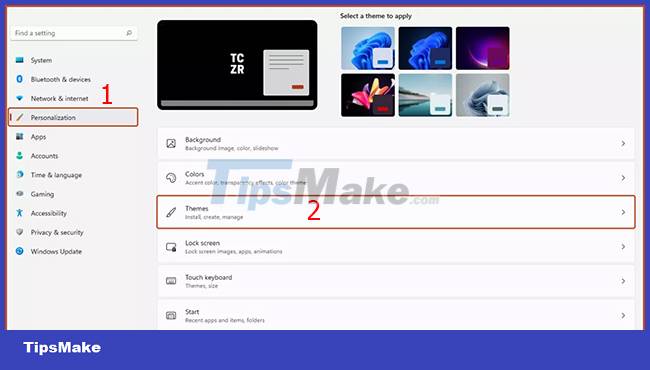
Step 3: Click Desktop icon settings in the Related Settings section.

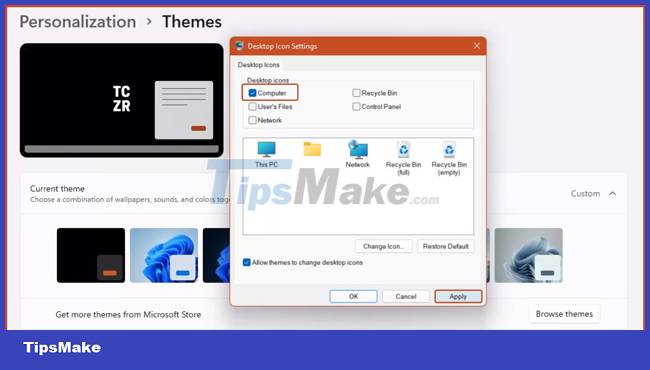
Step 4: Desktop Icon Settings window appears. You need to tick the Computer line and then select Apply. Through this operation, This PC icon will again appear on the Desktop as usual.
Bring This PC to Desktop on Windows 11 with Shortcut
Step 1: Open any folder on your computer.
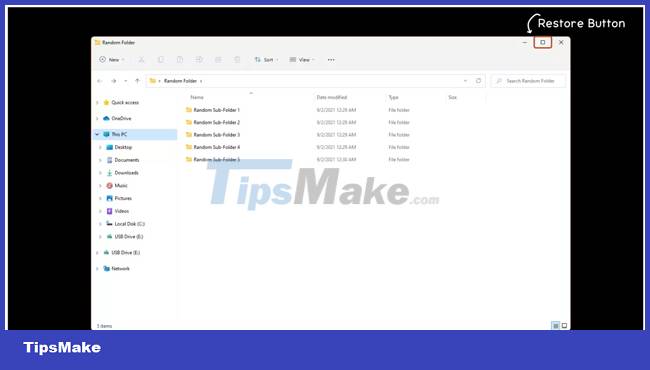
Step 2: Click the Restore button at the top right of the opened folder to minimize the folder interface.
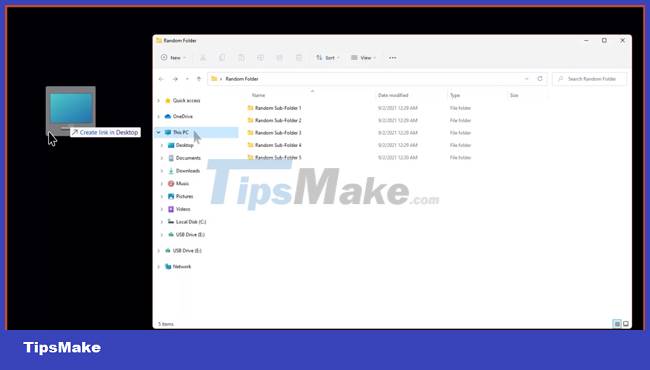
Step 3: You will see the This PC icon in the bar on the left side of the folder window. Click on the This PC icon, then hold and drag it to the Desktop and then release. So the This PC shortcut will appear on your Desktop.
Bring This PC to Desktop on Windows 11 with Control Panel
The last way to help you bring This PC to the Desktop is through the Control Panel.
Step 1: Access Control Panel at the Start menu.
Step 2: Enter File Explorer Options in the top right search bar of Control Panel.
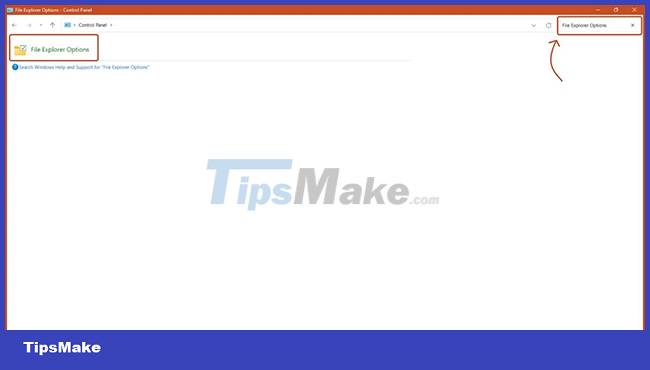
Step 3: The File Explorer Options window appears.
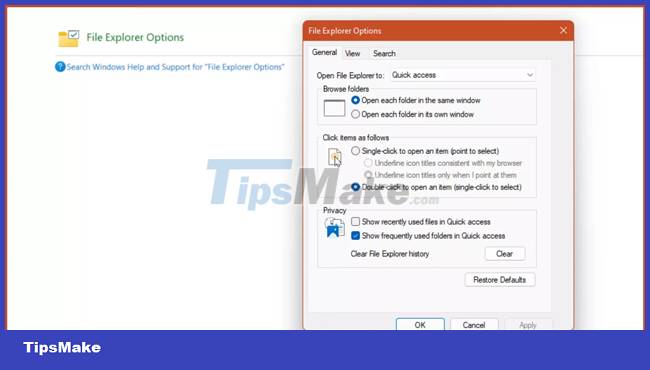
Step 4: In the General tab, Open File Explorer to, click This PC and then Apply.
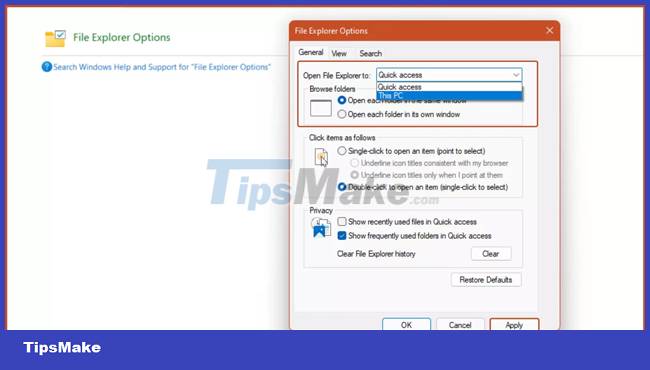
Step 5: Press Windows + E key combination and This PC window will appear.
Note that if you do not perform the steps above, the Windows + E key combination will turn on File Explorer as default.
So you have been able to understand 3 ways to bring This PC or My Computer to the Desktop on Windows 11. Hope this trick will help you more convenient in the process of using Windows 11 operating system.