How to adjust auto width on Excel
You can simply adjust the width of Excel columns with the code to automatically adjust the width. When you need to adjust the width of a column, just click on the column header..
Adjusting the width of rows and columns in Excel is a simple and easy operation. However, you can simply adjust the width of this column with the code to automatically adjust the width. When you need to adjust the width of the column, you just need to click on the column header and the column width will immediately be adjusted to match the content. Below are instructions for automatically adjusting the width in Excel.
Instructions for adjusting automatic width on Excel
Step 1:
At the sheet interface where you want to adjust the column width, we right-click on the sheet and select View Code in the displayed menu interface to open the VBA code writing interface.

Step 2:
Display the new interface, in the upper left corner of the window, click on General and switch to Worksheet .

Step 3:
You will then see a code generated in the interface. Now you will enter the following command line into the interface.
Target.EntireColumn.AutoFit
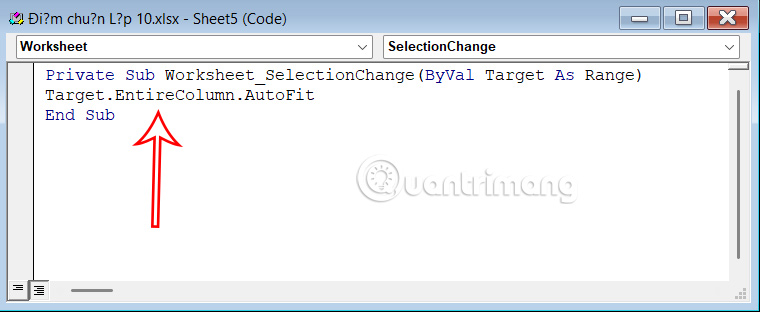
This command automatically adjusts the width of columns based on the length of the content inside. Close the window to execute the command.
Simply move your mouse to the column you want to align, select the entire column by clicking on the column header. Excel will automatically adjust the width to best fit the length of the content in each cell.
