Instructions automatic text carriage return in Excel - Auto line breaks when the width of the column in Excel
When working with Excel files when you type content for a cell with long content, the letters will not automatically enter the line, but will be overwritten in the next column. The following article shows you how to auto-wrap text in Excel - Auto-wrap text at the end of the column width in Excel.
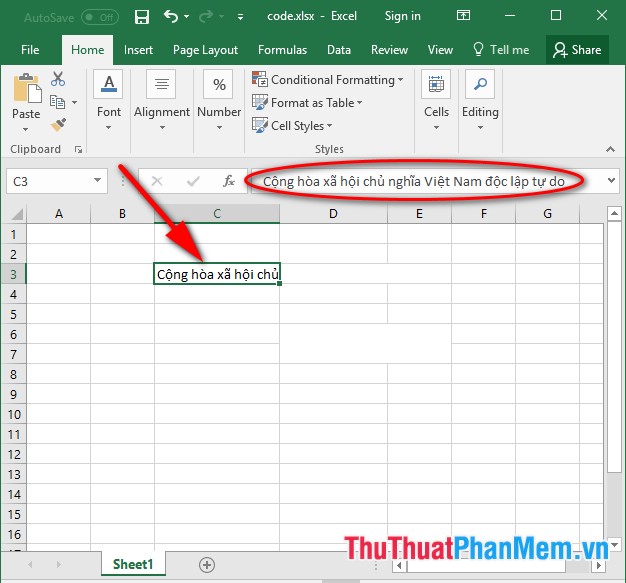
For example, when typing the text into cell C3 exceeds the width of the column so the text is obscured and not displayed:

1. For a cell that is an original cell (do not merge other column or row cells into 1), it is very simple:
- Select the cell you want to automatically drop text when the width of the column ends -> go to Home tab -> Alignment -> select Wrap Text feature :

- After selecting the option Wrap Text -> text content in the cell automatically down the line when the width of the column:

2. With data cells assembled from multiple cells
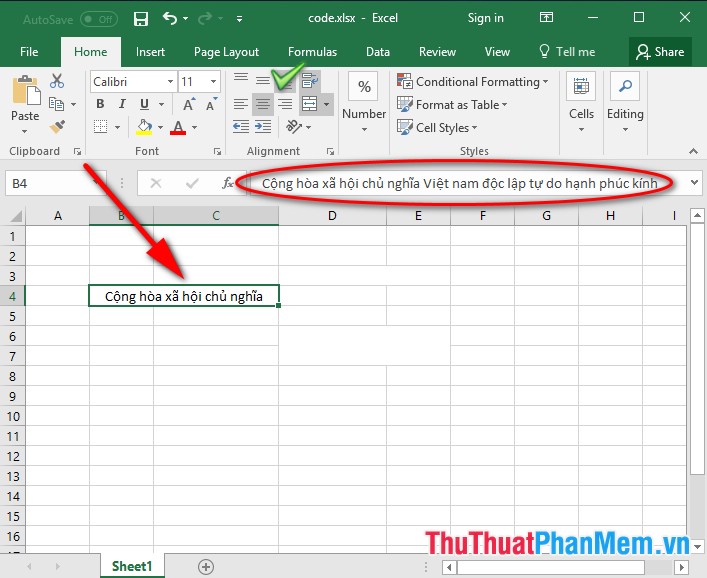
- The case with Excel cells is aggregated from many other cells if using Text Wrap feature to wrap text content when the column width is empty but the height of the cell does not change so the text is still covered. For example, when merging cell B4 and cell C4 into one cell after entering the content, selecting the Wrap Text feature does not automatically go down the line when the width of the column is over:

- In this case (the cells are aggregated from many other cells) you need to use additional code after selecting the Wrap Text feature :
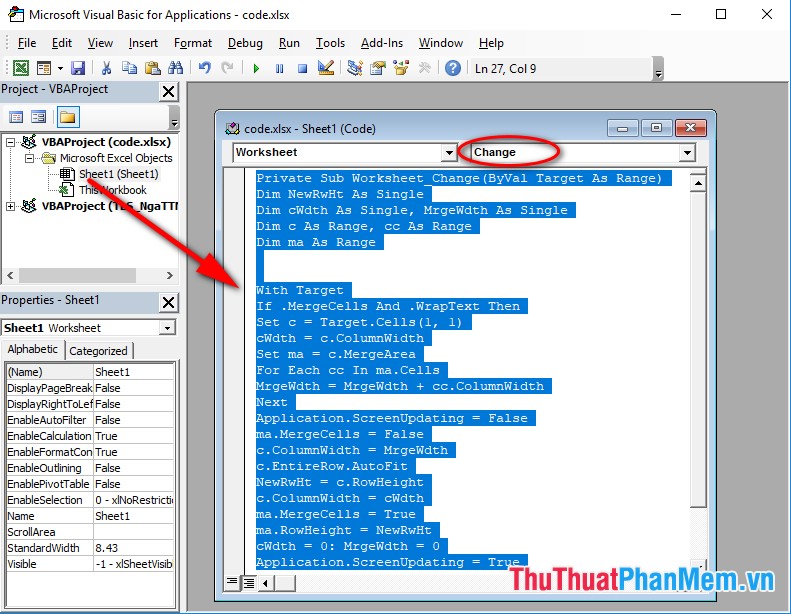
+ Select the Excel file that you want to automatically move the text down the width of the column -> press Alt + F11 to enter the command window -> copy the following code for the Change event of the worksheet:
Private Sub Worksheet_Change (ByVal Target As Range) Dim NewRwHt As Single Dim cWdth As Single, MrgeWdth As Single Dim c As Range, cc As Range Dim ma As Range With Target If .MergeCells And .WrapText Then Set c = Target.Cells (1 , 1) cWdth = c.ColumnWidth Set ma = c.MergeArea For Each cc In ma.Cells MrgeWdth = MrgeWdth + cc.ColumnWidth Next Application.ScreenUpdating = False ma.MergeCells = False c.ColumnWidth = MrgeWdth c.EntireRow.AutoFit NewRwHt = c.RowHeight c.ColumnWidth = cWdth ma.MergeCells = True ma.RowHeight = NewRwHt cWdth = 0: MrgeWdth = 0 Application.ScreenUpdating = True End If End With End Sub

+ After typing the above code to save and exit VBA, return to the Excel file to re-enter the content for the cell just created the text content automatically down the line when the width of the column and the height of the cell is changed. , unbleached text content:

The above is a detailed guide on how to auto-wrap text in Excel - Auto-break line at the end of the column width in Excel version 2016. I wish you success!