Change the width of columns and the height of rows in Excel
The default column widths and row heights in Excel may not match the data you enter. You want to change the width, height of rows and columns so that data is displayed fully on cells in Excel.
The following article shows you some ways to change the width of columns, the height of rows in Excel.
1. Change the width of the column.
Change width by specific value
1. Select one or more columns you want to change the width.
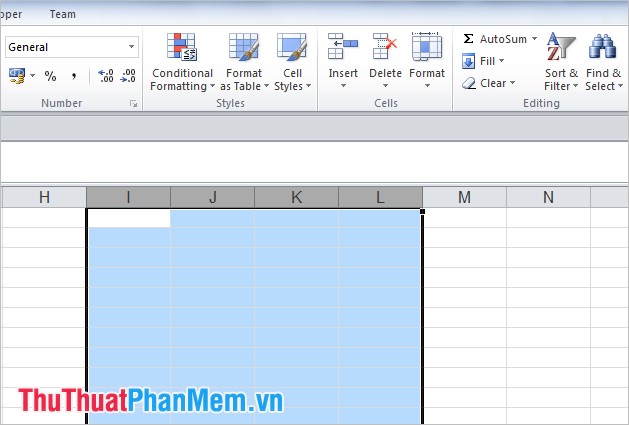
2. Select the Home tab , in the Cells section, select Format -> Column Width .
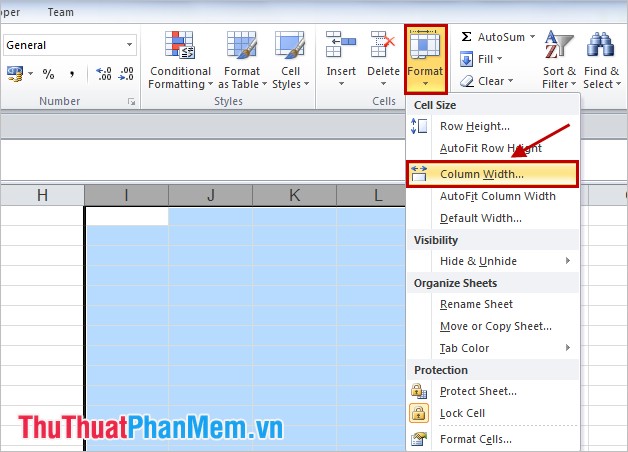
3. In the Column Width dialog box, enter the width value for the column as you like. Then click OK .
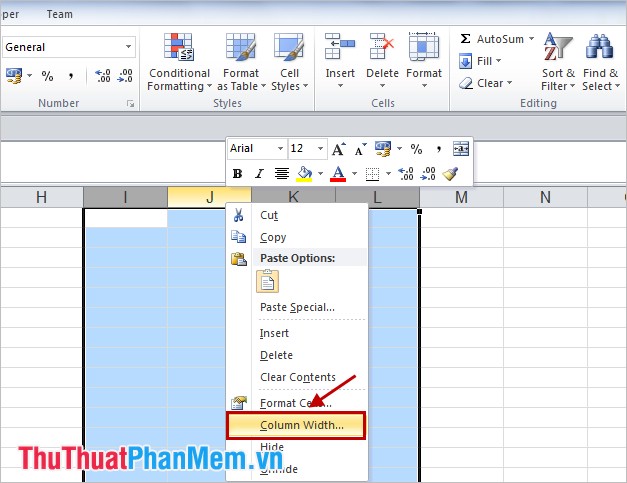
Note: You can change the width of the column quickly by, select one or more columns to change the width, right-click the title of the selected columns and select Column Width , and enter the width value. in the Column Width dialog box.
Change the column width to automatically match the content in the column
1. Select one or more columns for which you want to change the width.
2. In the Home tab, select Format -> AutoFit Column Width .
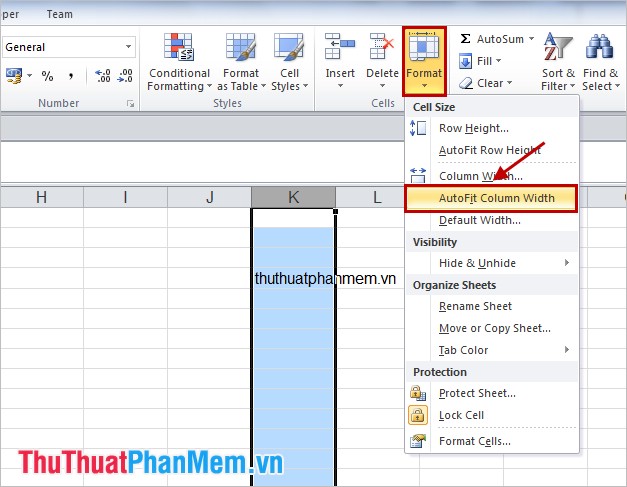
The column will automatically change the width to match the content in the column.
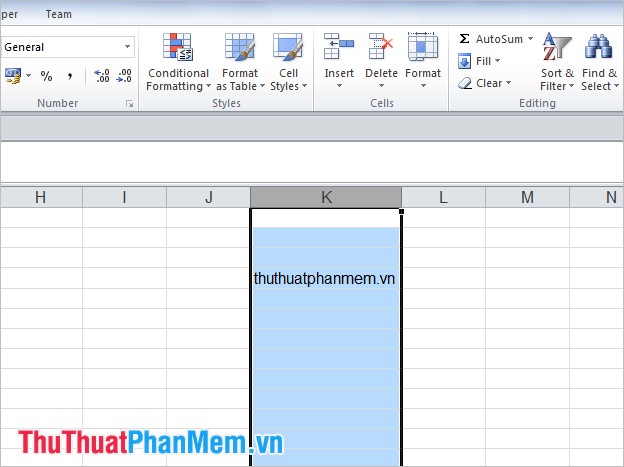
Change the width of all columns in the sheet
1. Select the icon in the following image to select (highlight) all columns in a sheet. You can press Ctrl + A .
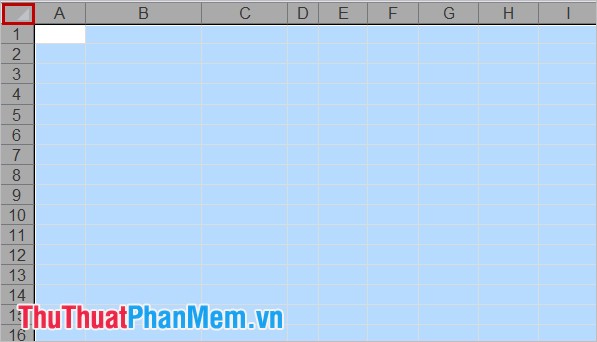
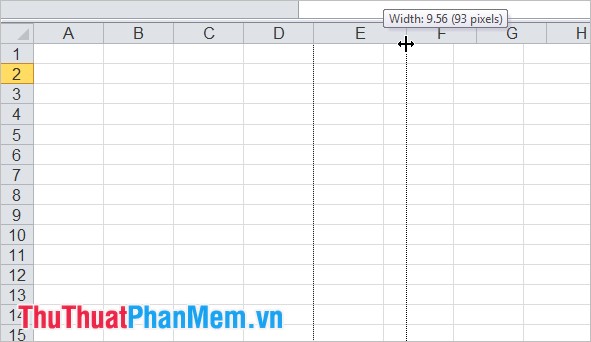
2. Place the cursor between any 2 column headers to appear the cursor icon as shown below:
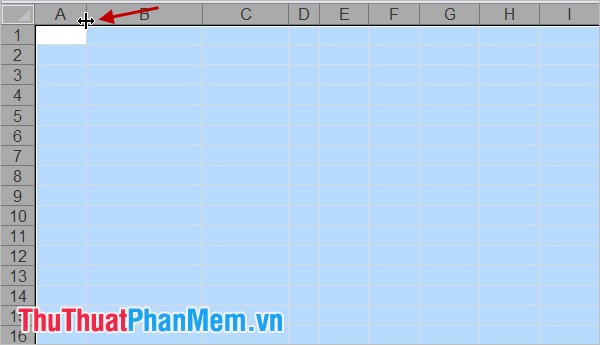
3. Click and drag the appropriate column widths and release the mouse pointer, all the other columns have equal width and equal to the width you just adjusted.
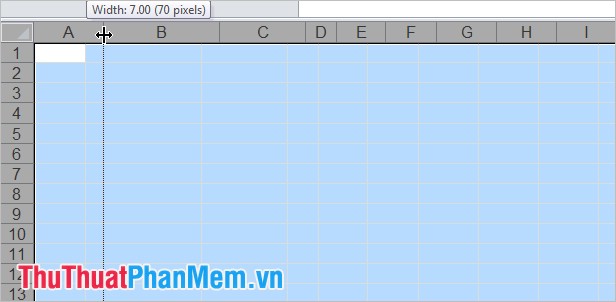
You can also change the width of each column by placing the mouse pointer on the header line with the next column, then moving left or right the title to expand or narrow the width of the column.
2. Change the row height.
Change the height to a specific value
1. Select one or more rows you want to change the height.
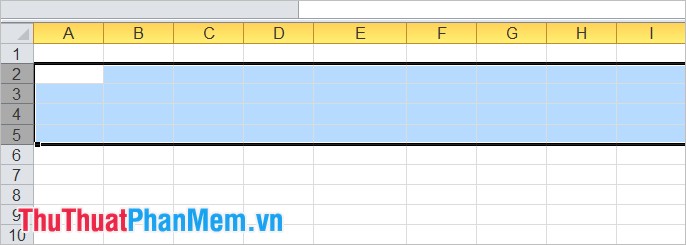
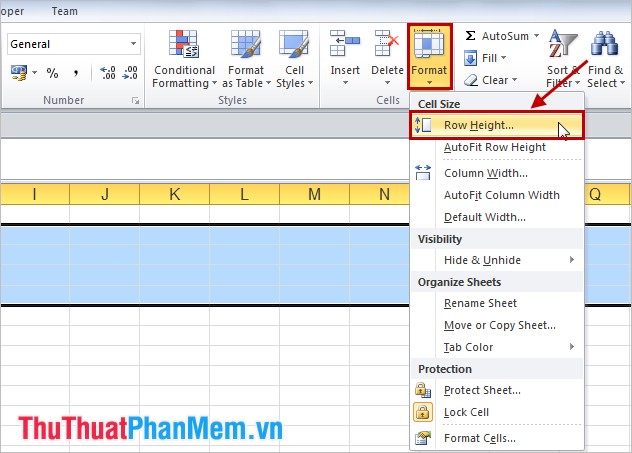
2. Select Home -> Format -> Row Height .
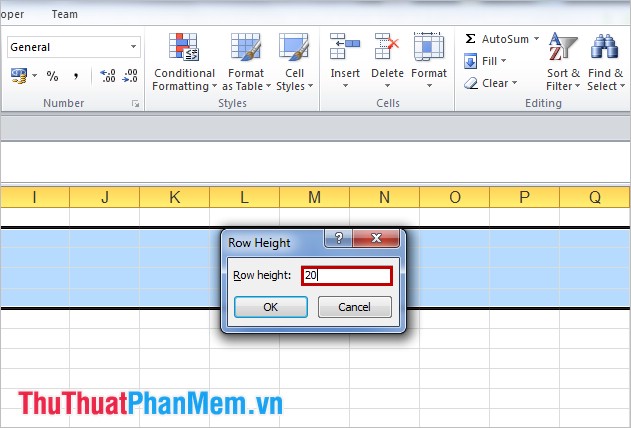
3. In the Row Height dialog box, enter the value to change the column height and click OK .
Change the row height to match the content in the row
1. Select one or more rows to change height.
2. Select Home -> Format -> AutoFit Row Height .
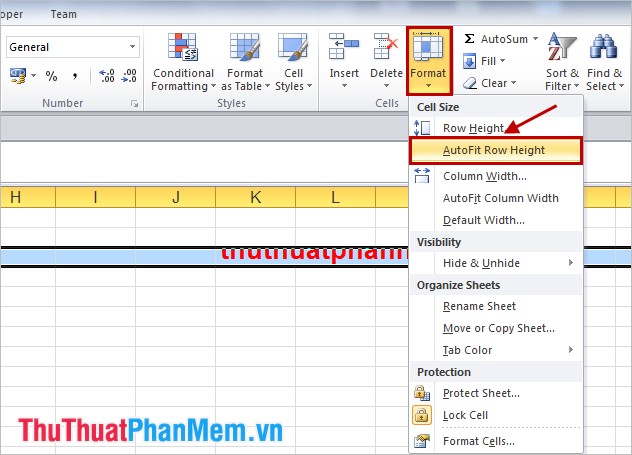
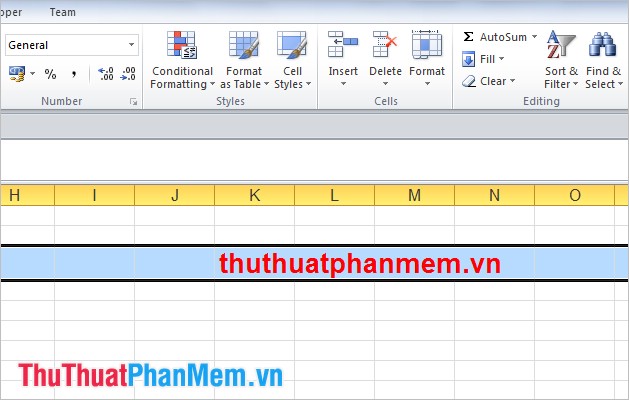
The result after automatically changing the height to match the content in the row:
Change the height of all rows in the sheet
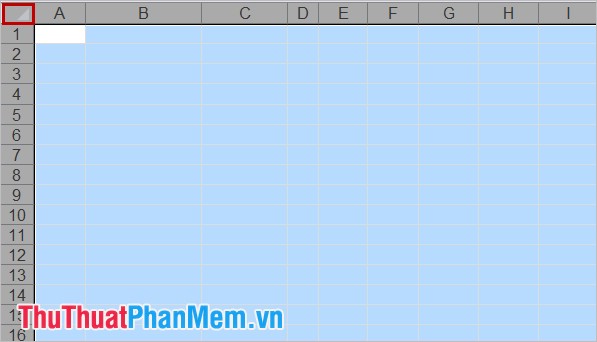
1. Select the icon shown below to select (highlight) all rows in a sheet. You can press Ctrl + A .
2. Place the cursor between any 2 row headers to bring up the cursor icon as shown below:
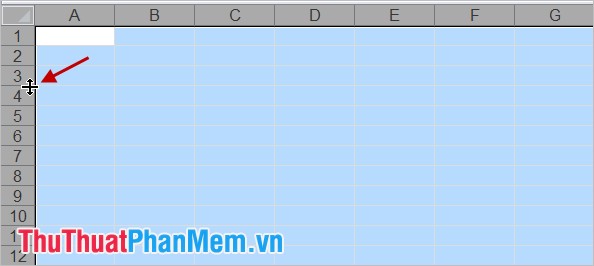
3. Click and drag to adjust the appropriate row height and release the mouse pointer, all other rows have the same height and the height you just adjusted.
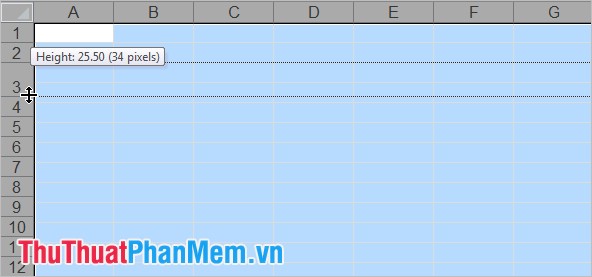
You can also change the height of each row by placing the mouse pointer on the header line with the row below (or the row above), then moving up or down the title to expand or collapse. narrow row height.
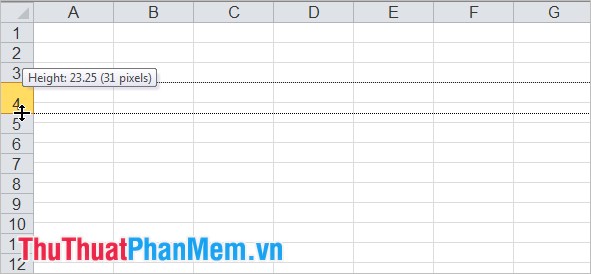
Above are the ways to change the width, height of rows and columns in Excel, when necessary you can quickly change the width and height to fit your data. Good luck.
You should read it
- How to change the size of rows, columns, cells equally in Word, Excel
- How to convert columns into rows and rows into columns in Excel
- How to handle cells, columns, rows in a spreadsheet in Excel
- Spacing rows and columns in Excel beautifully
- How to move rows and columns in Excel
- How to quickly Add and Delete rows and columns in Excel
- Height and width in CSS
- Table operations in Excel
May be interested
- Table operations in Excelinstructions on table operations in excel. when working with tables you should pay attention to the following: 1. edit the width of rows and columns. there are many ways to edit the widths of rows and columns. method 1: with the column moving into the vertical bar of the column - when the child
- How to delete rows and columns in Excel with mouse or keyexcel is an important and indispensable tool in the work process. however, editing data or deleting rows and columns in excel can be quite complicated for some new users. therefore, to help make work more efficient, we will introduce to readers how to delete rows and columns in excel using the mouse or keys in detail in the article below.
- How to temporarily hide rows and columns in Excel 2013excel 2013 has a feature that allows temporary users to hide one or more rows / columns in an excel spreadsheet. this feature is very useful in case you only want to print a part of the spreadsheet but do not want to delete other excess rows and columns.
- How to add rows and columns in Excelhow to add rows and columns in excel. the article shows you 3 ways to add rows (rows) or add columns in excel.
- How to fix column and header rows in Excel 2016how to fix columns and headlines in excel 2016. with an excel table with a large number of columns and rows, fixing columns and headlines is a necessary job, you can easily check. investigate and process data without confusion and waste n
- Instructions for coloring alternating rows and columns in Excelalternating colors in excel is a useful technique to make your spreadsheet more visual. learn how to use conditional formatting in excel 2007 to 2016 to easily distinguish rows and columns.
- Box Model (Box Model) in CSSelements in html can be considered boxes. in css, the term 'box model' is used to refer to design and layout.
- How to convert rows into columns and vice versa in Excelthe following article contains detailed instructions how to convert rows into columns and vice versa in excel. assuming i have the following data table, the attributes that are in the row i want to turn into columns.
- How to add columns, delete columns, add rows, delete rows in Word 2007, 2010, 2013, 2016how to add columns, delete columns, add rows, delete rows in word 2007, 2010, 2013, 2016. the following article helps you perform the operation of inserting columns, rows or simply deleting redundant columns and rows in data tables in extremely simple ways.
- Excel does not allow inserting additional columns and rows [FIXED]excel does not allow inserting additional columns or rows, so you cannot continue editing the document? tipsmake has found the cause and how to fix it