How to add tile column on Windows Start menu
By default, Windows 10 displays three tile columns in the Start menu. It has a hidden fourth column that users don't know.
By default, Windows 10 displays three tile columns in the Start menu. It has a hidden fourth column that users don't know. So this article will show you how to add columns to the Start menu to display more applications when clicking on the Windows button.
- Tips or help you master the Start Menu on Windows 10
- Fix the loss of tile icons in Windows 10 Start Menu
- Start Menu does not work and free applications replace
How to add tile columns on the Start menu
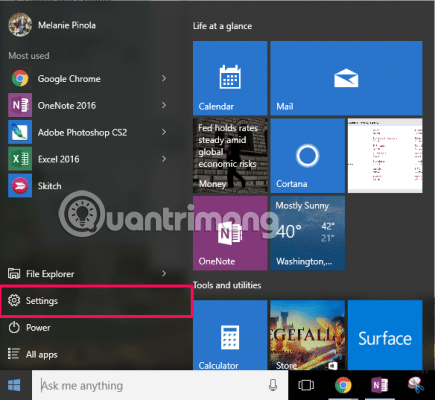
Step 1 . Open Settings from the Start menu.
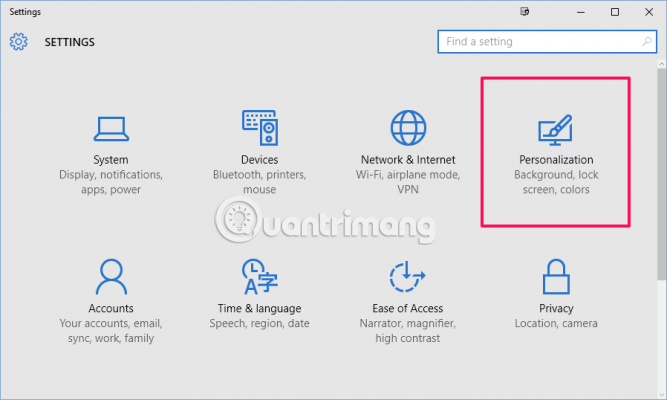
Step 2 . Click Personalization .
Step 3 . Click Start on the left menu and turn on the Show more tiles option on the right.

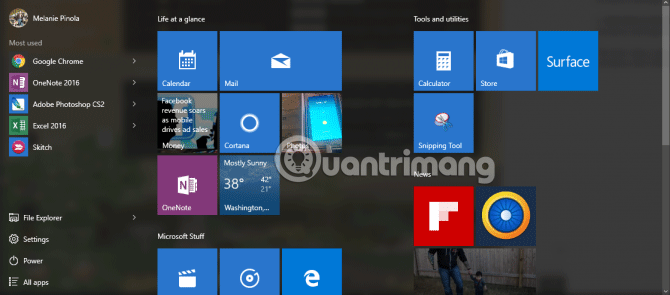
The Start menu now has additional columns for you to drag the tile into.

If you drag the right side of the Start menu to the right, you will see four more tile columns to arrange and organize your favorite content.
I wish you all success!
- Fix the loss of tile icons in Windows 10 Start Menu
- Disable all Live Tile at the same time on Windows 10 Start Menu
- How to create impressive Tile in Windows 8?
- 3 ways to fix Start Menu on Windows 10 stopped working
- Windows 11 is hiding a second Start menu: Why should you use it?
- How to pin any file to Start Menu on Windows 10
- How to Use the Windows 10 Start Menu
- How to add and remove folders in the Windows 11 Start menu
- Back up Start Menu settings on Windows 10
- Invite to admire Start Menu on Windows 10 completely new with modern design and more elegant
- Quick ways to open the Control Panel
- How to Customize the Start Menu to Better Navigate Windows 11
- Back up Start Menu settings on Windows 10
- How to fix Pin to Start error on Windows 10
- Windows 10 1809 version is now widely deployed, available for download
- The prospect of experiencing Xbox One games on PC is not far away
- Microsoft tested the Android screen on a Windows 10 computer
- Microsoft launched 19H1 build 18305 for Windows 10 Insider on the Fast Ring
- Microsoft unveiled a new version of Windows 10 with improvements in RAW images and light themes
- Microsoft admits to deactivating some Windows 10 PCs
-
 34 breakfast menus to help women answer the question 'what to eat for breakfast today'.
-
Lesson 32: Selection Menus in Bootstrap 5
-
Lesson 28: Offcanvas in Bootstrap 5
-
Lesson 20: Navs in Bootstrap 5
-
Lesson 18: Creating a Dropdown Menu in Bootstrap 5
-
Guide to creating free restaurant and cafe menus with Genspark AI
 34 breakfast menus to help women answer the question 'what to eat for breakfast today'.
 Lesson 32: Selection Menus in Bootstrap 5
 Lesson 28: Offcanvas in Bootstrap 5
 Lesson 20: Navs in Bootstrap 5
 Lesson 18: Creating a Dropdown Menu in Bootstrap 5
 Guide to creating free restaurant and cafe menus with Genspark AI
-
 Free Tools
- CSS Minifier and Compressor
- HTML Minifier
- JavaScript Minifier
- Json Minifier
- SQL Queries Minifier
- XML Minifier
- Password Generator
- uuid Generator
- Hash Generator
- Lorem Ipsum Generator
- QR Code Generator
- QR Code Scanner
- Barcode Generator
- Meta Tag Generator
- Slug Generator
- Placeholder Image Generator
- HTML Table Generator
- Markdown Table Generator
-
System
-
Mac OS X
-
Hardware
-
Game
-
Tech info
-
Technology
-
Science
-
Life
-
Application
-
Electric
-
Program
-
Mobile