Back up Start Menu settings on Windows 10
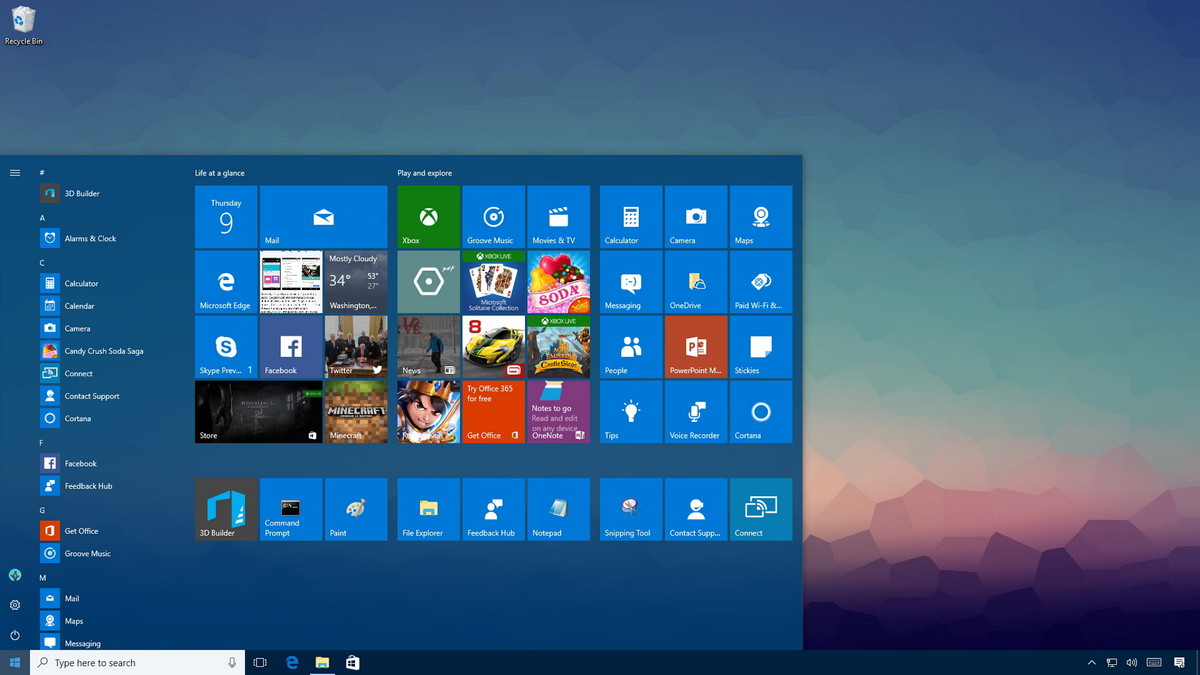
Start Menu on Windows 10 is one of the useful and customizable tools. You can arrange a new layout on the left to access settings and other locations. In the middle you can quickly access the list of applications you have installed and on the right side you can set Live Tiles to continuously display updates.
Start Menu on Windows 10 is one of the useful and customizable tools. You can arrange a new layout on the left to access settings and other locations. In the middle you can quickly access the list of applications you have installed and on the right side you can set Live Tiles to continuously display updates.
Everything that you view and customize in the Start Menu menu is stored in the database inside the TileDataLayer folder. The only problem is that when you least expect it, the database may be corrupted because the menu doesn't work properly. To fix this situation or if you want to move your settings to refresh the installation or move the settings to a new computer, then you can back up and restore the Start Menu database with all customization on Windows 10.
1. Activate the integrated Admin account on the system
You cannot use your login account to back up Start Menu settings. This means you will have to use another account or temporarily activate the Admin account that is integrated on Windows 10.
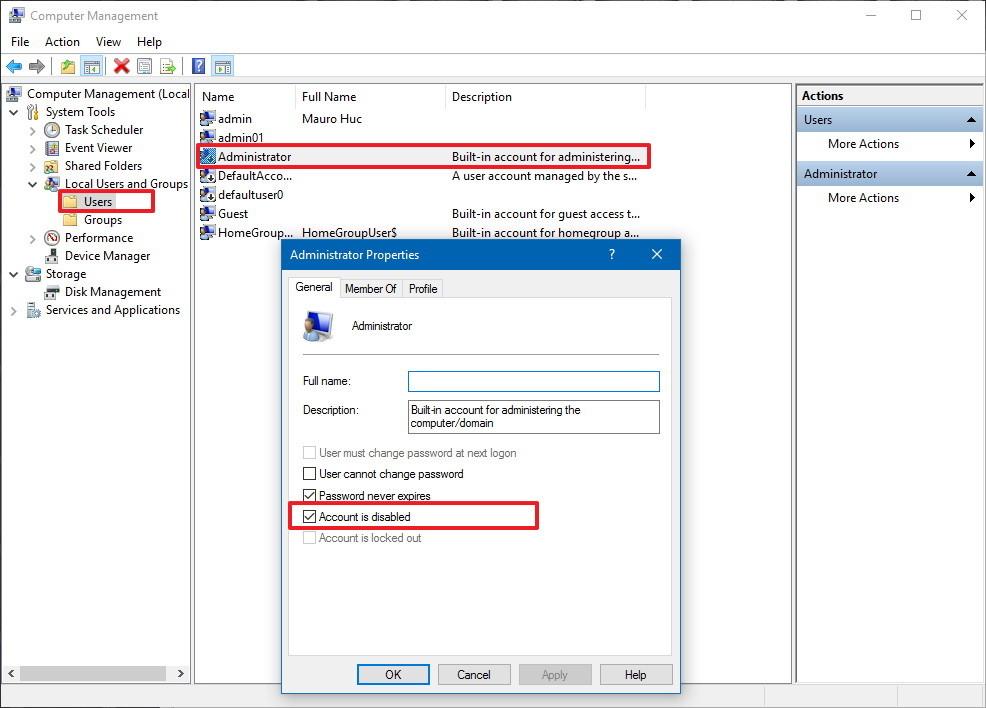
1. Press Windows + X key combination to open the Power User Menu and select Computer Management .
2. On the Computer Management window, expand the Local Users and Groups section .
3. Select Users .
4. Double-click the Administrator account.
5. Remove the option Account is disabled to activate the account.

6. Click Apply .
7. Click OK .
In addition, you can create a new Admin account, but the solution to temporarily activate the Admin account will be faster.
2. How to backup Start Menu settings?
To back up your current Start Menu settings, follow the steps below:
1. Log out of your Windows 10 account.
2. Log in with another account or an integrated Admin account on the system.
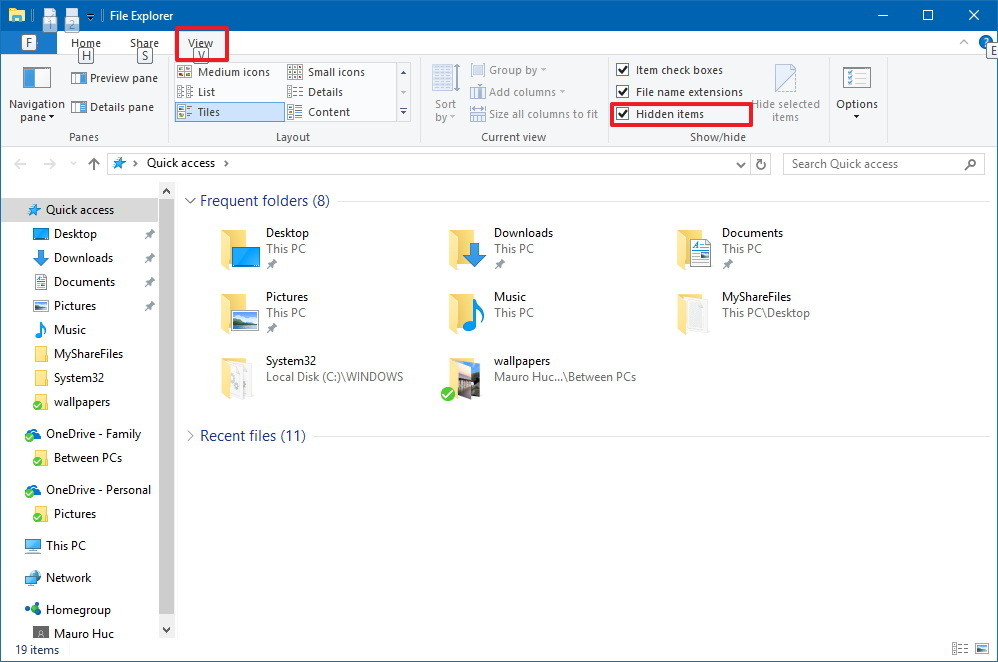
3. Open File Explorer .
4. Click on the View tab .
5. Check the Hidden items option to display hidden files.

6. Next navigate by the path:
C: UsersYOUR-ACCOUNT-NAMEAppDataLocalTileDataLayer
Note:
In the above path, replace YOUR-ACCOUNT-NAME with the user account name with the Start Menu setting you want to back up.
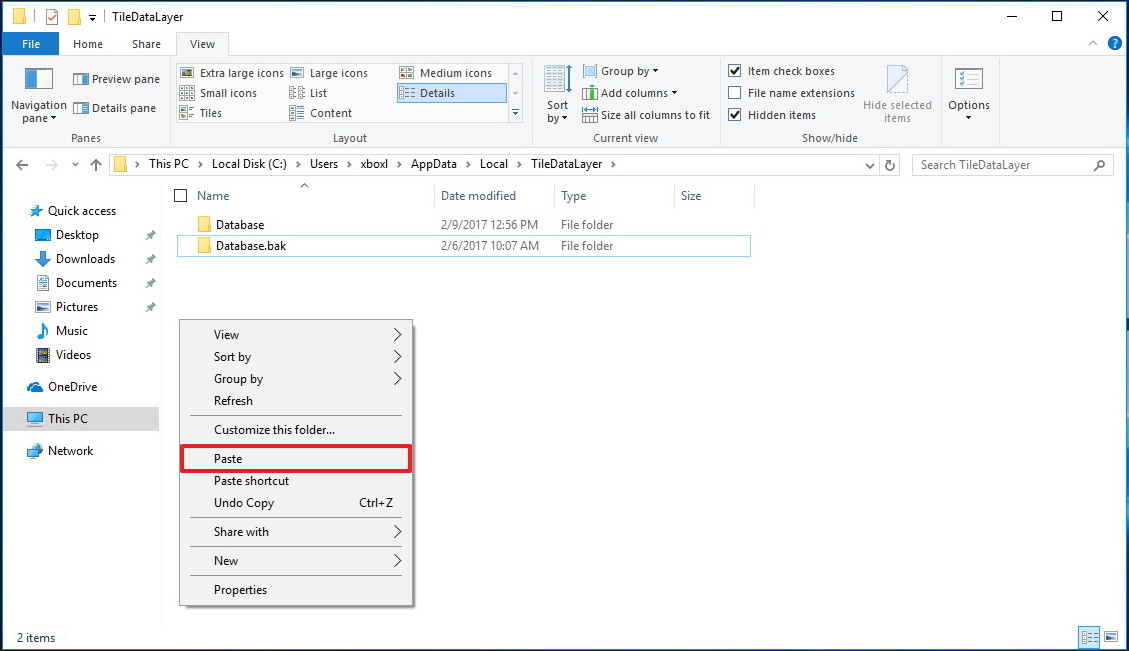
7. Right-click the Database folder - the folder contains all the settings and select Copy .
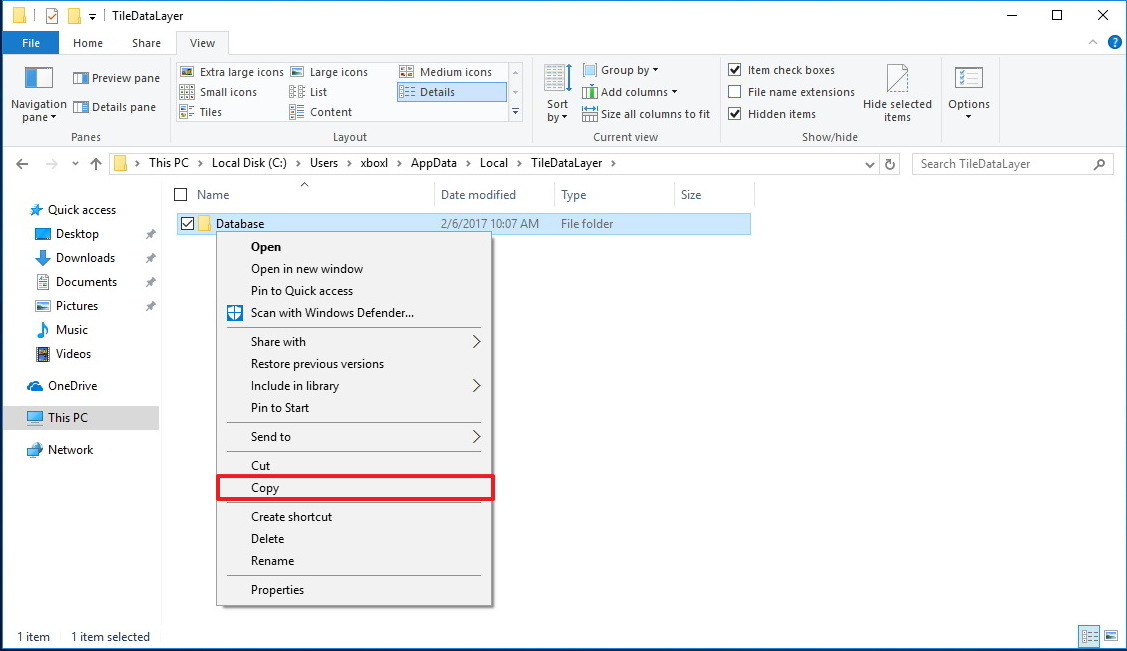
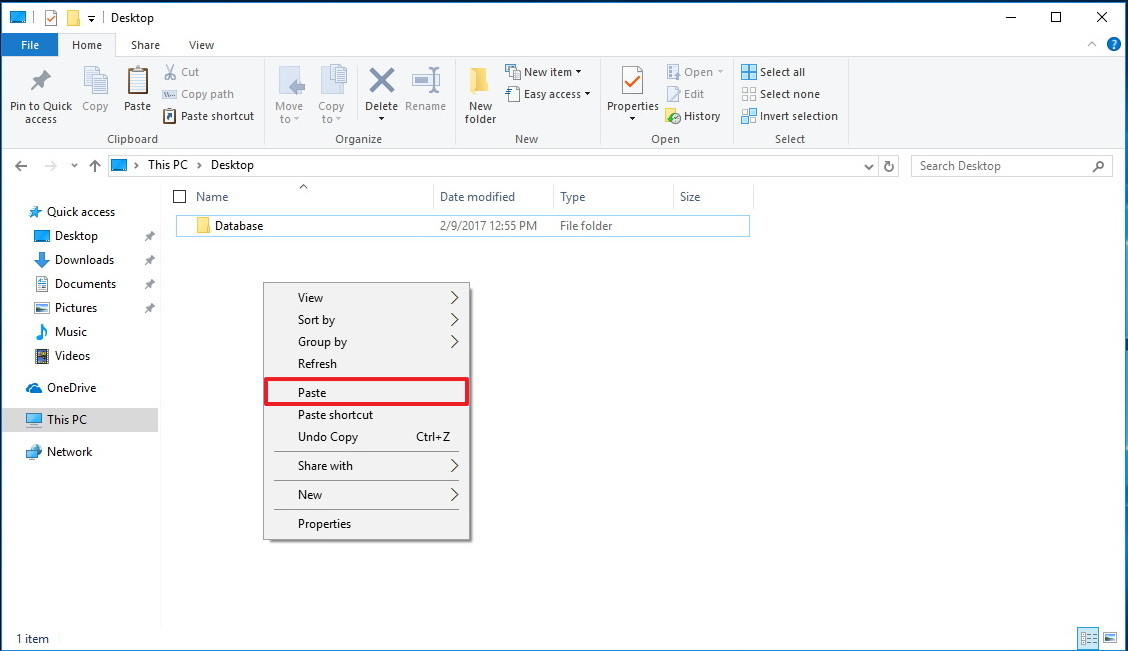
8. Open the location where you want to store Database.
9. Right-click it and select Paste .
3. How to restore Start Menu settings?
If you do not want to set up another Admin account on your computer, you can use the steps above to temporarily enable an integrated Admin account on Windows 10.
To restore Start Menu settings, follow the steps below:
1. Log out of your account.
2. Login with another account or Admin account integrated on the system.
3. Open File Explorer .
4. Click on the View tab .
5. Check the Hidden items option to display hidden files.
6. Next navigate by the path:
C: UsersYOUR-ACCOUNT-NAMEAppDataLocalTileDataLayer
Note:
In the above path, replace YOUR-ACCOUNT-NAME with the user account name with the Start Menu setting you want to back up.
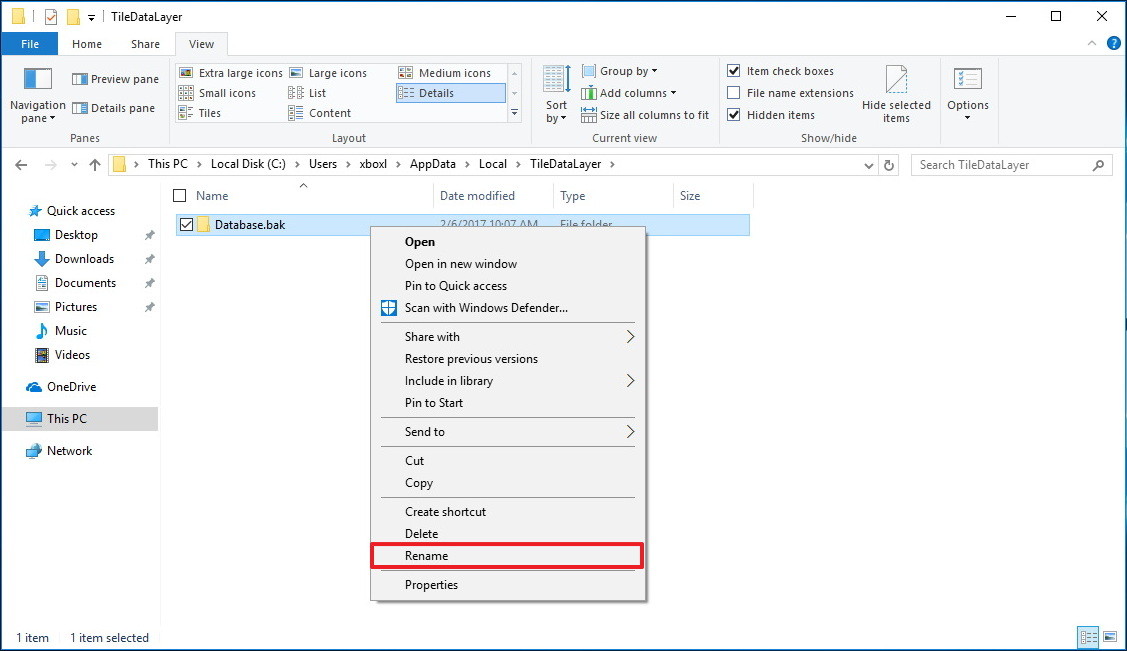
7. Right-click the Database folder - the folder contains all the settings and select Rename .
8. Rename the folder as Database.bak and press Enter .
9. Open the location where you store the backup file.
10. Right-click the Database folder and click Copy .
11. Go back to the TileDataLayer folder in your account as in step 6.
12. Right-click it and select Paste to restore the settings.
13. Log out of your account.
After you have completed the above steps, log back into your account and the Start Menu will be restored with all your custom settings.
4. Delete the old Database and disable the integrated Admin account
The final step is to delete the Database.bak folder and disable the integrated Admin account on the system.
- To delete the old Database, follow the steps below:
1. Press the Windows + R key combination to open the Run command window.
2. Enter the command line below in the Run window and press Enter to open the TileDataLayer folder:
% HOMEPATH% AppDataLocalTileDataLayer
3. Right-click the Database.bak folder and select Delete .

- To disable the built-in Admin account on Windows 10, follow the steps below:
1. Press Windows + X key combination to open the Power User Menu and select Computer Management .
2. Expand Local Users and Groups .
3. Select Users .
4. Double-click the Admin account.
5. Check Account is disabled to disable the account.
6. Click Apply .
7. Click OK .
Refer to some of the following articles:
- Touchpad on Windows 10 does not work, this is how to fix it
- Summary of Touchpad operations on Windows 10
- Summary of some ways to turn off Touchpad on Laptop
Good luck!
- How to bring the traditional Start and Start Menu back on Windows 8?
- How to add and remove folders in the Windows 11 Start menu
- How to Get Your Windows 10 Start Menu Back
- 3 ways to fix Start Menu on Windows 10 stopped working
- Personalize the Start Menu of Windows 10
- Windows 11 is hiding a second Start menu: Why should you use it?
- How to block Bing search results from appearing in the Windows 11 Start menu.
- How to pin any file to Start Menu on Windows 10
- How to Use the Windows 10 Start Menu
- Invite to admire Start Menu on Windows 10 completely new with modern design and more elegant
- How to Change the Default User Account Avatar in Windows
- How to add tile column on Windows Start menu
- How to change, prolong the delay of updating on Windows 10?
- Instructions for activating Keyboard Backlight on Windows 10
- How to use a virtual machine to test Windows 10 Insider builds does not worry about system failure
- How to check Secure Boot has been enabled on your computer or not?
- Error 'can't change desktop wallpaper' on Windows 10, this is how to fix it
- Instructions for completely removing the 3D Builder application on Windows 10
- Instructions for changing Windows 10 wallpaper timer
- Pin Email account to Start Menu on Windows 10
-
 Is your Copilot account temporarily suspended? Here's how to recover it.
-
How to permanently delete your Facebook account on your phone and computer.
-
How to unlock your Acer laptop quickly and effectively when you forget your password.
-
How to download Office 365 for free for life, with automatic renewal.
-
How to unlock a laptop safely and easily after forgetting the password.
-
Quick guide to registering for Garena on a computer
 Is your Copilot account temporarily suspended? Here's how to recover it.
 How to permanently delete your Facebook account on your phone and computer.
 How to unlock your Acer laptop quickly and effectively when you forget your password.
 How to download Office 365 for free for life, with automatic renewal.
 How to unlock a laptop safely and easily after forgetting the password.
 Quick guide to registering for Garena on a computer
-
 Free Tools
- CSS Minifier and Compressor
- HTML Minifier
- JavaScript Minifier
- Json Minifier
- SQL Queries Minifier
- XML Minifier
- Password Generator
- uuid Generator
- Hash Generator
- Lorem Ipsum Generator
- QR Code Generator
- QR Code Scanner
- Barcode Generator
- Meta Tag Generator
- Slug Generator
- Placeholder Image Generator
- HTML Table Generator
- Markdown Table Generator
-
System
-
Mac OS X
-
Hardware
-
Game
-
Tech info
-
Technology
-
Science
-
Life
-
Application
-
Electric
-
Program
-
Mobile