Table of Contents
This guide provides a practical overview of Instructions to Customize Your Start Menu Bar on Windows 10, including its main features, benefits, limitations, and important considerations.
1. Add favorite apps
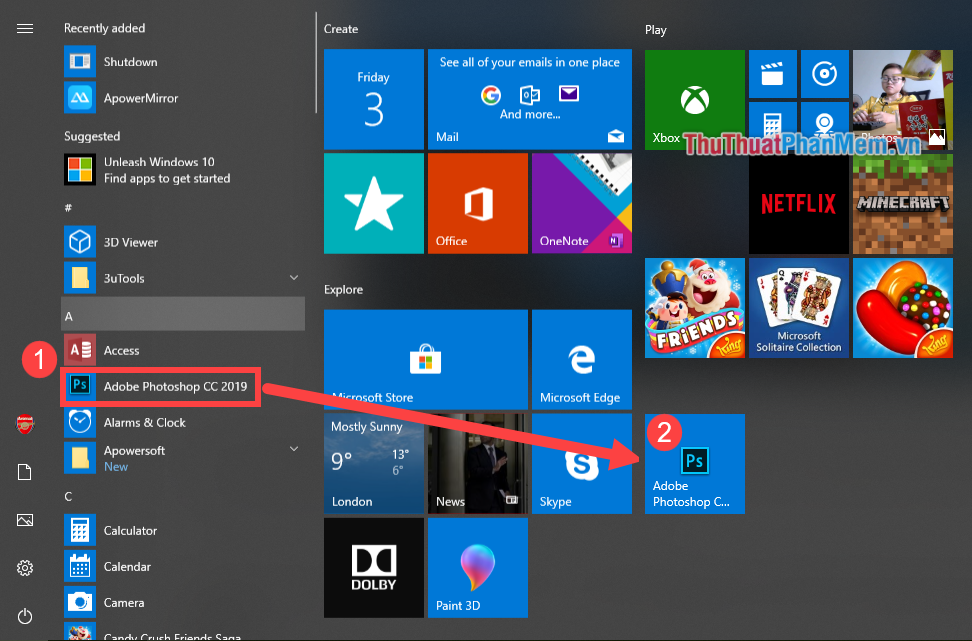
Instead of having to rummage through each time to find an application in the Start Menu, you can now pin the app to the top to make it easier to serve your work needs by:
(1) Find the app to pin in the Start Menu.
(2) Hold down the left mouse button on the application, then drag and drop the application onto the front page of the Menu.
2. Delete some applications from the Start Menu
Deleting the application that appears in the Start Menu is extremely simple, right-click the application you want to delete -> then select Uninstall .

3. Resize display application
To resize the application icons to be able to display more applications, right-click the application that needs resizing -> select Resize -> Customize the size you want.

4. Turn off the application live tile update feature
Some applications will automatically update and display annoying effects such as News, One Note. To get the Live update feature you do the following:
(1) Right-click the application you want to turn off Live Tile, select More .
(2) Click on Turn Live Tile off .

However, some applications such as Weather or Calendar should allow them to automatically update to bring more accurate information.
5. Arrange applications into groups
You find the application, drag and drop them into a group. The group name can then be changed to facilitate later management:

6. Change the color of the Start Menu bar
Step 1 : Open the Start Menu , select Settings .

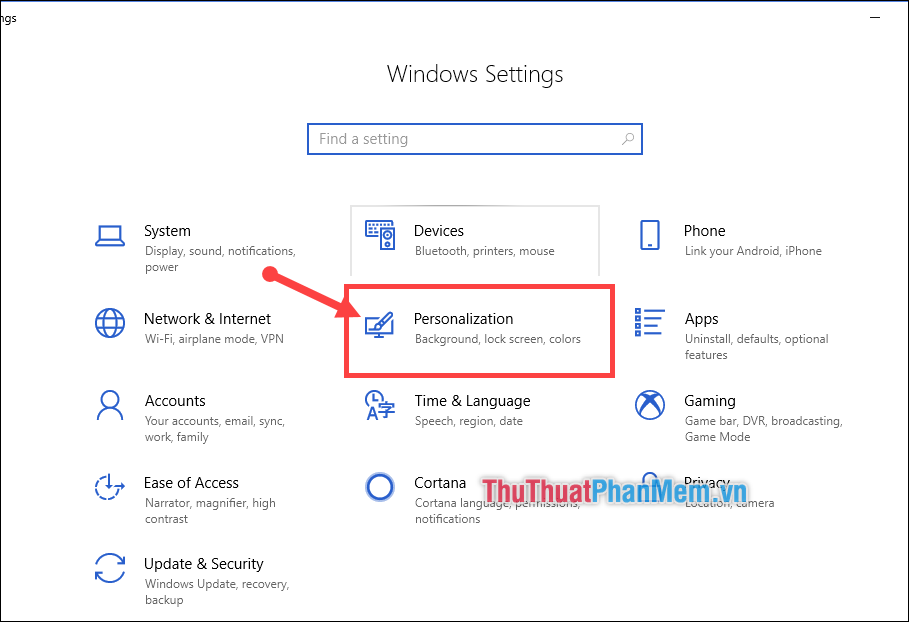
Step 2 : In the window Settings , select Personalization ( Personalization ).
Step 3 : Here you select the Colors section, then the menu color option according to your preferences.
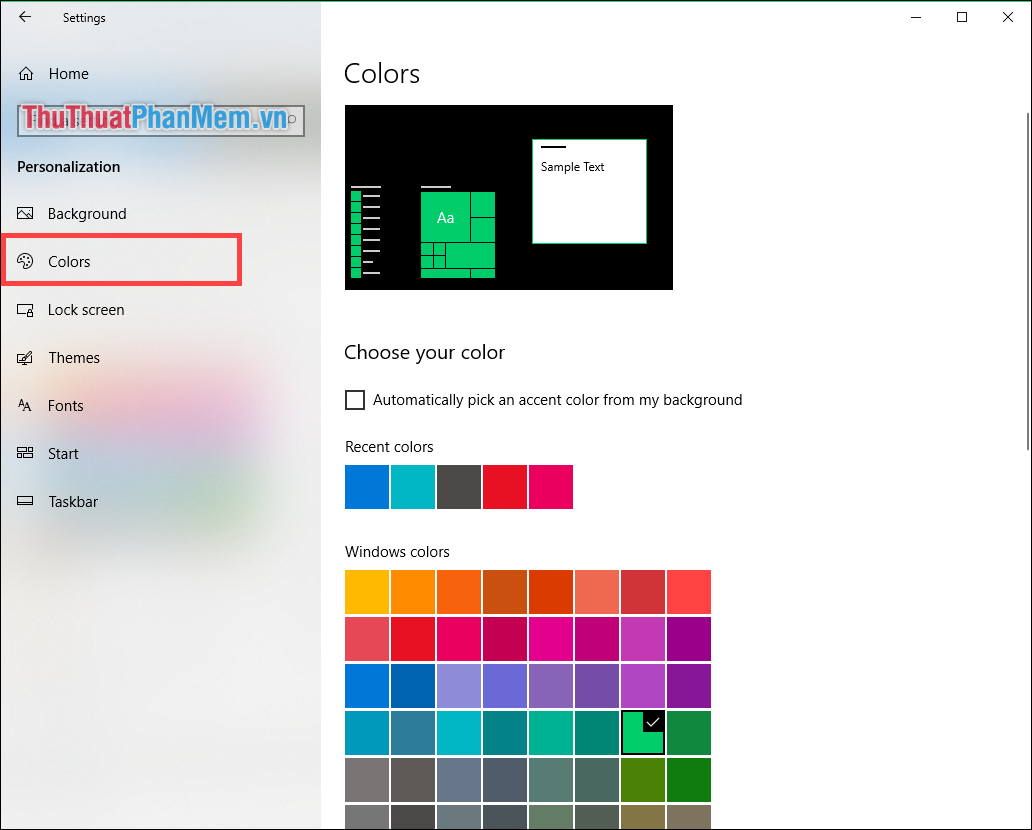
In addition, when you scroll down there are also some options such as:
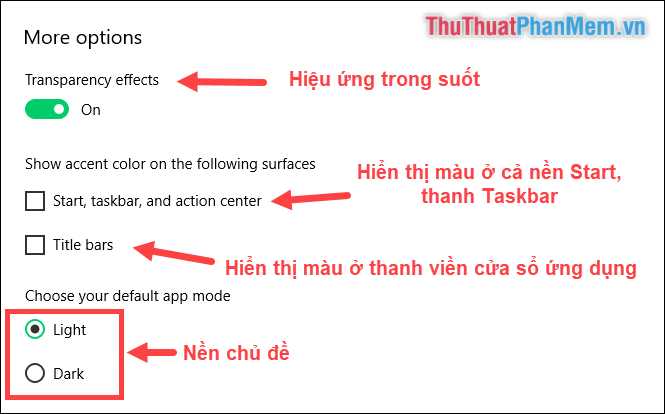
7. There are also a number of other options for the Start Menu

Now with the above tips, you will make your Start Menu richer and more convenient for you. Thank you for watching the article!
FAQ
What should I know about Instructions to Customize Your Start Menu Bar on Windows 10?
Focus on the key features, requirements, limitations, and practical use cases explained in this guide.
How do I get the best results with Instructions to Customize Your Start Menu Bar on Windows 10?
Follow the recommended steps, use current software or information, confirm compatibility, and review settings before major changes.
Are there any risks or limitations?
Potential limitations depend on compatibility, data quality, cost, privacy, support, and how the product or method is used.
Related Articles
 6 Tips to Customize the Start Menu on Windows 114 minutes read
 Personalize the Start Menu of Windows 106 minutes read
 How to Customize the Start Menu to Better Navigate Windows 116 minutes read
 Classic Shell: What It Is and How to Use It to Customize Menu on Windows4 minutes read
 Instructions to Remove the All Apps Option on Windows 10 Start5 minutes read
 Tips to Customize the Transparency of the Start Menu in Windows3 minutes read
Reader Comments 0
Sign in with email or Google to join the discussion.