Table of Contents
This guide provides a practical overview of Draw a Mind Map in Word, including its main features, benefits, limitations, and important considerations.
Step 1: In card INSERT -> Shapes -> choose the form you want to present on mind maps.
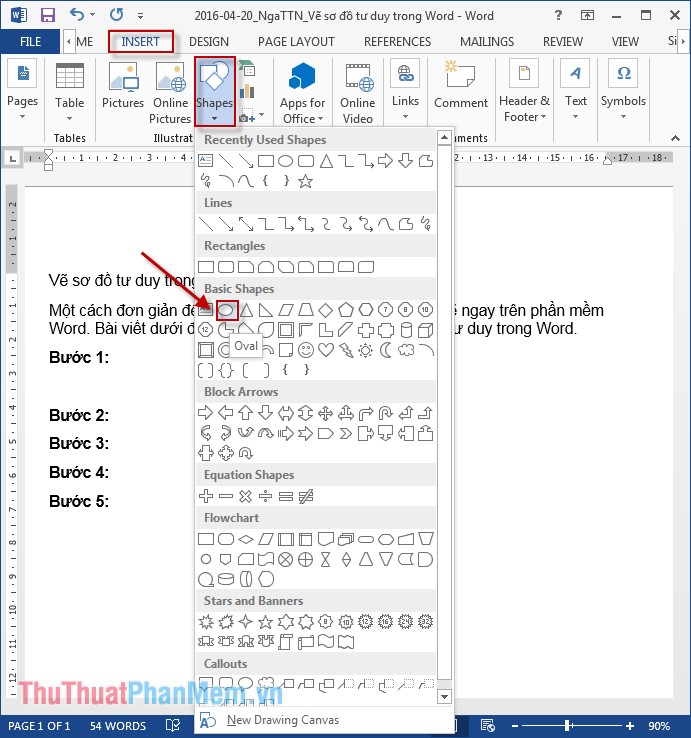
Step 2: Right-click the object you just drew and choose Edit Text to insert text into each element of the mind map:

You can change the size of the object by selecting the object and moving by the 2-way arrow.
Step 3: The next step you draw the other components of the mind map. You can select arbitrary straight lines or curves, here select curves: Go to INSERT -> Shapes -> select curves:
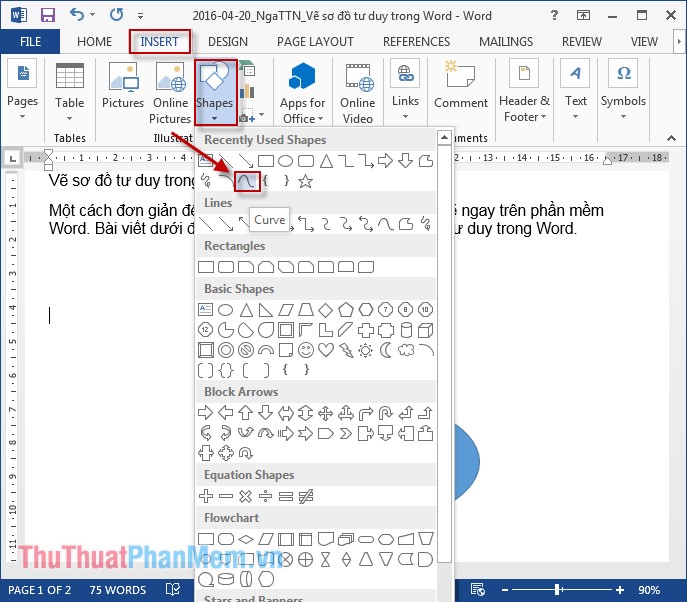
Step 4: After drawing the curve, draw the attributes of the object. Usually the properties of the object are rectangular.

Step 5: After creating the attribute you name that attribute. Result:

Similarly, draw more attributes of the object with the diagram:

In case you want to create other levels do the same.
Above is how to draw a simple mind map. Hope to help you. Good luck!
FAQ
What should I know about Draw a Mind Map in Word?
Focus on the key features, requirements, limitations, and practical use cases explained in this guide.
How do I get the best results with Draw a Mind Map in Word?
Follow the recommended steps, use current software or information, confirm compatibility, and review settings before major changes.
Are there any risks or limitations?
Potential limitations depend on compatibility, data quality, cost, privacy, support, and how the product or method is used.
Related Articles
 How to Draw Mind Maps with Word6 minutes read
 How to Draw Mind Maps Using PowerPoint6 minutes read
 How to Build a Mind Map in Microsoft Word8 minutes read
 How to Draw a Frame in Word4 minutes read
 Draw a Beautiful, Professional Mind Map in PowerPoint: Step-by-Step Guide4 minutes read
 How to Draw a Mind Map Using Mindjet MindManager9 minutes read
Reader Comments 0
Sign in with email or Google to join the discussion.