How to draw diagrams in Word
Shapes is a great tool in Word that helps you do many things like draw shapes or anything and more specifically they support to draw diagrams in Word. Today I will share with you How to draw diagrams in Word, or follow the article below.

I. Draw a diagram in Word 2016 and 2013
Step 1: Go to Insert menu = Shapes => Select a rectangle shape.
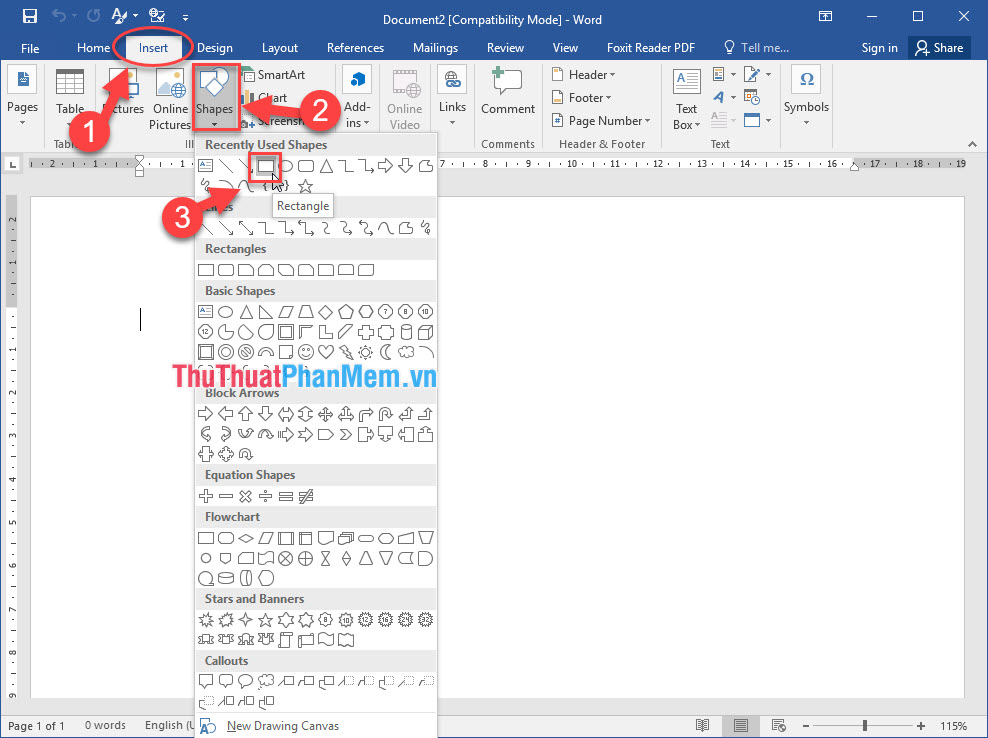
Step 2: Click on the position you want to place the drawing => Hold the left mouse button and drag the mouse to form a rectangle and release the mouse to get a rectangle.
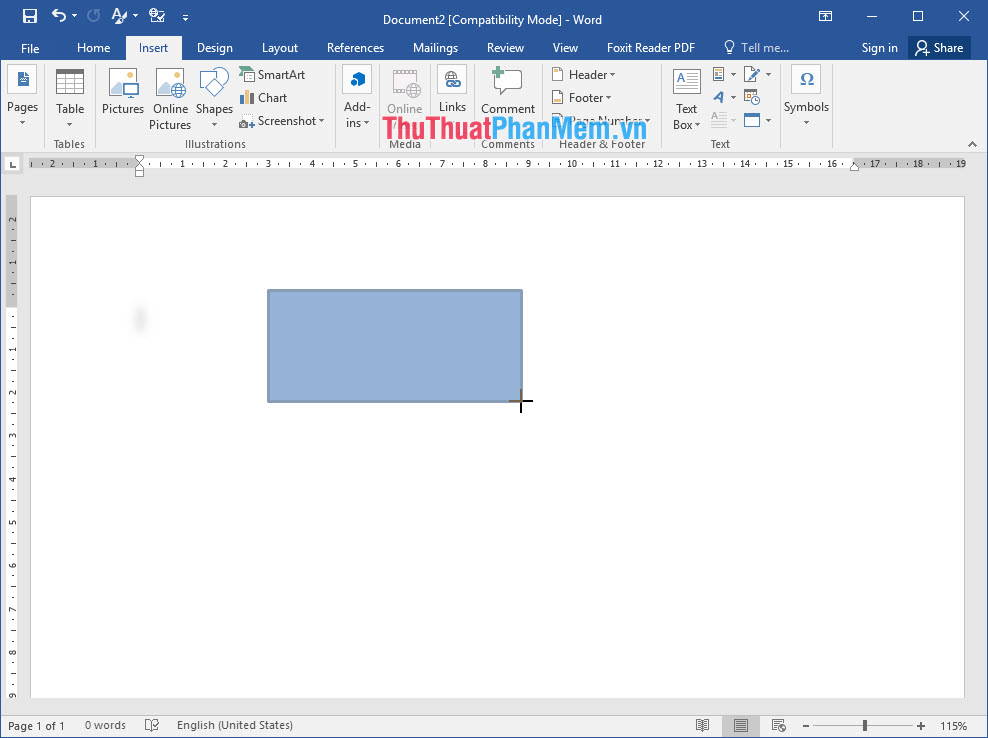
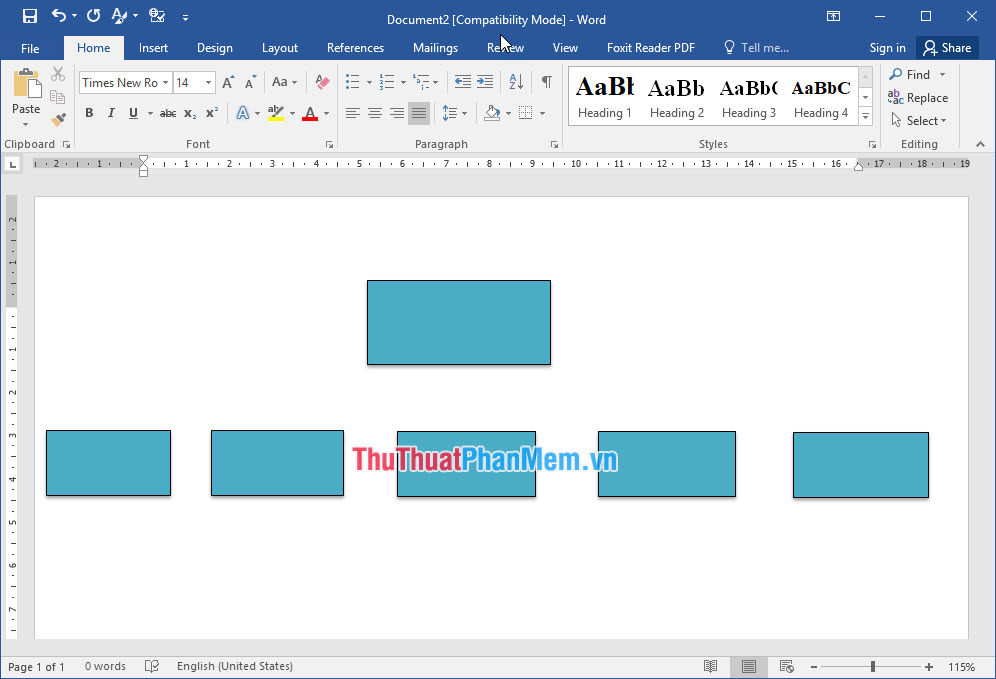
- Continue drawing other rectangles, pay attention to the distance between the images to keep the arrows pointing down.

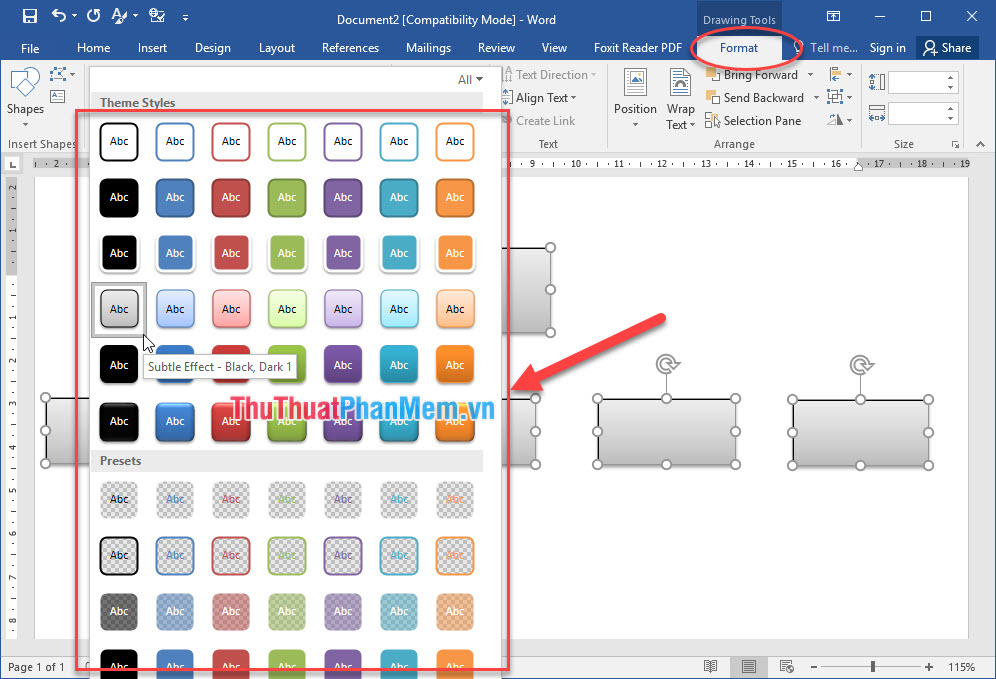
- Change the format of the shapes by clicking on the image you want to format => go to Format => menu in Shape Styles section to choose the color and text format depending on your purpose.
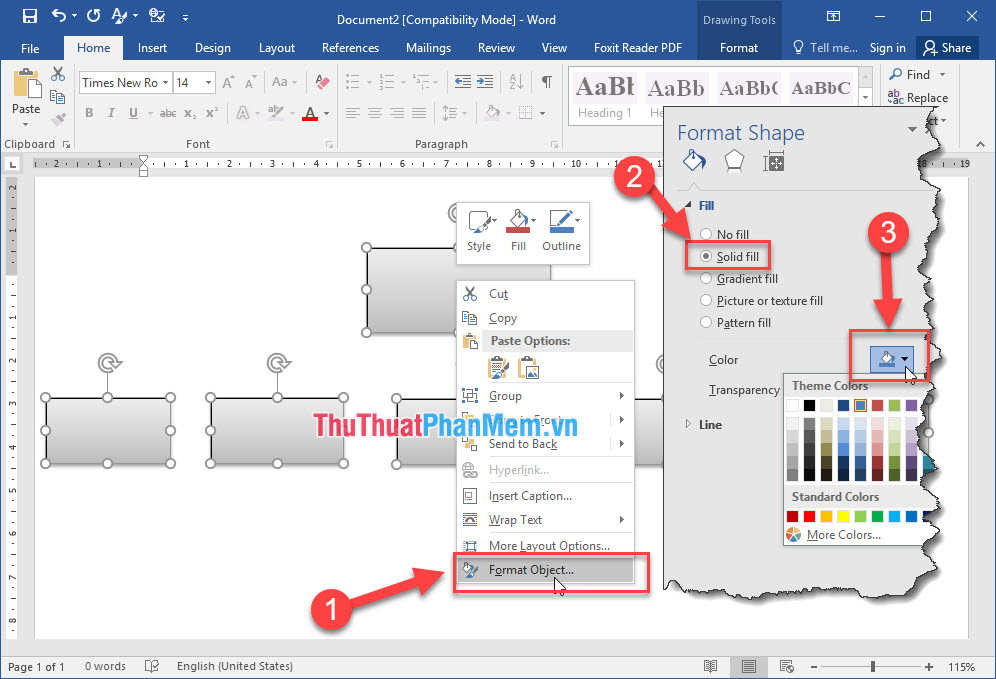
- We can also change the color and border format by right clicking on the image you want to change => Select Format Object => After a Format Shape window appears => Fill => Solid fill => Color => Choose the color of the desired image.
- Results after changing the rectangular format.
Step 3: Draw lines and arrows.
- Go to Insert menu => Shapes => Select the line and arrow to draw.

- First draw straight line first, then draw arrows.
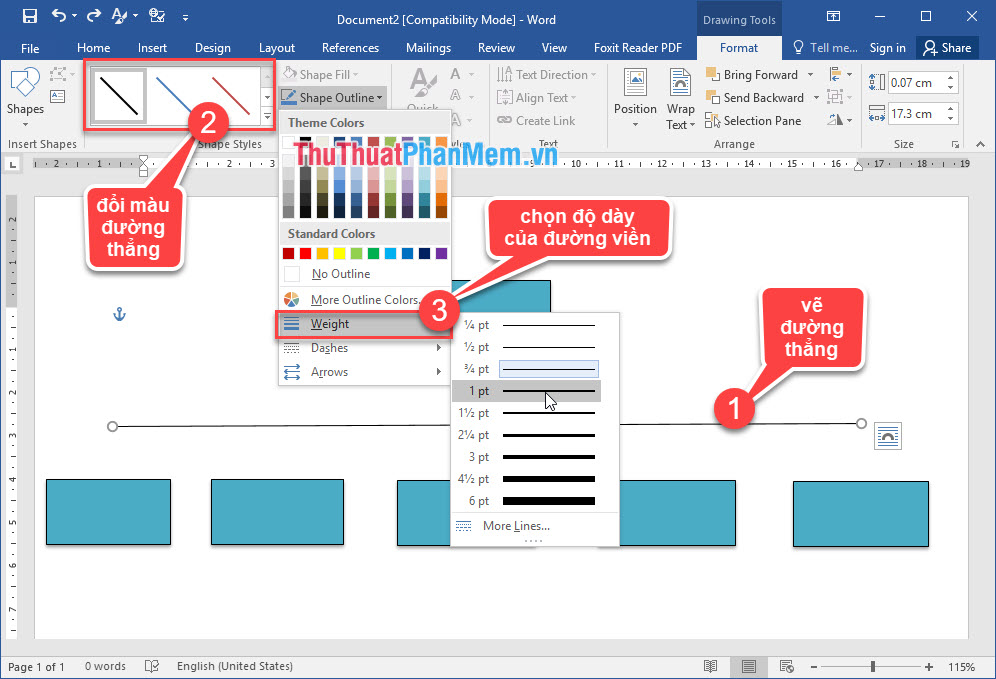
- Results after drawing arrows and lines for the organization chart.
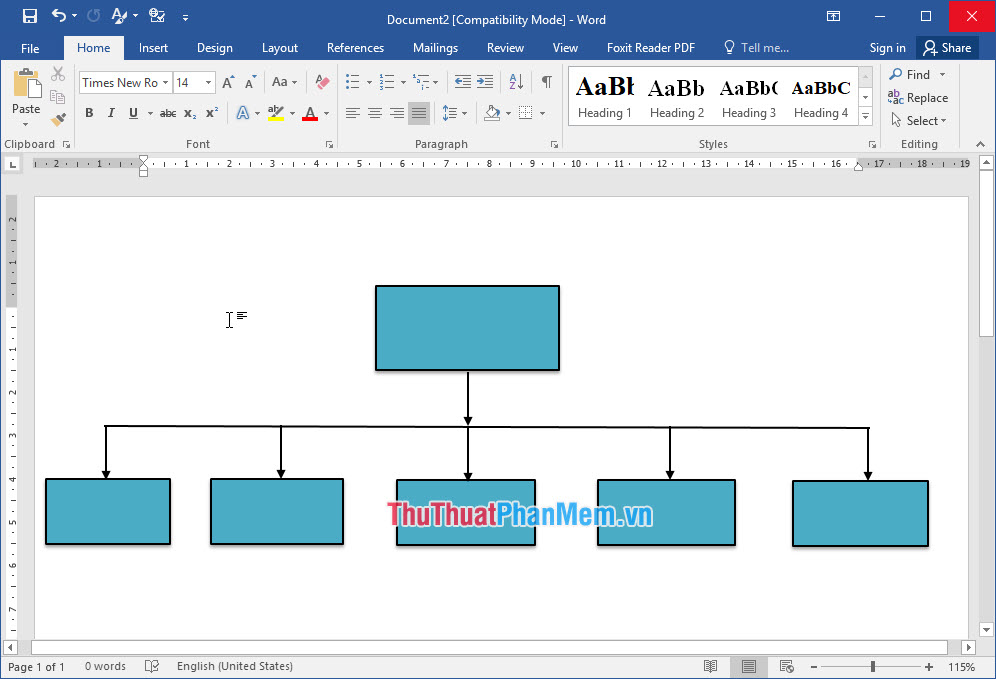
Step 4: Type the word in the picture => click on the picture when you see a blinking vertical line appear, then start typing.
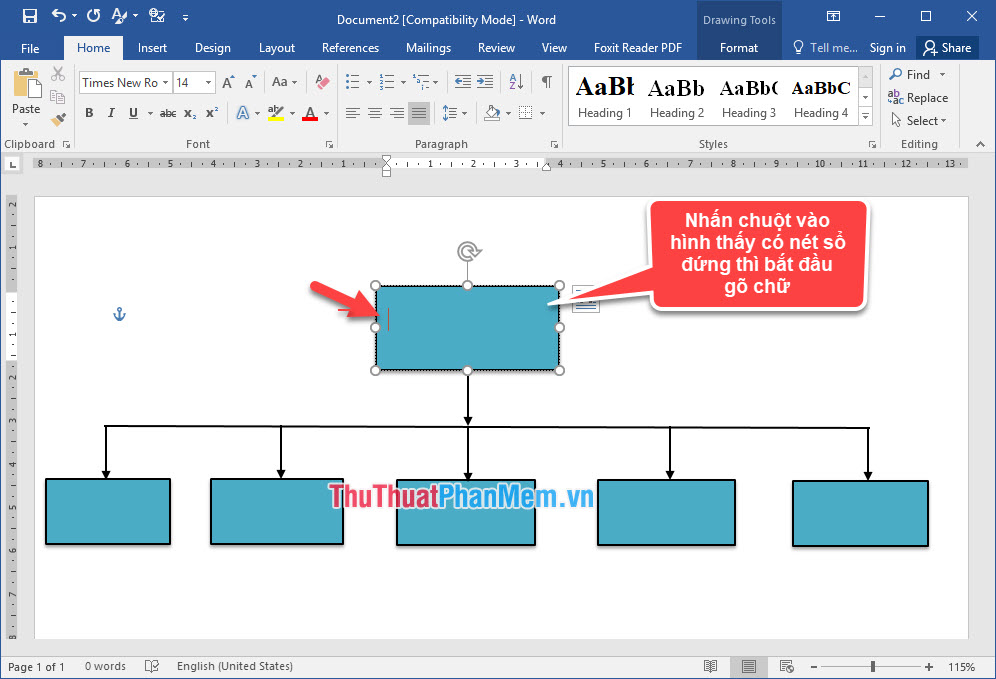
- Type in all the pictures with the content specified and the results as shown.

II. Draw a diagram in Word 2010 and 2007
Step 1: Go to Insert menu = Shapes => Select a rectangle shape.

Step 2: Click on the position you want to place the drawing => Hold the left mouse button and drag the mouse to form a rectangle and release the mouse to get a rectangle.
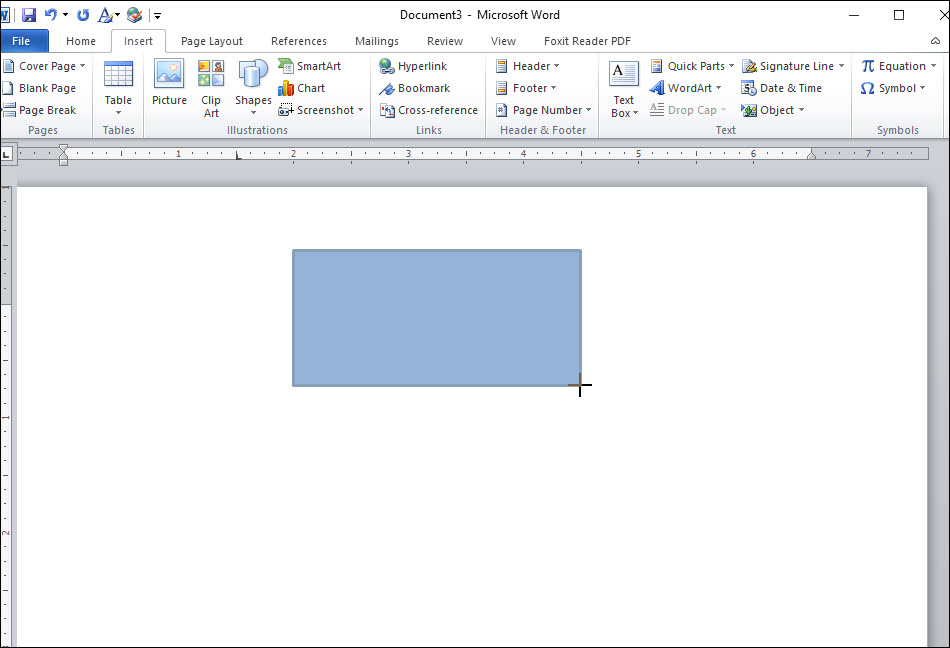
- Continue drawing other rectangles, pay attention to the distance between the images to keep the arrows pointing down.

- Change the format of the shapes by clicking on the image you want to format => go to Format => menu in Shape Styles section to choose the color and text format depending on your purpose.
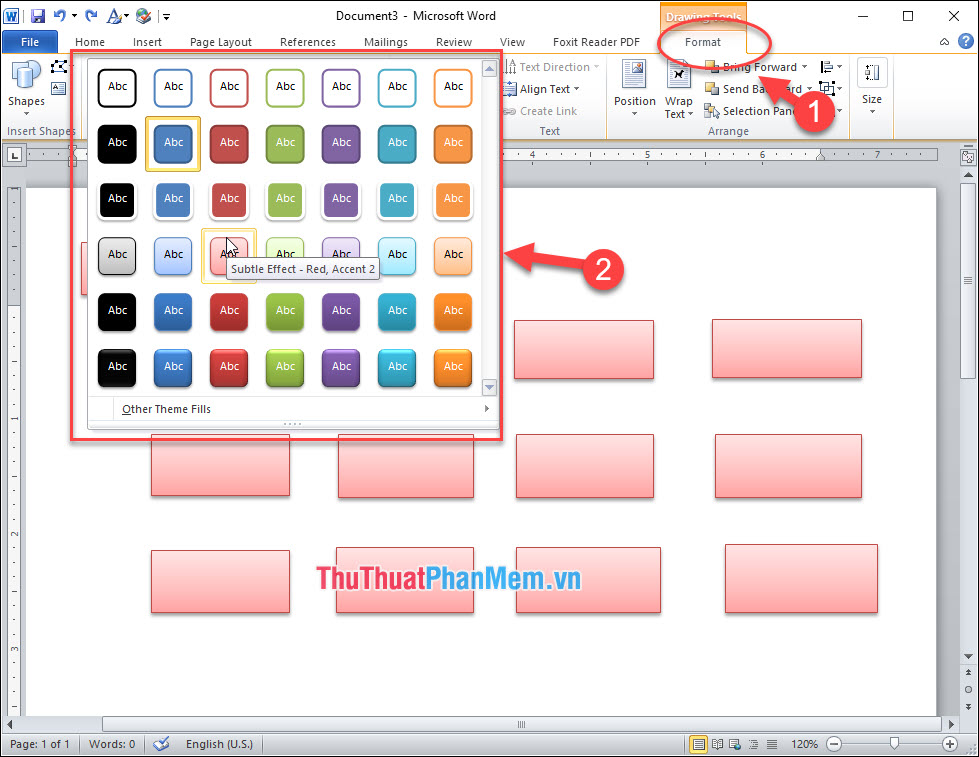
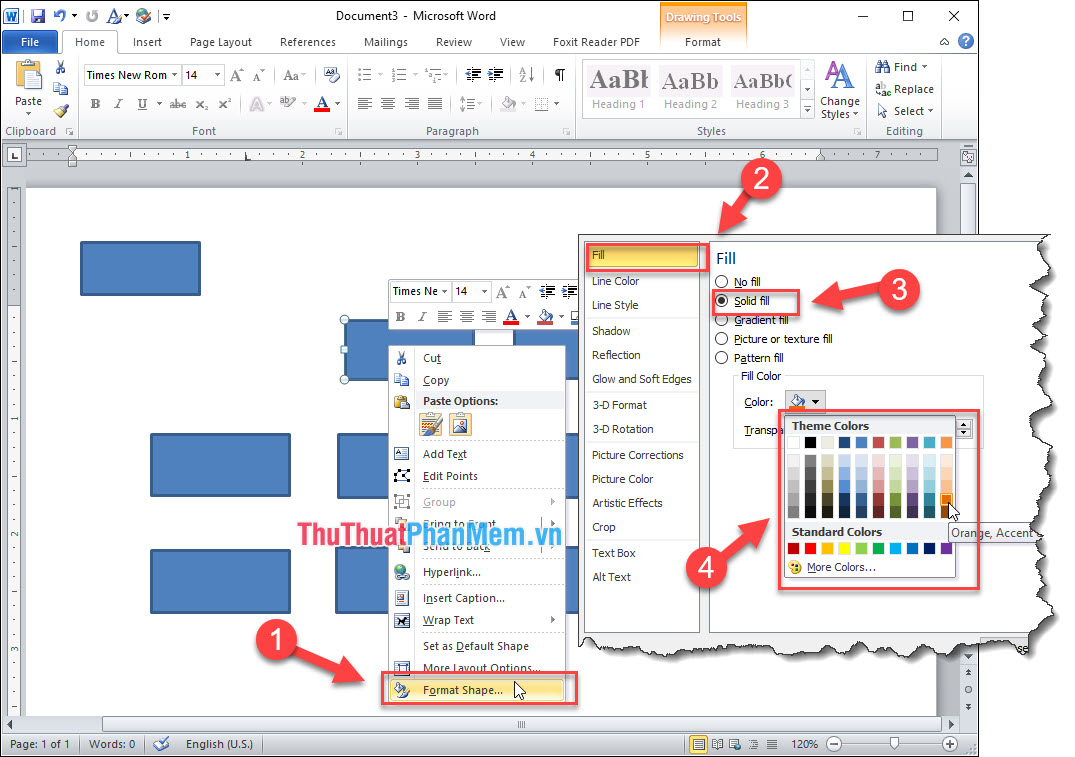
- We can also change the color and border format by right clicking on the image you want to change => Select Format Object => After a Format Shape window appears => Fill => Solid fill => Color => Choose the color of the desired image.
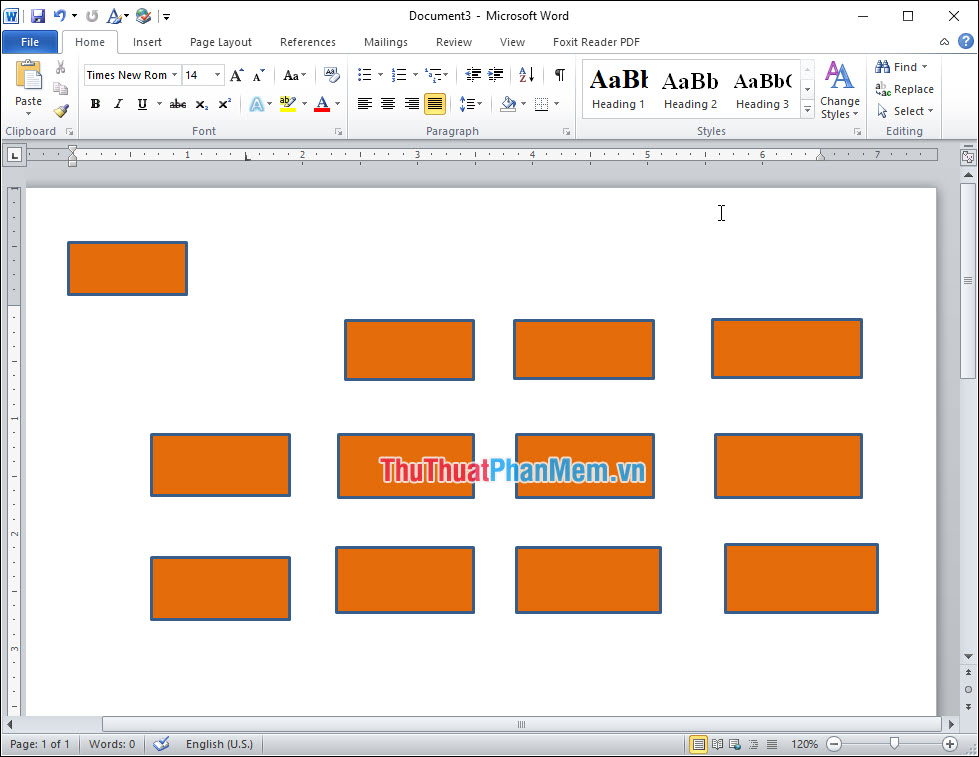
- Results after changing the rectangular format.
Step 3: Draw lines and arrows.
- Go to Insert menu => Shapes => Select the line and arrow to draw.
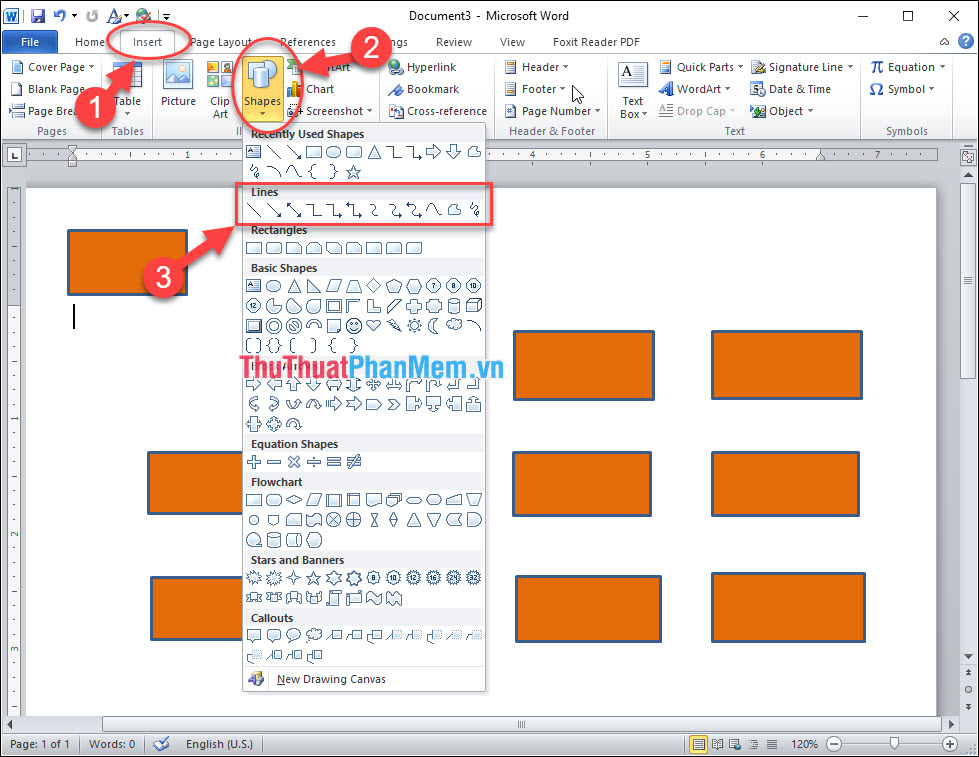
- First draw straight line first, then draw arrows.
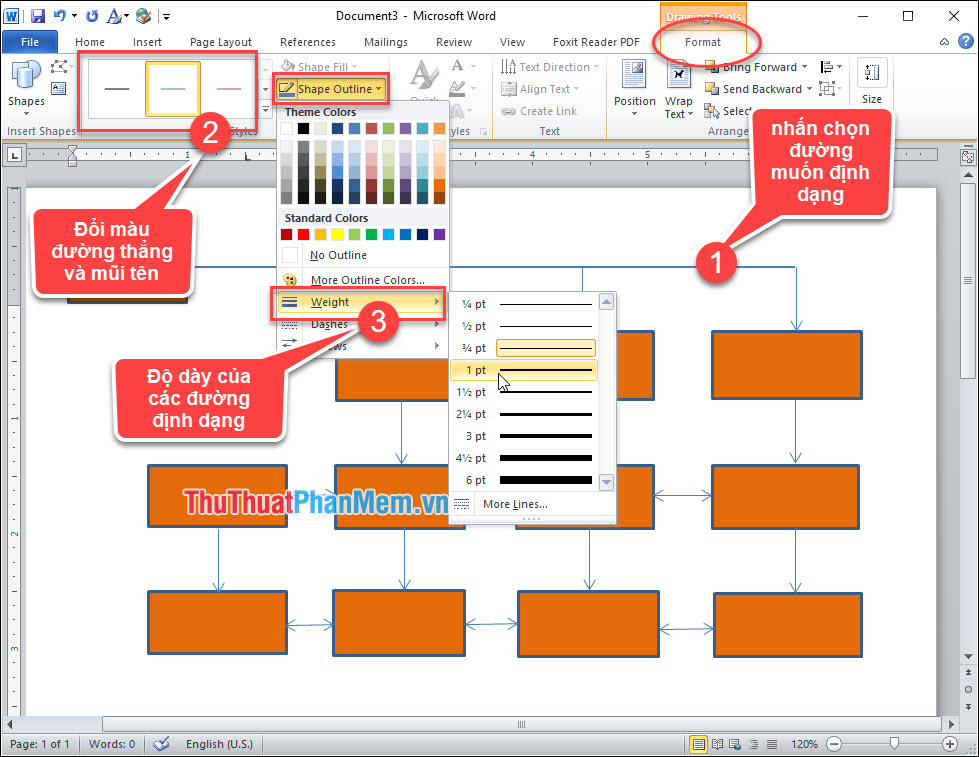
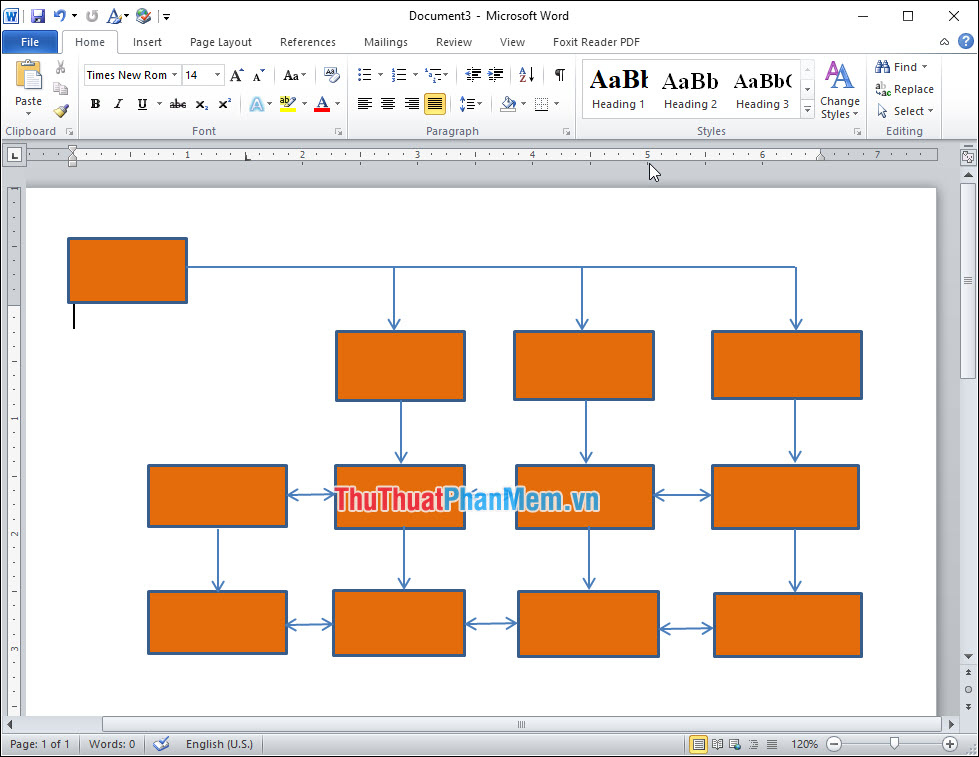
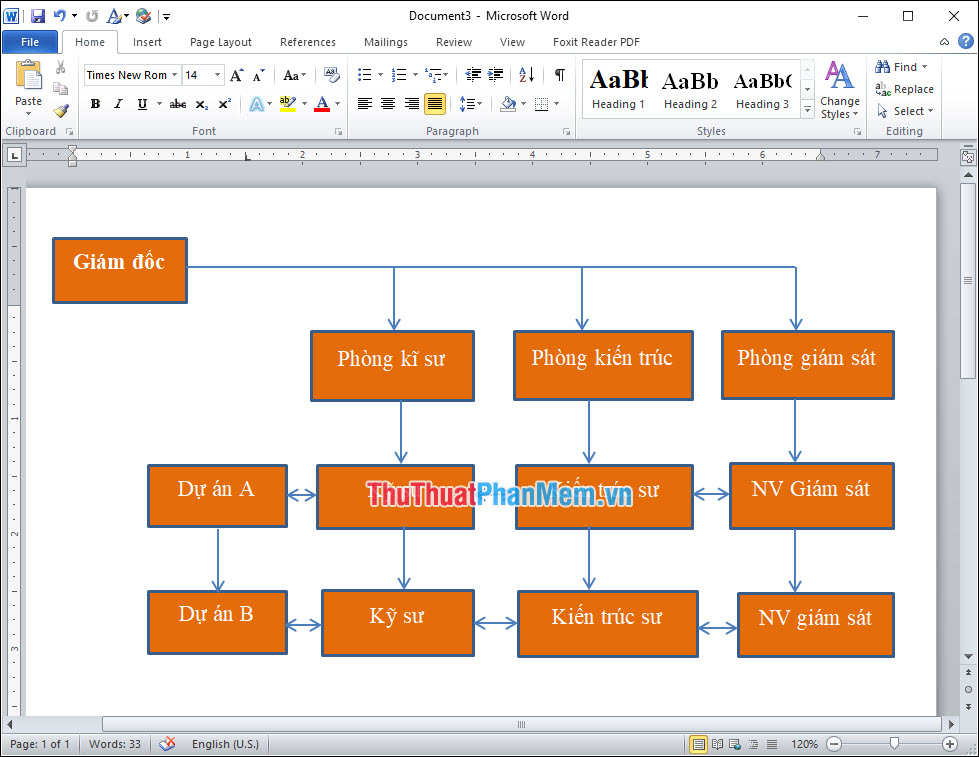
- Results after drawing arrows and lines for the organization chart.
Step 4: Type the word in the picture => click on the picture when you see a blinking vertical line appear, then start typing.
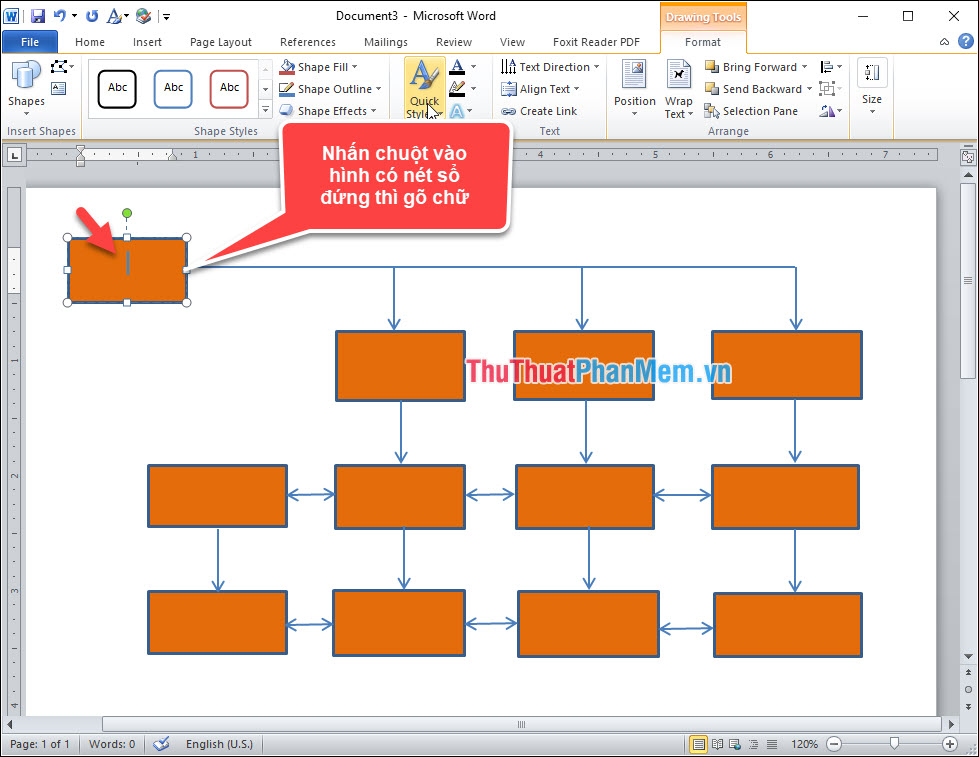
- Type in all the pictures with the content specified and the results as shown.
III. Draw an organization chart with SmartArt
Step 1: Go to Insert menu => SmartArt .

Step 2: The Choose a SmartArt Graphic dialog box appears => Hierarchy => Select the diagram depending on the purpose of use => Click OK .
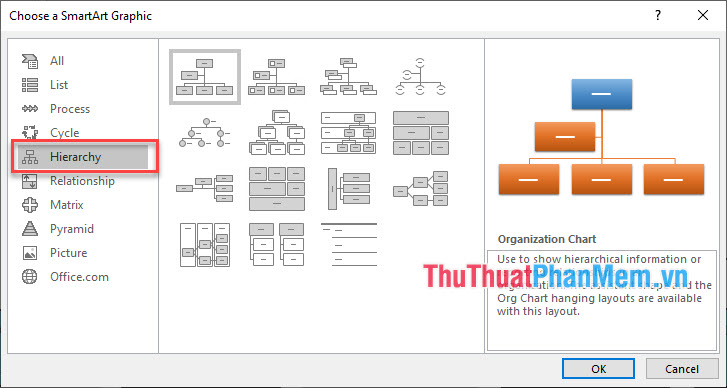
Step 3: After clicking OK on your page will appear a diagram that you have chosen.
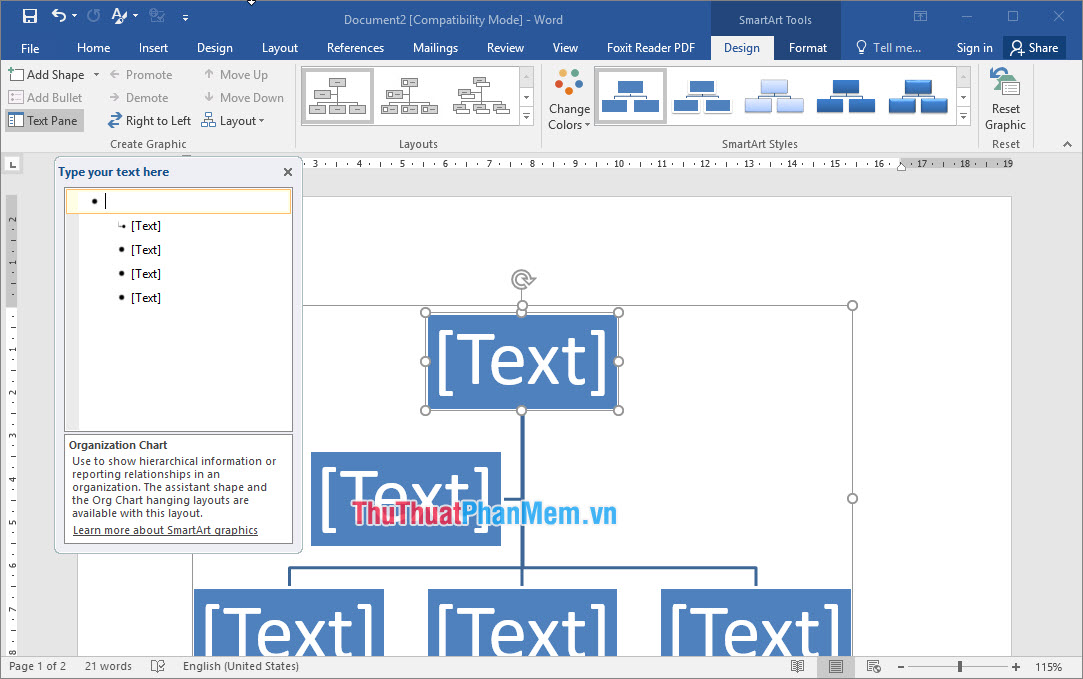
Results after adding words.
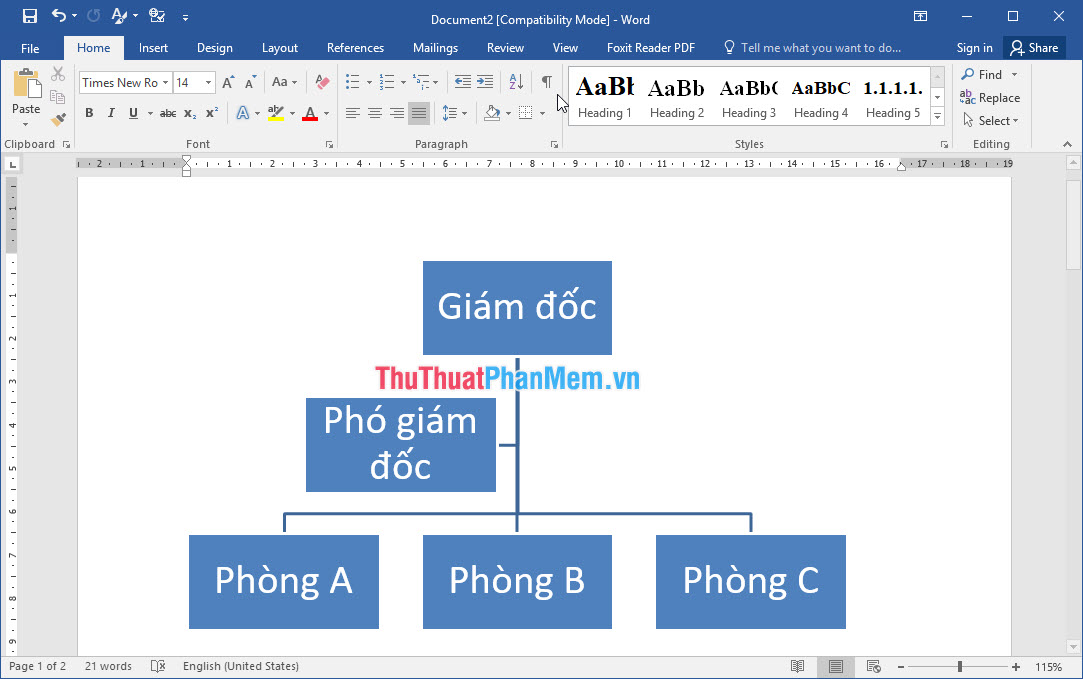
- Also you notice in the Design section will have the following:
- Add Shape: add small branches, horizontal branches, sub-branches .
- Layouts: change the shape of the branches and the content boxes.
- Change Colors: change the color.
- SmartArt Styles: diagram style.
- In the Format section, it will be the place for you to format the font and color.
Thank you for taking the time to follow the article and do not forget to leave a comment below to contribute comments for the article.