Table of Contents
This guide provides a practical overview of Cut Ringtones Using Xilisoft Audio Converter, including its main features, benefits, limitations, and important considerations.
Article on how to cut ringtones with Xilisoft Audio Converter software.
Step 1: Download and install the Xilisoft Audio Converter software.
Step 2: On the main interface, select Add File (s) or Add Folder to open music files, or music files in Folder.
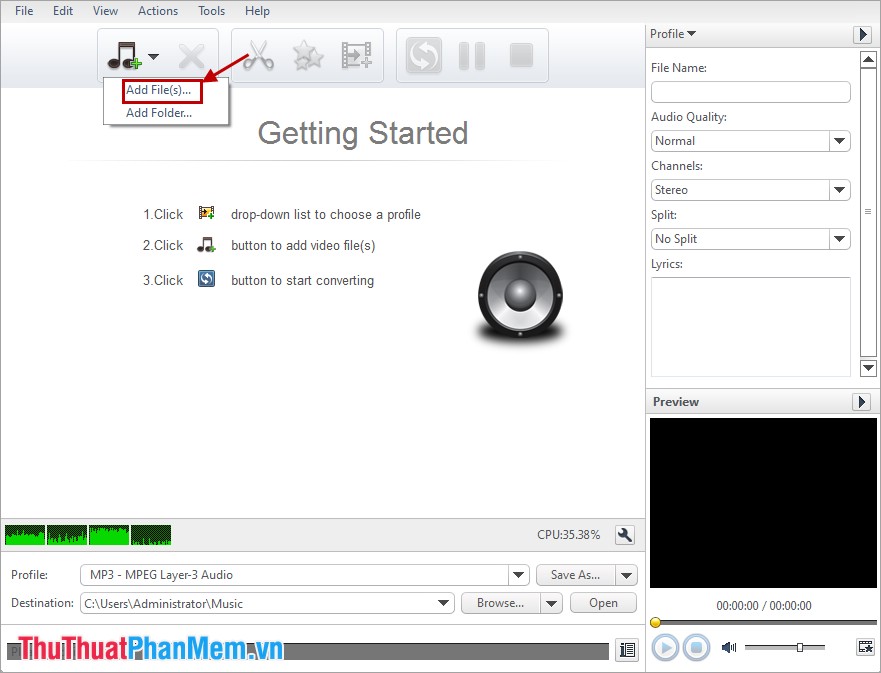
Step 3: Select the music file you want to cut on the interface and click on the scissors icon.

Step 4: Select the music to cut.
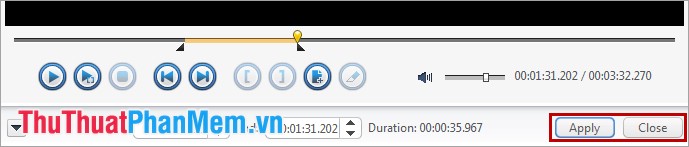
- Drag and drop the icon in the timeline and click the icon [ to locate the tip to be cut.

- Drag and drop the icon to the right on the timeline and click the icon ] to locate the end to cut.

Step 5: Click Apply -> Close .
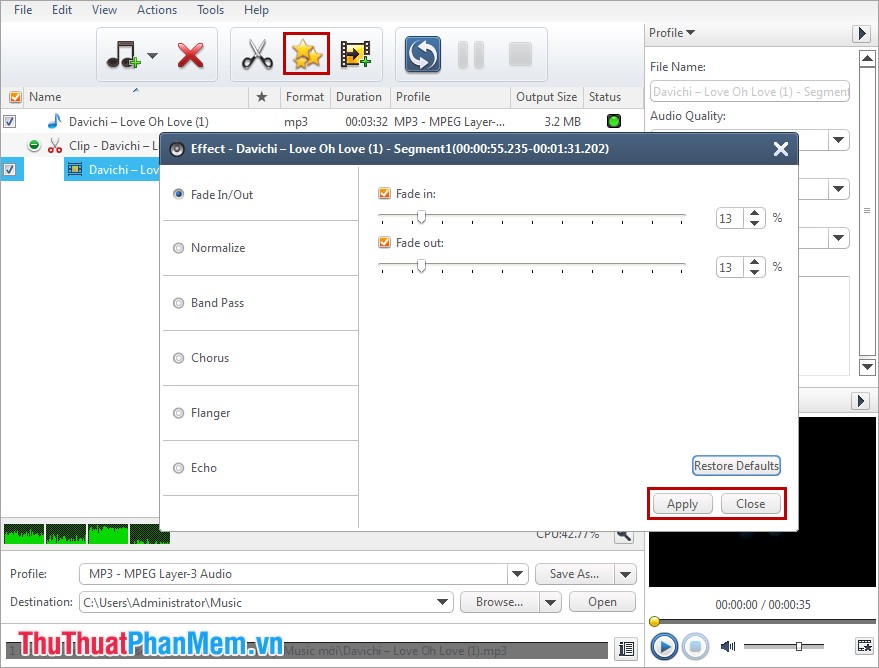
Step 6: To create sound effects, select the star icon (Effect) .
Step 7: Select the output format for music files above the music file name or under Profile .
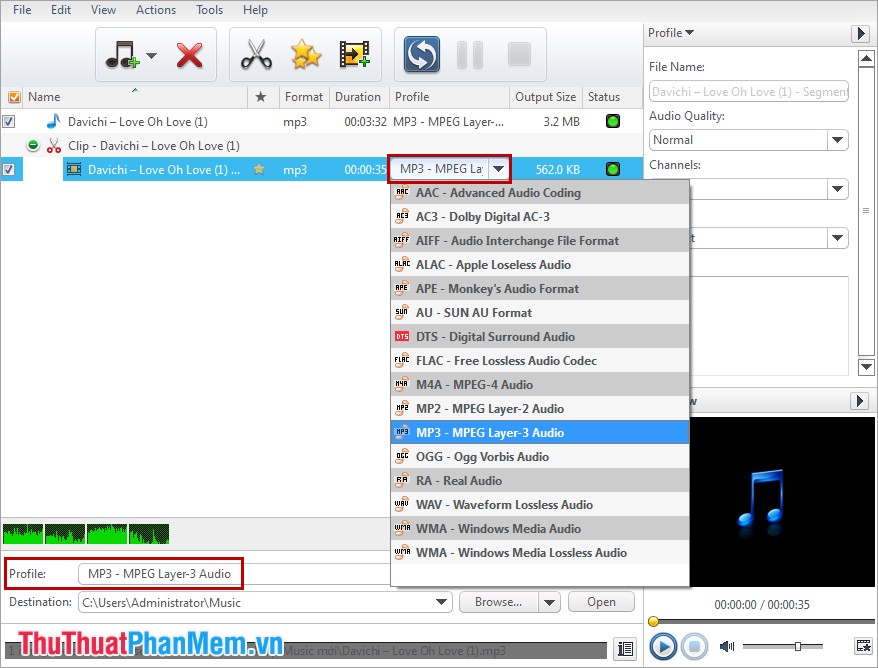
Step 8: Enter a file name and choose a quality for the file.
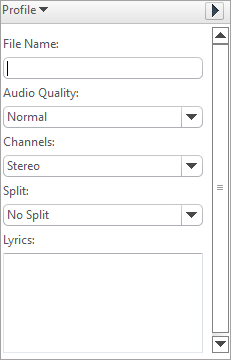
Step 9: Click Browse to select a folder to save the file.

Step 10: Uncheck the box before the original music file and select the Converter icon to cut music.
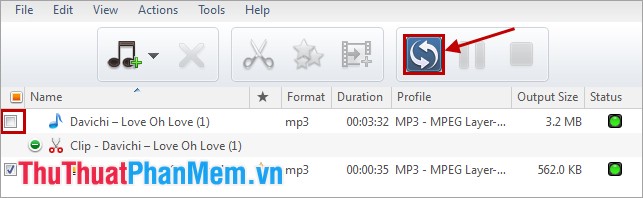
The above article has shown how to cut music files as ringtones using Xilisoft Audio Converter software. You should adjust the cutting time to suit the music section to be cut as a ringtone to have a good ringtone. Good luck!
FAQ
What should I know about Cut Ringtones Using Xilisoft Audio Converter?
Focus on the key features, requirements, limitations, and practical use cases explained in this guide.
How do I get the best results with Cut Ringtones Using Xilisoft Audio Converter?
Follow the recommended steps, use current software or information, confirm compatibility, and review settings before major changes.
Are there any risks or limitations?
Potential limitations depend on compatibility, data quality, cost, privacy, support, and how the product or method is used.
Related Articles
 6 Tools to Convert Audio to Video Online7 minutes read
 VideoProc Converter AI: What You Need to Know9 minutes read
 How to Convert Audio Formats with Online Audio Converter6 minutes read
 5 Best Applications to Convert Audio and Video Files on Linux8 minutes read
 How to Split Video Audio on Video Converter5 minutes read
 11 Best Digital Dac Converters for Hi-res Audio9 minutes read
Reader Comments 0
Sign in with email or Google to join the discussion.