Table of Contents
Corel Draw: Draw a Burning Candle: Figure covers the essential facts behind the topic, including what changed, why it mattered, and how it affected users.
Figure Overview
Step 1: Draw the candle body
- Select the rectangle tool ( Rectangle Tool ), draw a vertical rectangle with the width equal to 2/3 of the length.
- Select the new rectangle to finish painting.
- Select Object - Convert To Curves.
- Select the node tuning tool ( Shape Tool ).
- Click on the small edge below, on the Shape Tool properties bar, select the Convert LINE To Curve box.
- Create a curve for the bottom edge.
- For the upper edge also create curves but make wavy to create uneven burning candles.
- For the long sides of the rectangle, the upper part also creates wavy, like drops of wax flowing down (Figure 1).
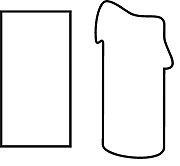 Figure 1
- Select Fill Tool - Fountain Tool, in the Fountain Tool dialog box in:
- Type: select Linear
- Color Blend: choose Custom (the top and bottom of the Custom palette are red, and the center is white) (Figures 2 and 3).
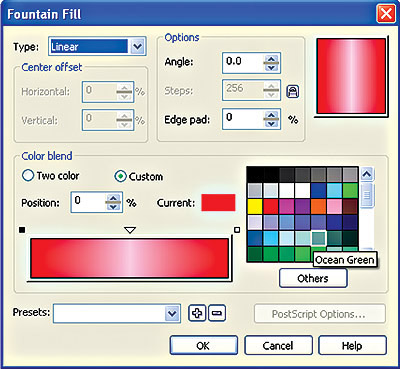
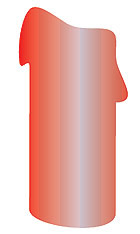
Figure 2
Figure 3
- Draw a few more drops of wax.
Step 2: Draw heart candles and flame
- Select the Bezier Tool to draw a wavy LINE, where you can find candles.
- Draw a small flame shape in red.
- Draw the shape of the fire but larger than the orange color (Figure 4, 5).
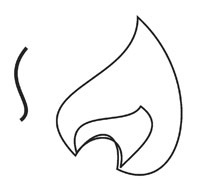 Figure 4
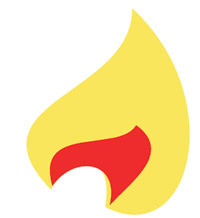 Figure 5
- On the toolbar, select the Interactive Blend Tool (you can press the shortcut W).
- Click to select the big orange fire shape and then drag to the small red flame and get the fire burning (Figure 6).
Step 3: Arrange and draw light from the fire
- Arrange the body, the heart of the candle and the flame, and get the burning candle (Figure 7).
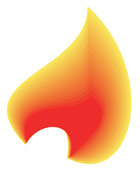
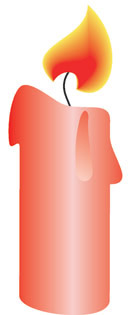
Figure 6
Figure 7
- But to be more like, we have to draw more light areas of the fire.
- Select the circle drawing tool ( Ellipse Tool ), draw two small circles, one big one with the same center.
- Large image with 20% yellow, while small image is white (Figure 8).
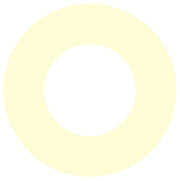 Figure 8
 Figure 9
- On the toolbar, select the Interactive Blend Tool (you can press the shortcut W).
- Click on the big circle then drag to the small white circle that is emitted by the light from the fire (Figure 9).
- Put in the fire so that it is balanced.
- Select Object - Order - To Back.
- We get the result as shown in Figure 10.
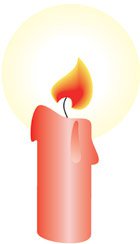 Figure 10
Lam Khe
FAQ
What does Corel Draw: Draw a Burning Candle: Figure explain?
Corel Draw: Draw a Burning Candle: Figure covers the essential facts behind the topic, including what changed, why it mattered, and how it affected users.
Who is most affected by Figure?
Figure Overview Step 1: Draw the candle body - Select the rectangle tool ( Rectangle Tool ), draw a vertical rectangle with the width equal to 2/3 of the length. - Select the new rectangle to finish painting. - Select Object - Convert To Curves. - Select the.
What are the key takeaways from this topic?
Figure 1 - Select Fill Tool - Fountain Tool, in the Fountain Tool dialog box in: Type: select Linear Color Blend: choose Custom (the top and bottom of the Custom palette are red, and the center is white) (Figures 2 and 3).
Related Articles
 Corel Draw: What Is Corel DRAW - Introduction12 minutes read
 Corel Shortcuts - All Shortcuts in Corel Draw You Need to Know4 minutes read
 Corel Draw: Use the Photo Corner Effect in Corel Draw: Image3 minutes read
 Corel Draw 12 - Draw Patterns in Circles: Figure3 minutes read
 Corel Draw 12: Draw the Butterfly: Figure3 minutes read
 How to Convert AI Files to Corel Quickly4 minutes read
Reader Comments 0
Sign in with email or Google to join the discussion.