Photoshop CS: Fire storm
1. Press D to default to the black and white background2. Open a new Document 500 x 370 px - White background (#ffffff)
1. Press D to default to the black and white background
2. Open a new Document 500 x 370 px - White background (#ffffff)
3. Filter > Render > Clouds
4. Filter > Sketch > Graphic pen and set the properties as shown below.
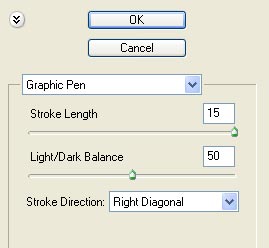
Figure 1
Effect result:

Figure 2
5. Filter > Blur > Radial blur > set properties
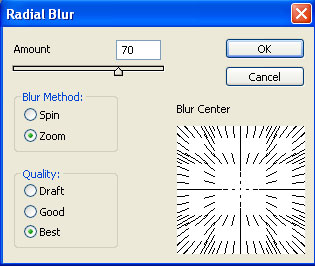
Figure 3
6. Filter > Disort > Ocean ripple
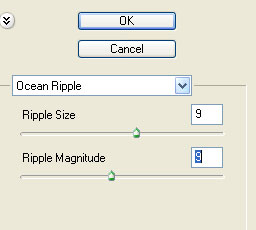
Figure 4
Effect results

Figure 5
7. Filter > Disort > Twirl
+ Angle : 395
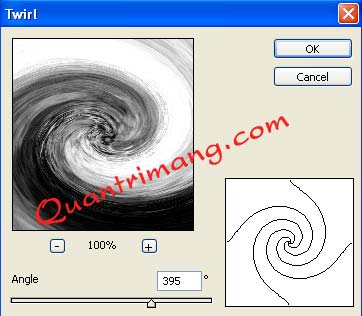
Figure 6
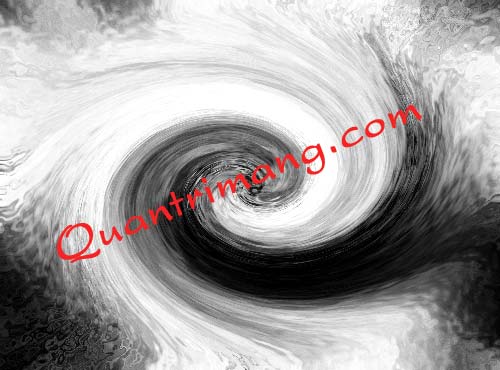
Figure 7
8. Duplicate the layer
- Right click on Background> Duplicate layer (or press Ctrl + J )
- Name the new layer "Delicious"
9. Rotate the layer "delicious" against the Background layer
- Click "delicious" layer
- Edit > Transform > Flip Horizontal
10. Right-click the layer "Slither"> Blending option > choose Blend mode : Lighten
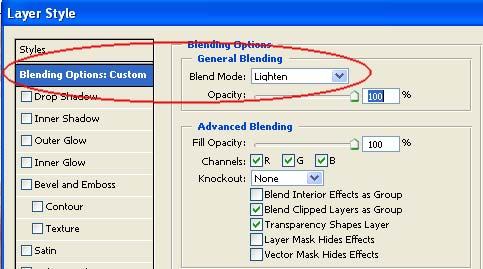
Figure 8
11. Click the Fill layer fill icon or adjustments > Color Balance

Figure 9
- Select Midtones: +100, 0, -100

Figure 10
12. Perform the duplication of the layer ( Ctrl + J ) "Color blance" 1 or 2 times to increase the yellow color of the flame

Figure 11
13. Click panner Color blance copy last> Blending options > select Blend mode : linear Burn

Figure 12
14. Change the image direction when necessary.
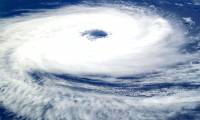
Final result:

Figure 13
Ngoc Lan ( Translating and practicing according to the graphic world )
Was this article helpful?
Your feedback helps us improve.
Related Articles
 Create surreal fire fire effect in Photoshop11 minutes read
 5 applications to help you track the activity of the storm easily12 minutes read
 Download Free Fire on PC - Survival Shooting Game6 minutes read
 How fast can a fire spread?2 minutes read
 How to name storms in the Pacific4 minutes read
 Why is the strongest super typhoon of 2025 named Ragasa?7 minutes read
Reader Comments 0
Sign in with email or Google to join the discussion.