Photoshop CS: Color whirlpool vortex
This is a very useful and interesting exercise, with just a few simple steps using the fillter filter you will create a tornado with lots of colors.
This is a very useful and interesting exercise, with just a few simple steps using the fillter filter you will create a tornado with lots of colors.
Step1 . Ctrl + N Create a new document 300 x 300 px (white background #ffffff)
+ Press D to define the foreground, and the background by default (Black - white)
+ Press X to change the position of the front and back candles (white - black)
Step 2 . Click Fillter -> Render -> Clouds
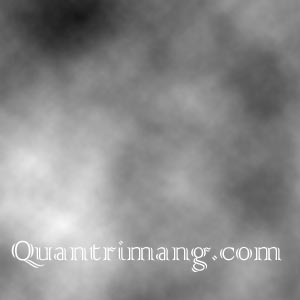
Figure 1
Step 3 . Click Fillter -> Pixelate -> Menzzotint , select Type: Short strokes
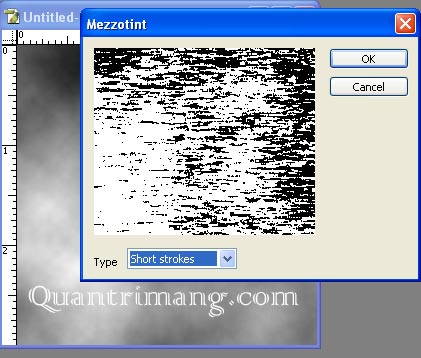
Figure 2
Result

Figure 3
Step 4 . Filter> Blur> Radial Blur, select:
+ Amount : 100
+ Blur Method : Zoom
+ Quality : best
Result
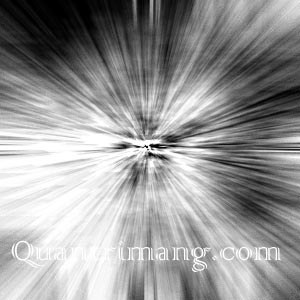
Figure 4
Step 5 . Ctrl + F to add blur blur
Your design may look like the following.
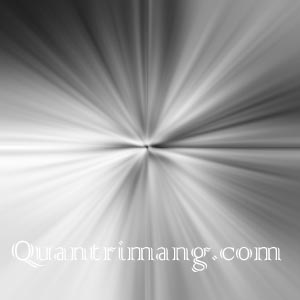
Figure 5
Step 6 . Right click Layer -> Duplicate Layer (or ctrl + J ) to copy the original layer.
Step 7 . On the copy layer, Click Filter> Distort> Twirl ( Amount : 200)
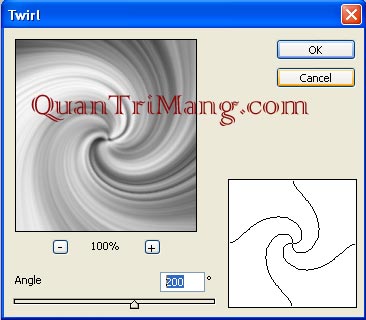
Figure 6
Result
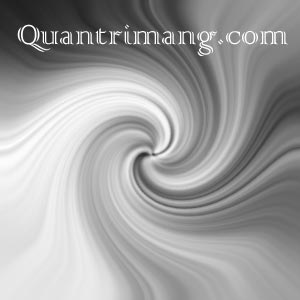
Figure 7
Step 8 Right-click the copy layer -> BLENDING OPTIONS , blend mode : lighten

Figure 8
Step 9 Right-click the copy layer -> Merge down (or Ctrl + E ) to merge the two layers into one
Your design may look like the following.
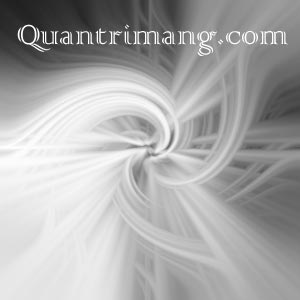
Figure 9
Step 10 . Color the swirl.
Image> Adjustments> Hue / Saturation or ( Ctrl + U )
Set properties
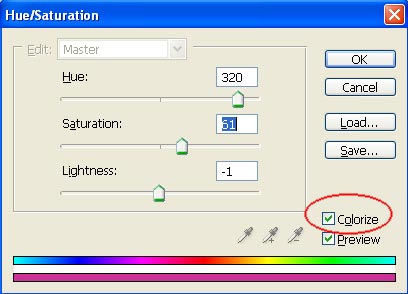
Figure 10
You should click on select colozize

Figure 11
Step 11 . Add a bright white layer to the color swirl, or cover another layer of color for a more distinctive spin
- Duplicate layer (Ctrl + J)
- On copy layer -> BLENDING OPTIONS
- Blend mode : Overlay
The end result in my design

Figure 12
Extensions .
You and I practice a little more, to get more colorful swirls, Not quite special !!!
- Starting from Step 8 .
- Instead of combining 2 working layers 1. You create color swirls for each layer.
- Click on each original layer -> Ctrl + U -> Adjust Hue / Saturation for Layer as follows

Figure 13
- Click copy layer -> Ctrl + U -> color correction as:
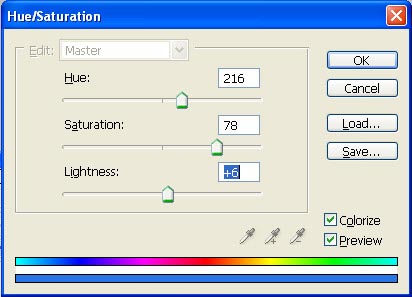
Figure 14
I have this picture.
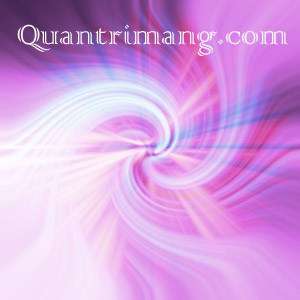
Figure 15
Each of the different clouds you choose will give different results, so what are the results of your practice? I wish you all create your own swirling colored circles.
Ngoc Lan
Was this article helpful?
Your feedback helps us improve.
Related Articles
 How to create whirlpool effect on Photoshop4 minutes read
 How to color images in Photoshop3 minutes read
 How to change hair color in Photoshop3 minutes read
 Instructions on how to color in Photoshop2 minutes read
 How to fix common color problems in Photoshop8 minutes read
 How to adjust color in Photoshop2 minutes read
Reader Comments 0
Sign in with email or Google to join the discussion.