Instructions to turn off Autoplay when plugging in USB, hard drive
This Autoplay function is also a source of infection for malicious programs or viruses from USB to your computer without your knowledge. In this article I would like to introduce you how to turn off Autoplay simply and quickly..
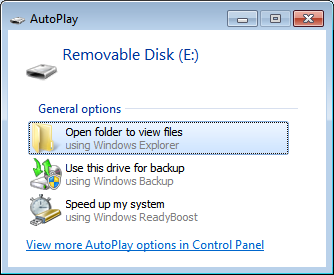
Autoplay is a Windows function that helps your computer automatically run the installation program . when you plug in a new USB or hard drive into the computer. This Autoplay function is also a source of infection for malicious programs or viruses from USB to your computer without your knowledge. In this article I would like to introduce you how to turn off Autoplay simply and quickly.
Method 1
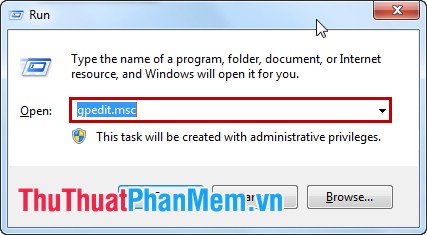
Step 1: You select Start -> Run ( Windows + R ) then enter gpedit.msc , select OK (or press Enter ).
Step 2: In the Local Group Policy Editor dialog box . You turn to Turn off Autoplay under the path User ConfigurationAdministrative TemplatesAll SettingsTurn off Autoplay .

Step 3: Double click the left mouse button to open the Turn off Autoplay dialog box . In this dialog box you tick the box Enabled and select All drives in Turn off Autoplay on .
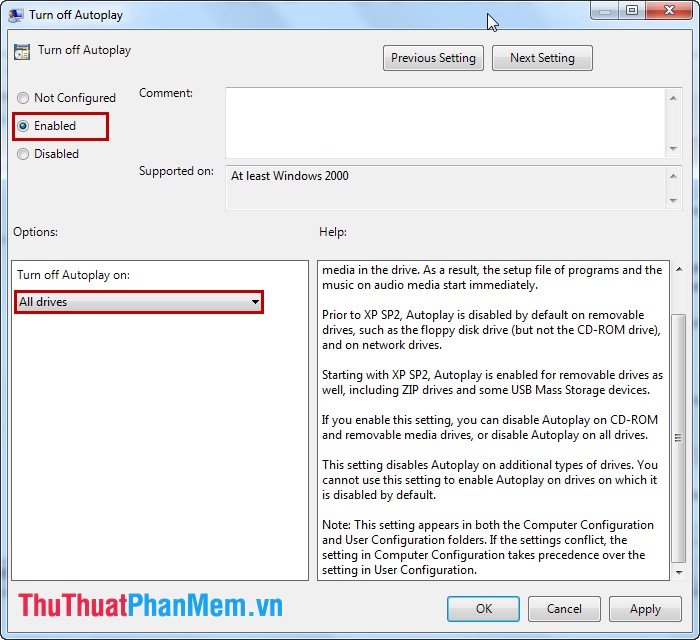
Then select OK to finish.
Method 2
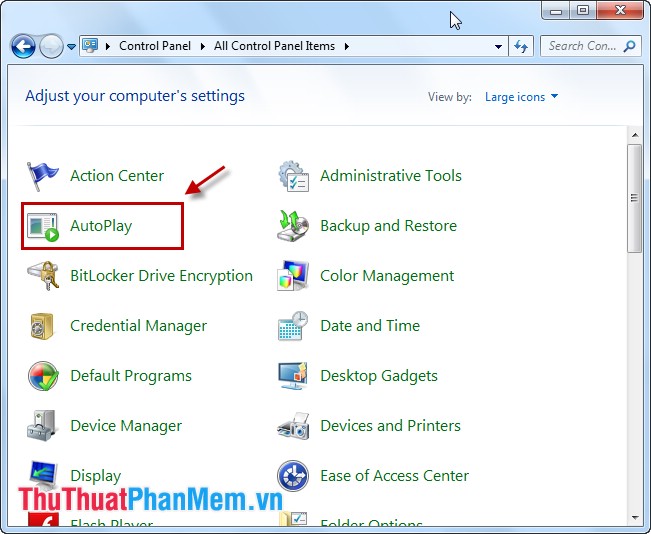
Step 1: Go to Start -> Control Panel .

Step 2: Navigate to Autoplay function , double click on Autoplay .
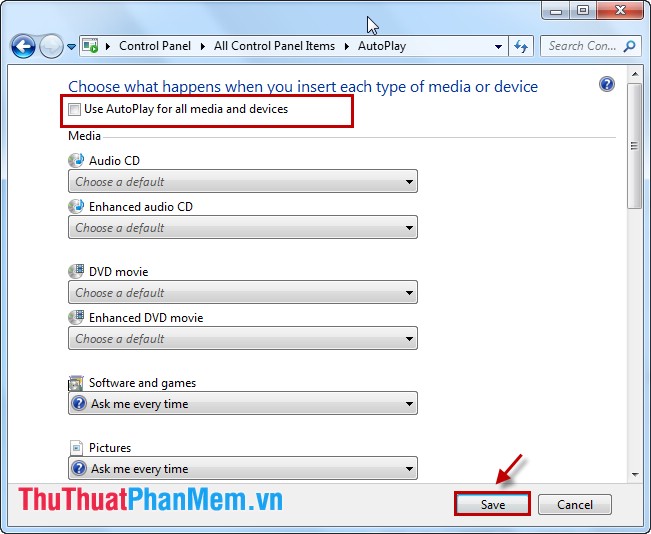
Step 3: In the Autoplay window . Uncheck the Use Autoplay for all media and devices box then select Save .
With the above two ways to turn off Autoplay, you can easily turn off Autoplay to keep your computer safe.