Custom instructions turn on, turn off Autoplay in Windows 10
AutoPlay feature to detect the type of device you have attached and automatically perform any tasks you require. However, this feature automatically runs on the system when connecting devices, USB, drives, ... can be dangerous to the computer..
When you connect an external storage device such as a CD, DVD or memory card to your computer, you often see Windows displaying an AutoPlay popup window. AutoPlay feature to detect the type of device you have attached and automatically perform any tasks you require.
However, this feature automatically runs on the system when you connect devices, USB, drives, etc. thus can be dangerous to the computer. This may be one of the virus transmission paths to your computer affecting the operation of the system.
In the following article, Network Administrator will guide you 3 ways to turn on and turn off Autoplay in Windows 10.
1. Turn on / off AutoPlay in Settings (Settings)
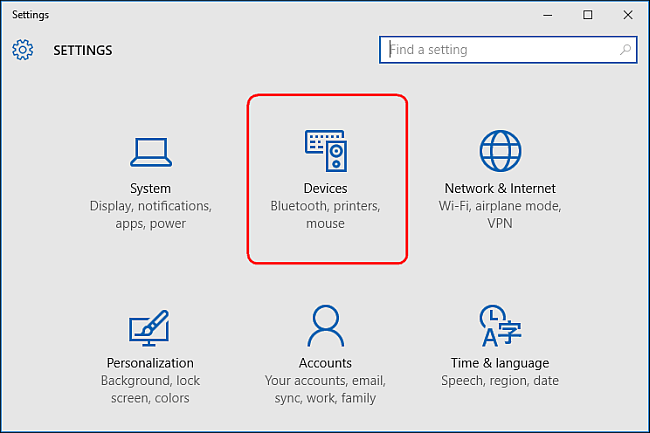
To turn on / off Autoplay in the Settings app, first open the Settings application, then click the Devices icon.
Next, click AutoPlay in the list on the left and switch the slider to ON / OFF in the Use AutoPlay section for all media and devices to turn on or turn off the AutoPlay feature.
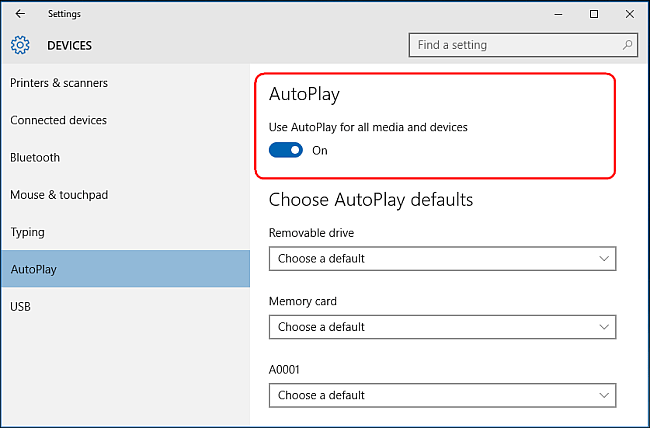
If you select OFF , you will never see the AutoPlay window displayed whenever you attach the device.
However, you can also select the ON option to turn on Autoplay and customize it to your liking.
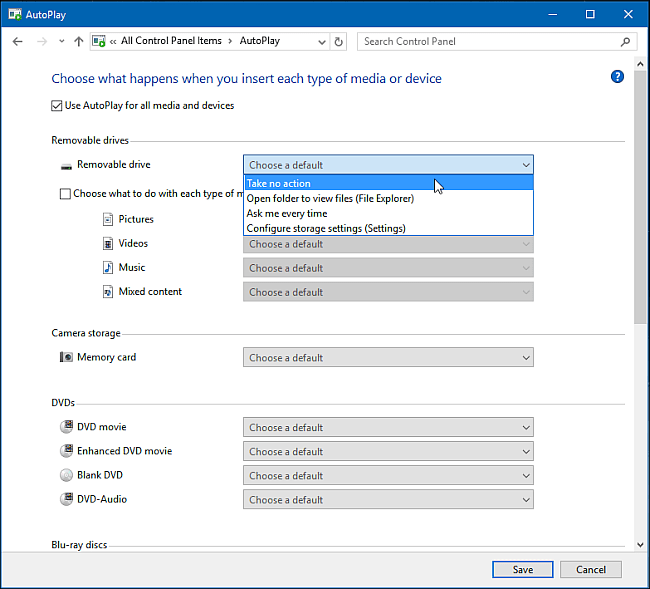
Under Choose AutoPlay Defaults , select the default action that you want AutoPlay to perform when connecting individual device types such as USB storage devices, memory cards or smartphones.
There are options for you like Open folder to view files, Import photos or videos, Configure this drive for backup or Take no action.
You can temporarily disable the AutoPlay feature for some device types by selecting the Take no action option.
Alternatively, press and hold the Shift key while connecting the device to display the AutoPlay window.
2. Turn on / off AutoPlay in Control Panel
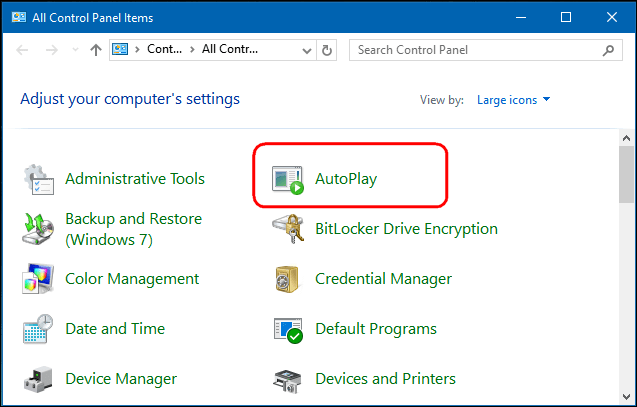
If you want to customize AutoPlay for all kinds of storage devices like music CDs, DVDs, SuperVideo or Blu-ray discs, you can do it in the Control Panel because the Windows 10 Settings app doesn't allow you to do so.
First open Control Panel then click on the AutoPlay icon.
You can check the checkbox in the box Use AutoPlay for all media and devices if you want to enable AutoPlay feature. Or uncheck the checkmark if you want to turn off this feature.
Similar to the instructions set up in Settings, you can choose the default action for each device type immediately below such as: Open folder to view files, Import photos or videos, Configure this drive for backup or Take không có hành động .
At the bottom of the items, you'll see the Reset all default button, which will switch all settings back to their original state.

AutoPlay windows in Windows 10, Windows 7 and Windows 8.1 are nearly identical.
In Windows 7, the Autoplay window displays a list of all types of multimedia connections that you can set accordingly in AutoPlay.
Windows 8.1 and Windows 10 are the same Autoplay window, just different types of multimedia connections available in the configuration.

3. Turn on / off AutoPlay in Group Policy Editor
If you are using Windows 10 Pro and want to disable AutoPlay for different user accounts on the same computer, you can do so via Group Policy Editor .
Press the Windows + R key combination to open the Run box, then type in the RUN dialog box " gpedit.msc ".
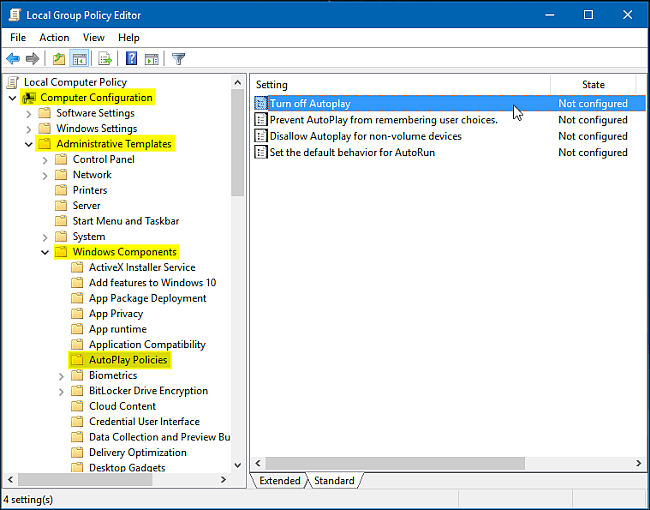
Select Computer Configuration => Administrative Templates => Windows Components and then select AutoPlay Policies .
In the list of items in the right pane, double-click the Turn off AutoPlay item to open the Properties dialog box.
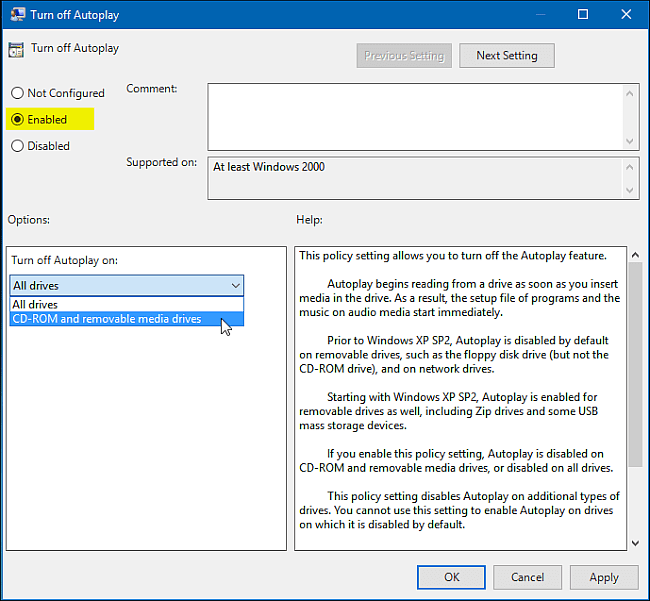
Then click Enabled and select All drives in the Turn off AutoPlay section to turn off AutoPlay for all devices, or select CD-ROM and removable media drives to turn off AutoPlay for CD-ROM drives and other devices. external drive.
Explore more:
-
How to block Windows 10 from collecting user information?
-
Instructions for dividing hard drives right in Windows 10
-
Parallel installation of Windows 10 with Windows 7 or 8
Good luck!