Table of Contents
AutoPlay is a useful feature of Windows that automatically executes when you connect external media or devices such as USB drives, memory cards, or DVDs. Depending on the type of content detected, AutoPlay can open File Explorer, launch a media player, or prompt an input dialog. Although it is quite convenient, many people do not like AutoPlay because of security concerns. In this guide, you will learn a few ways to enable or disable AutoPlay in Windows 11.
Enable or disable Windows 11 AutoPlay via Settings
Open Settings on your computer, then select Bluetooth & devices and then select AutoPlay next to it.
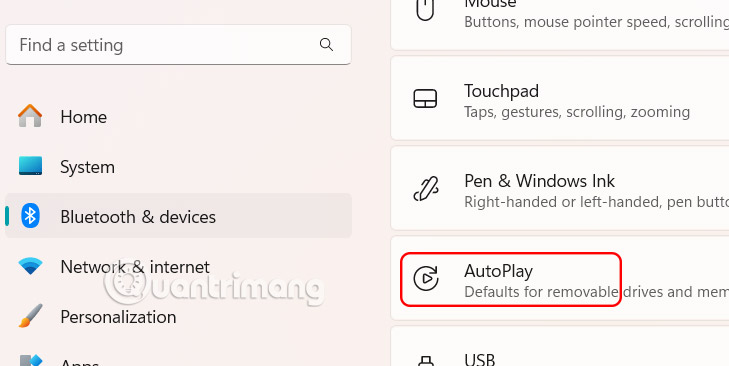
Then turn off AutoPlay at Use AutoPlay for all media and devices .
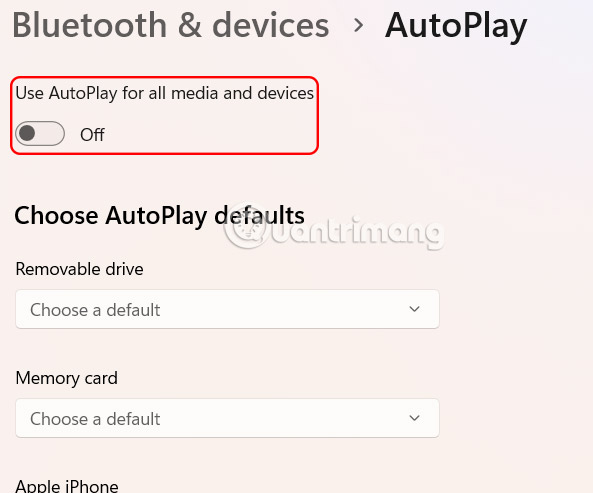
In the Choose AutoPlay defaults section , select actions for Removable drive and Memory card .
Turn on, turn off AutoPlay Windows 11 via Control Panel
Step 1:
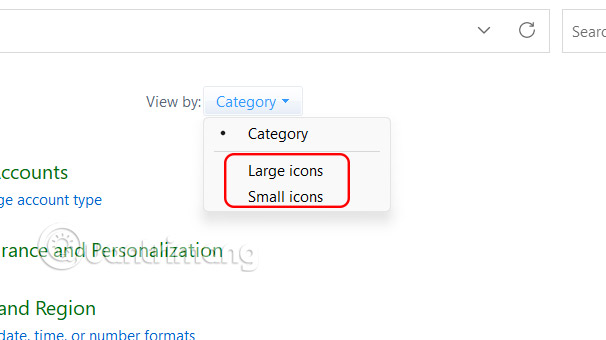
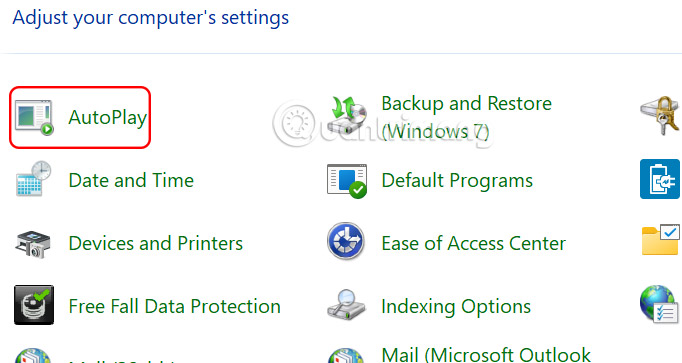
Open Control Panel on your computer and select Small icons or Large icons .
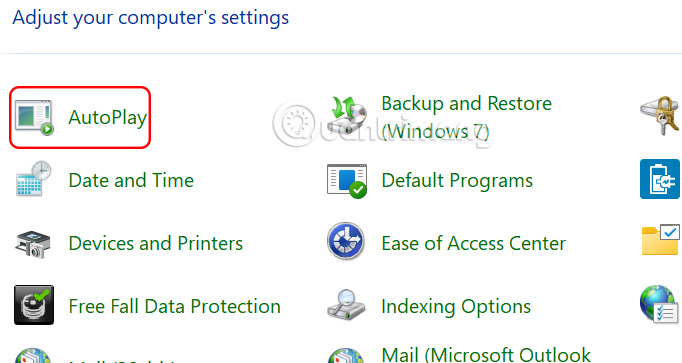
Now you select AutoPlay to adjust this mode on the computer.
Step 2:
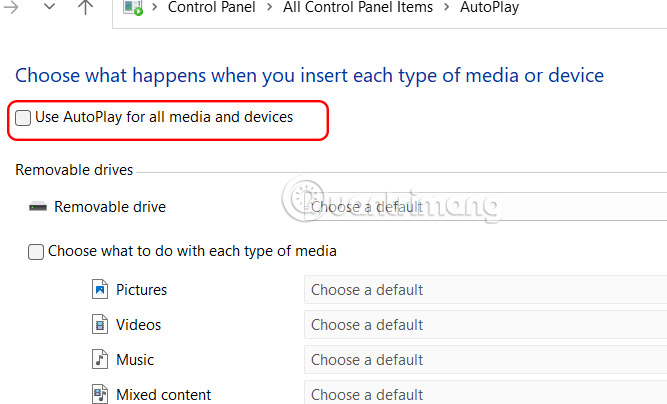
Switch to the new interface and turn off Use AutoPlay for all media and devices if you don't want to use AutoPlay on Windows 11.
How to enable and disable AutoPlay via Group Policy
Step 1:
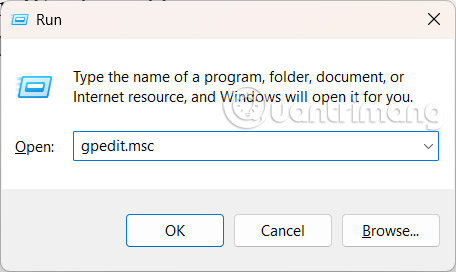
Open the Run dialog box and click gpedit.msc to access Group Policy.
Step 2:
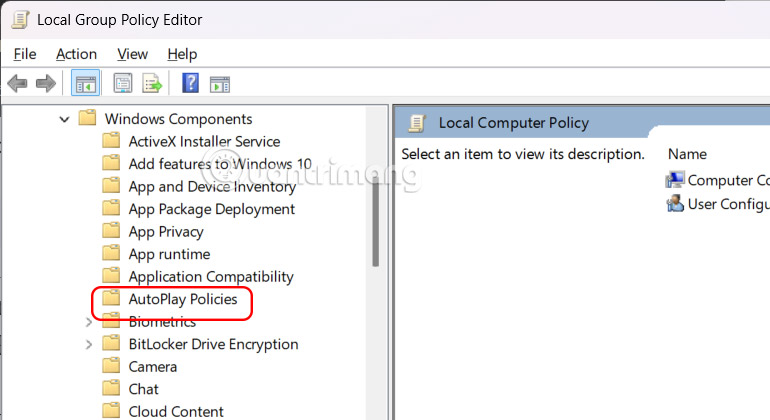
Now you access the link below.
Computer Configuration > Administrative Templates > Windows Components > AutoPlay Policies
Step 3:
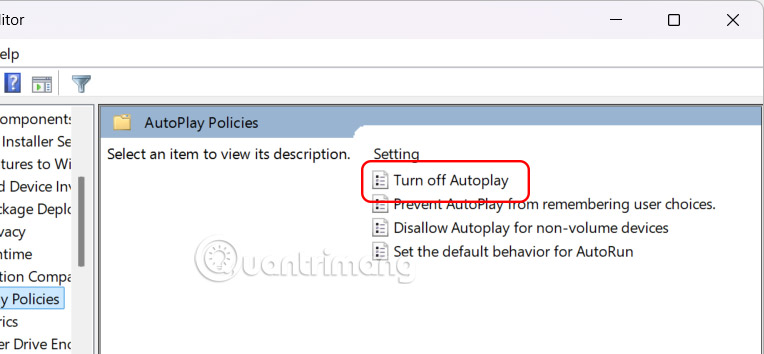
Look to the side and double select the Turn off AutoPlay value .
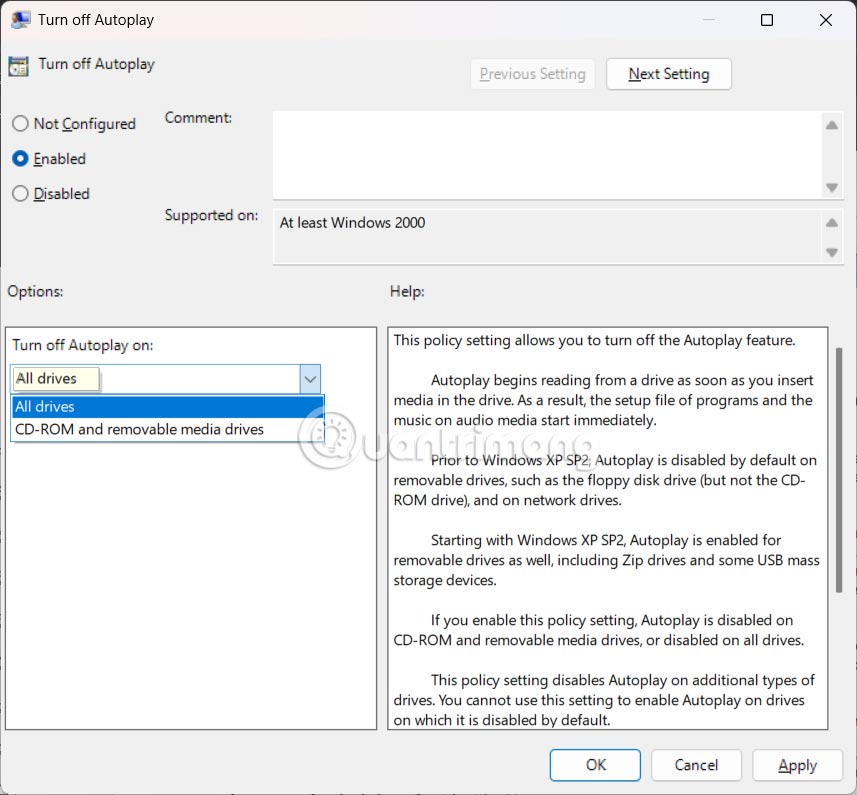
To display the new interface, select Enabled and then click All drives at Turn off AutoPlay on to turn off autoplay on all drives or select CD-ROM and removable media drives to turn off autoplay on these media.
Final Thoughts
Overall, 3 Ways to Enable and Disable Windows 11 AutoPlay is best understood by considering the main facts, practical context, and limitations together. Use the details above as a clear starting point and confirm time-sensitive information when necessary.
FAQ
What does this article explain about 3 Ways to Enable and Disable Windows 11 AutoPlay?
AutoPlay is a useful feature of Windows that automatically executes when you connect external media or devices such as USB drives, memory cards, or DVDs.
What should you know about Enable or disable Windows 11 AutoPlay via Settings?
Open Settings on your computer, then select Bluetooth & devices and then select AutoPlay next to it.
Should time-sensitive details be verified?
Yes. Software features, game codes, product specifications, prices, and research findings can change. Confirm important details with an official or primary source when accuracy affects your decision.
Related Articles
 Turn Off Autoplay in Windows 10, XP3 minutes read
 How to Set up or Turn Off the Autoplay Feature on Windows 115 minutes read
 How to Change Autoplay Settings in Windows 83 minutes read
 Custom Instructions Turn on, Turn Off Autoplay in Windows 106 minutes read
 Summary of Some Simple Ways to Disable USB Ports on Windows6 minutes read
 Instructions to Turn Off Autoplay Video Feature on Facebook5 minutes read
Reader Comments 0
Sign in with email or Google to join the discussion.