Instructions on how to create Labels, mailing labels in Word 2010
Creating Labels in Word 2010 helps you send mass mail easily. This article will guide you how to create mailing labels, using data from different sources such as Excel, ensuring work becomes convenient and effective..
Instructions for creating Labels and mailing labels in Word 2010 help you send mass mail and automatically fill in addresses from different data sources, saving time and effort at work.
Steps to create Label in Word 2010
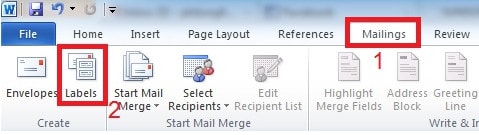
Step 1: Go to the Mailings tab , then select Label .
Step 2: The Envelopes and Labels window appears. If you have typed the address into the Word document, it will appear in the Address section of the Labels tab . You can enter a new address or edit it.
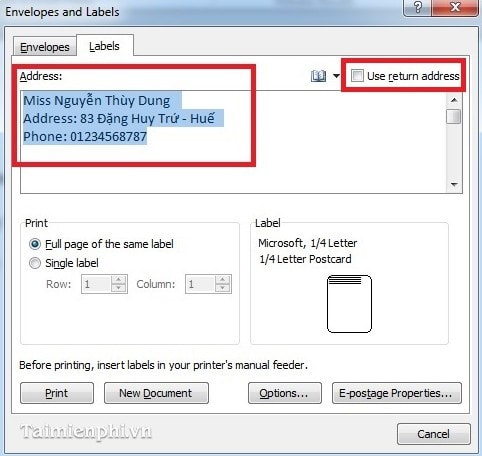
Click on Use return address to have Word save the address information in the corresponding Address box. To see the return address, go to File and select Options.

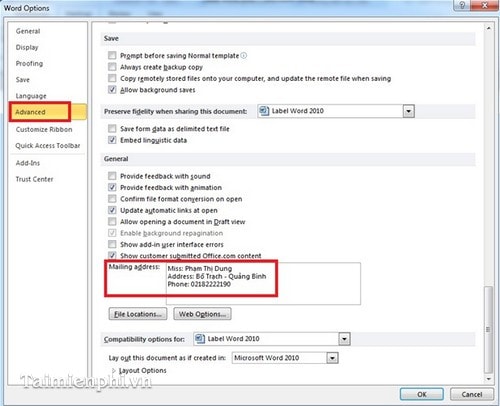
Next, select the Advanced tab and scroll down, stopping at the General section. The result is in the Mailing address section .
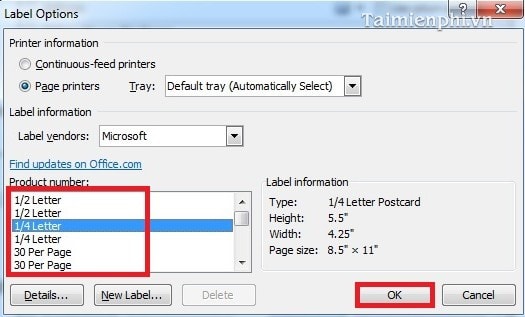
Step 3: Select the Label display style you want in the Envelopes and Labels window by clicking the Options button to display the Label Options window . To see more information for each selected style, click Details .
Step 4: After saving the edited template, click the New Document button in the Envelopes and Labels window as above to see the results.
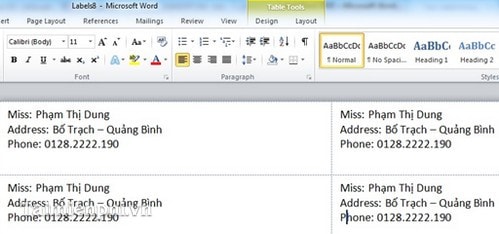
With just the simple steps above, you can easily create mailing labels in Word 2010 to send mass mail quickly. This trick saves time and effort, very useful for your work.
In addition, printing product labels or business cards in Word 2010 also becomes simple thanks to the Label feature. You can refer to more tips for creating effective mailing labels on TipsMake to optimize your workflow.