Instructions for creating Labels and mailing labels on Word 2013 quickly
If you want to automatically create mailing labels from a pre-existing list, the Mail Merge feature in Word 2013 can save you time. This method is especially useful when you need to send mass mailings or print labels.
Table of Contents
Mail Merge helps you create mailing labels quickly by importing data from Excel into Word. Learn the detailed steps to set up and print labels correctly in Word 2013.
Benefits of Creating Mailing Labels Using Mail Merge
- Save time when sending mass mail.
- Ensure accuracy when importing data from Excel.
- Easily edit and format labels as desired.
Steps to create Label in Word 2013
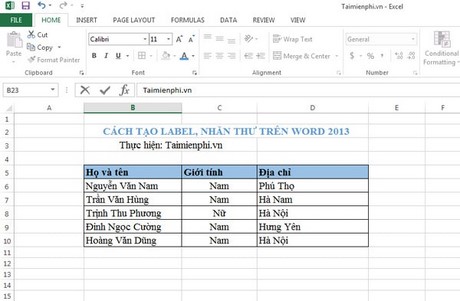
Step 1: Create an Excel data file containing the information to be entered into the mailing label, for example as shown below.
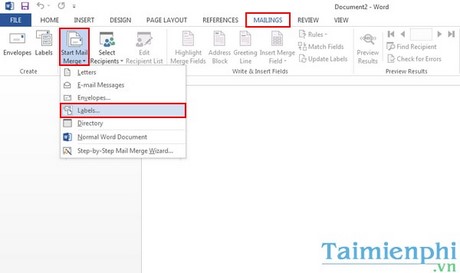
Step 2: Open a new Word file, select Mailings > Start Mail Merge > Labels …
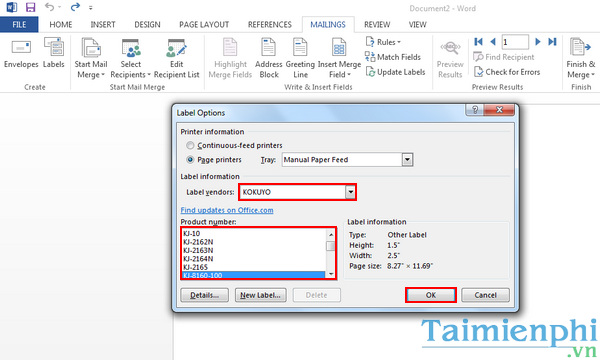
Step 3: The Label Option dialog box appears . Depending on your work purpose, you can select the table according to the available items in Label vendors and Product number , then click OK .
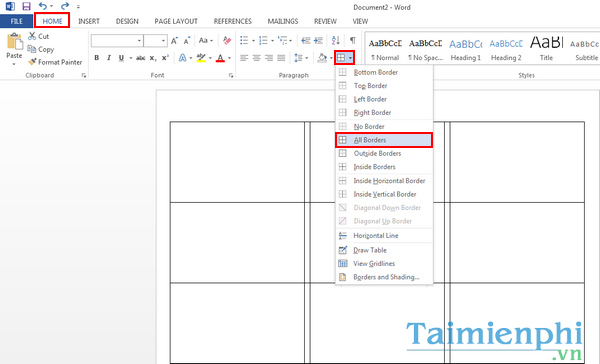
Step 4: Highlight the entire table by pressing Ctrl + A and select the Home tab > Borders > All Borders to create a frame for the mailing label as shown below.
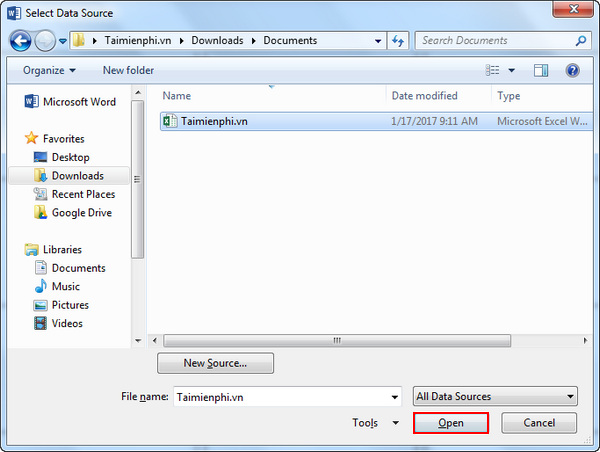
Step 5: Next, select Mailings > Select Recipients > User an Existing List …

In the dialog box, point to the newly created Excel data file and click Open .
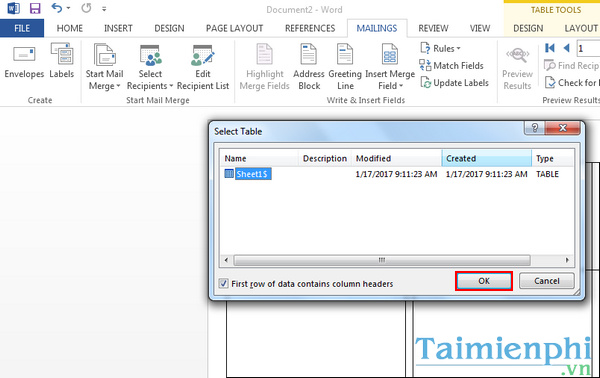
The Select Table dialog box appears , click OK to confirm.
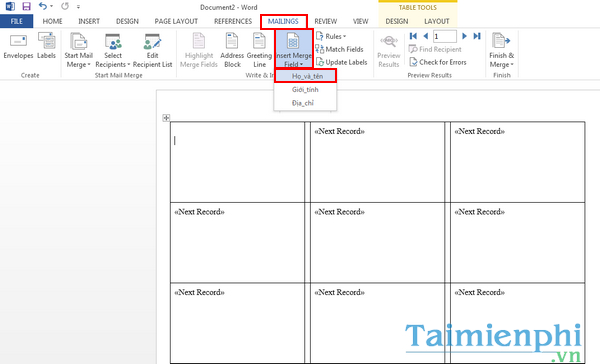
Step 6: Click on the first white box, select Mailings > Insert Merger Filed > Full_name > Enter to go to the next line and continue to select the Gender and Address fields.
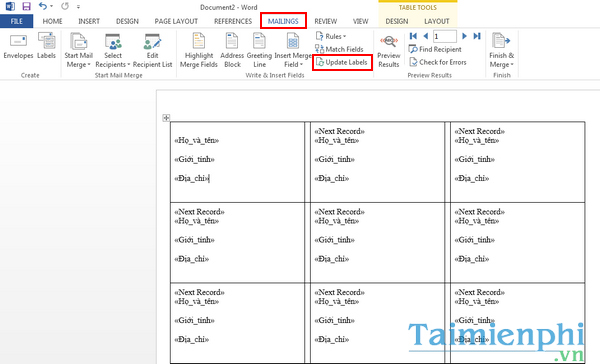
Step 7: From Mailings , select Update Labels to update information on the remaining labels.
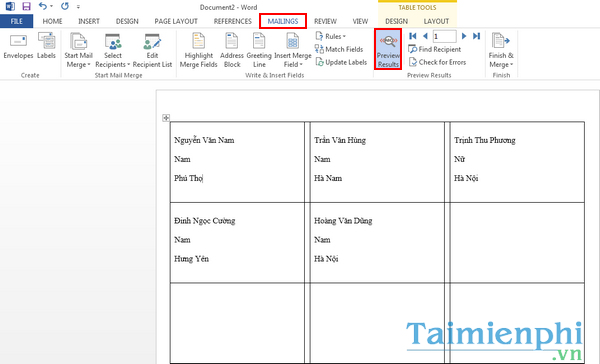
Step 8: Select Preview Results to display the results.
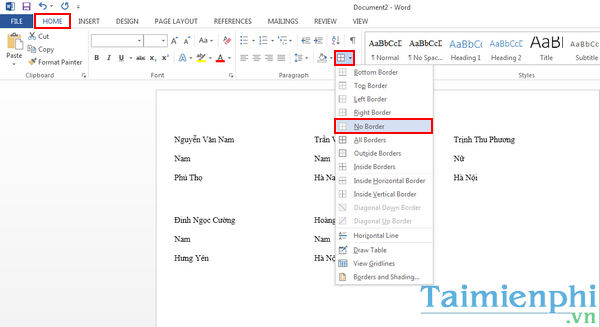
Step 9: Now you highlight everything by pressing Ctrl + A and then select Home > Borders > No Borders to remove the frame for the label.
With the instructions on how to create Labels in Word 2013 that Free Download introduced above, hopefully you can easily apply it to your work. Depending on your needs, you can customize the font, font size or color to make the mail label look more professional and suitable.
In addition, if you are interested in creating labels for learning, you can refer to the instructions on how to make labels for students and teachers on Word . The list of beautiful and cute label templates will also help you have more suitable options for the new school year.
Was this article helpful?
Your feedback helps us improve.
Related Articles
 Instructions on how to create Labels, mailing labels in Word 20102 minutes read
 How to create labels, mailing labels in Word 2007 simply2 minutes read
 MS Access 2003 - Lesson 33: Creating Mailing Labels (mailing labels)9 minutes read
 How to Create Labels in Microsoft Word6 minutes read
 Customize bulk messages in Gmail3 minutes read
 How to make your own baby stickers on Microsoft Word4 minutes read
Reader Comments 0
Sign in with email or Google to join the discussion.