Instructions for installing Windows 8 on Mac computers
News about Windows 8 is getting more and more and the interface is quite new to make many people want to see and use it with their own eyes, and to meet that, Microsoft released the final test version of Windows 8 as Release Preview lets developers and users fully experience the new version of Windows.
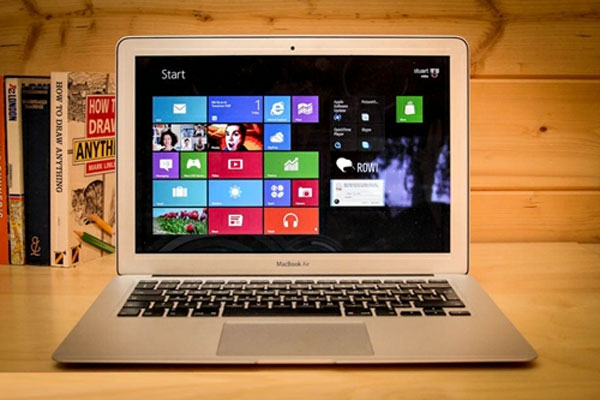
If you own a Mac computer and are using OS X operating system then you probably want to try Windows 8 'once to say ' right on your 'fastidious' Mac.
This article will guide you step by step how to install Windows 8 in parallel with your OS X operating system on your Mac. Please pay attention to follow up.
Step 1: Download the ISO file of Windows 8 Release Preview

Please download the file IOS version of Windows 8 Release Preview recently released by Microsoft. There are 2 versions to choose from: 32bit and 64bit download . If you want to save disk space and trouble installing software, we recommend using Windows 8 Release Preview 32bit. After downloading, proceed to save this file at a certain storage location on OS X.
Step 2: Use Boot Camp Assistant to create Windows 8 installation partition on Mac
With installing and using Windows in parallel with OS X on a Mac, you must use the Boot Camp application to be able to set up the system partition for installing Windows into it, in addition to being able to move. back and forth between the two operating systems at the boot screen. And especially used to create USB install Windows. (Be prepared to have 1 USB with 8GB or more capacity).
Next you plug the USB into the device and open up Boot Camp application (can easily be found in the Utilities folder or use the shortcut Cmd + shift + U to activate), then follow the instructions. to use. At the Select Tasks screen, check all the options.

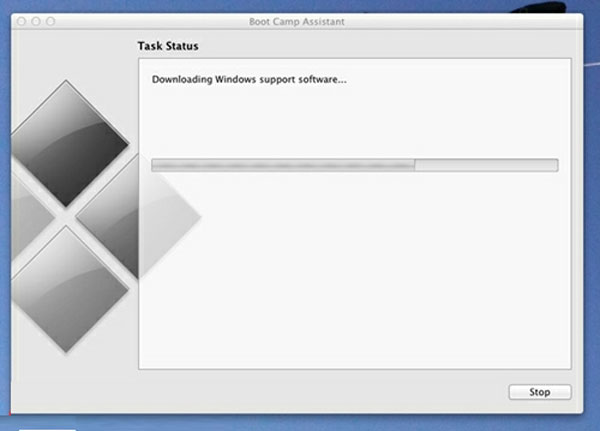
Boot Camp will turn your USB device into a bootable system drive, this process will automatically download the latest Windows support applications from Apple so that the use of Windows operating system is guaranteed. fully protect on a Mac.
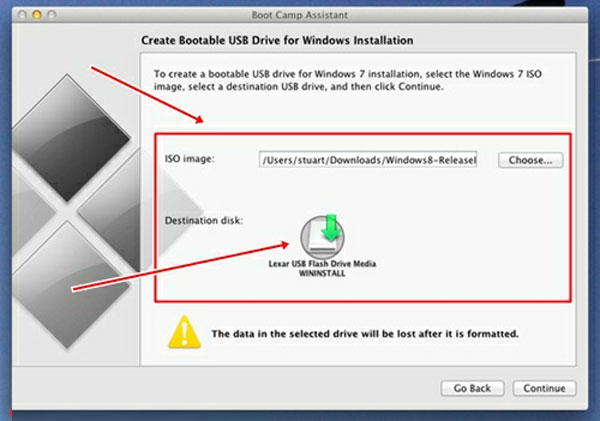
At the next setting interface, you will set the selection of the downloaded Windows 8 ISO file path and the USB device used to create the installer. After setting up, press Continue to start importing ISO files to USB, this process may take up to 5 minutes or longer depending on the system configuration.
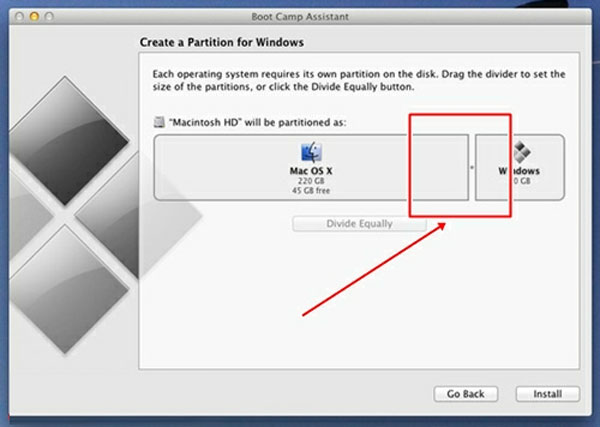
After the process is finished, you will be moved to the next setup screen. Here you will customize the drive space containing the Windows operating system. We recommend adjusting the capacity to about 30GB, with this capacity you are quite comfortable with for using, installing applications and updating Windows. After installation is complete, click Install to begin the installation of Windows 8 on Mac via USB.
Step 3: Install Windows 8
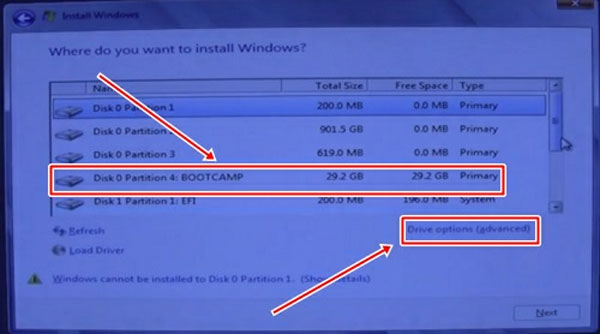
The Mac will reboot and the Windows 8 USB installation will begin. At the installation screen you proceed to select the language, enter the Installation license TK8TP-9JN6P-7X7WW RFFTV-B7QPF provided by Microsoft and proceed to select the installation partition you created and set up in step 2. The Windows installation partition will have the default name of BOOTCAMP , please proceed to format (format) this partition by clicking the Drive options (advanced) command, select Next Format and click OK after the specified process ending form.
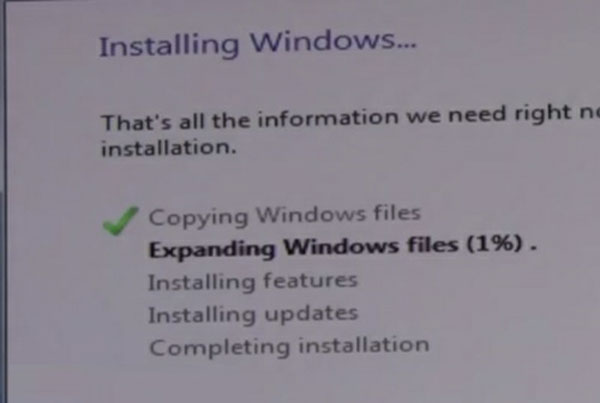
The installation process is fast or slow depending on the USB read speed of your hard drive.
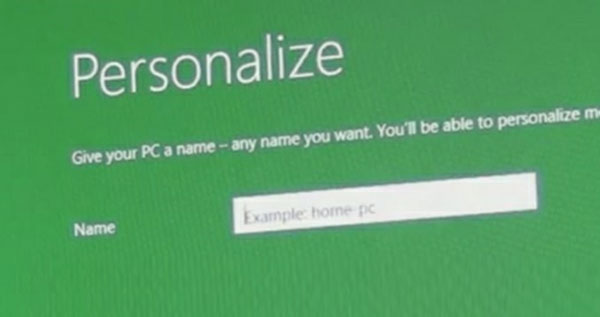
After the installation process has finished, proceed to name your computer and use Hotmail account to log in or create yourself a Microsoft account (requires a network connection) to be able to use Windows 8.
To help the system be compatible with Windows 8, install the missing components of the system by accessing the WindowsSupport folder in the installed USB drive (press Cmd + E and select the USB drive from the list drives) and run the Setup file to install support drivers based on the device's hardware.
Step 4: Move back and forth between Windows 8 and OS X
So the installation of Windows 8 on Mac has ended. You can freely ' Windows ' your Windows operating system right on your Mac.
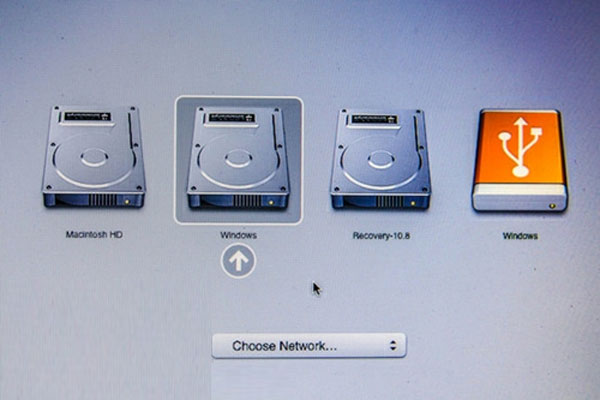
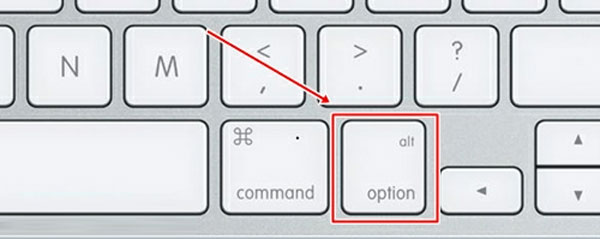
When rebooting the machine, if you want to move back and forth between Windows 8 and OS X, press the Option key (right of the Cmd key) right in the boot screen.
Good luck.