Instructions for creating stickers using ChatGPT
Users can combine the sticker creation feature available on some high-end phones to create their own stickers on ChatGPT, from images uploaded by users..
Users can combine the sticker creation feature available on some high-end phones to create their own stickers on ChatGPT, from images uploaded by users. We can create many different types of stickers through the expressions you want ChatGPT to create stickers. Below are instructions for creating stickers using ChatGPT.
How to create stickers using ChatGPT
Step 1:
At the ChatGPT application interface, users click on the plus icon and upload your personal photo . Then you fill in the content to create the sticker as shown below. Write clearly the emotions you want the sticker to be created with and then click send.
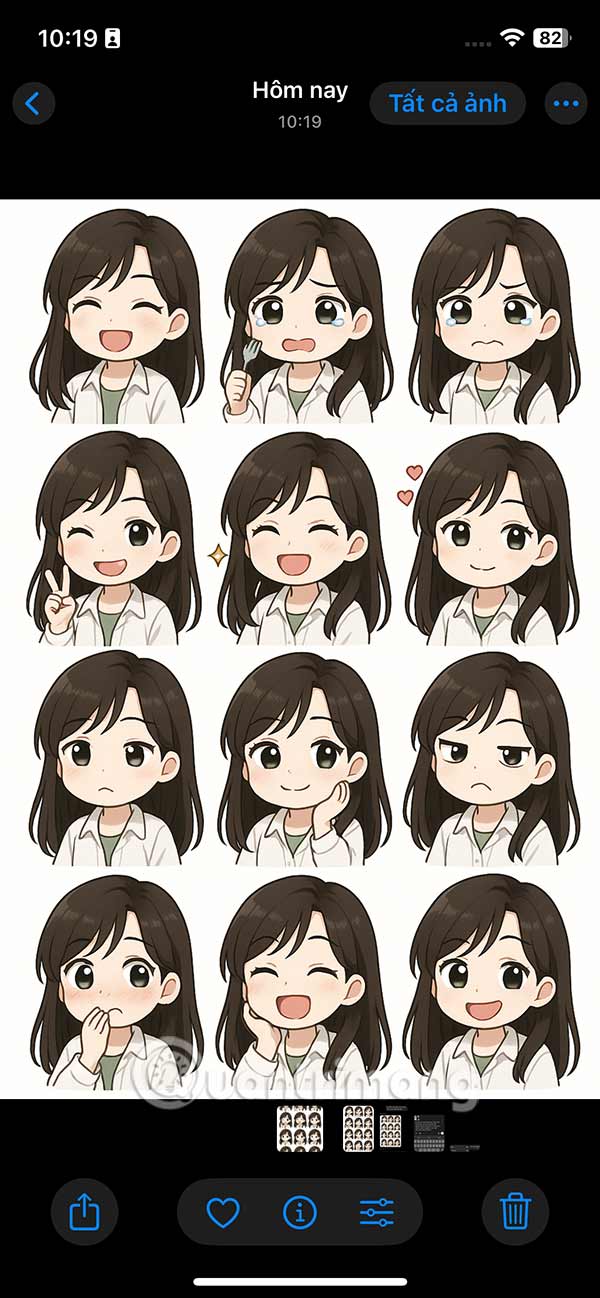
Convert photos into a set of 16 chibi stickers. Costumes and hair as shown in the picture. White background sticker set, including smiling, eating, crying, angry, happy, cheerful, sleepy, and humorous expressions.


Step 2:
As a result, you get 16 sticker images created on ChatGPT as shown below. Click on the image and then click Save to download this chibi image.


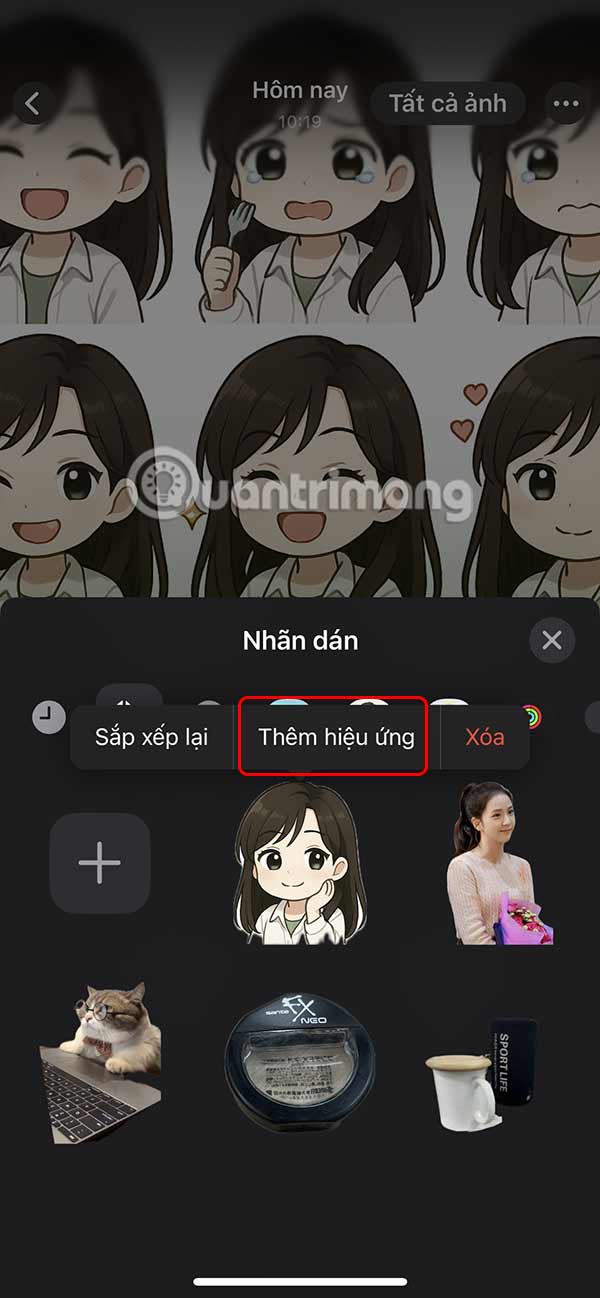
Step 3:
You open the iPhone with sticker creation mode , or use some high-end Samsung phones to save stickers from photos. You zoom in on the photo, then press and hold on the sticker you want to save and select Add sticker .
If you are using a Samsung phone, press and hold the sticker and select Save as sticker to download it. Then in the Samsung phone keyboard interface, tap the emoji icon and open the library icon. Here, you will find all the stickers created by ChatGPT.

Step 4:
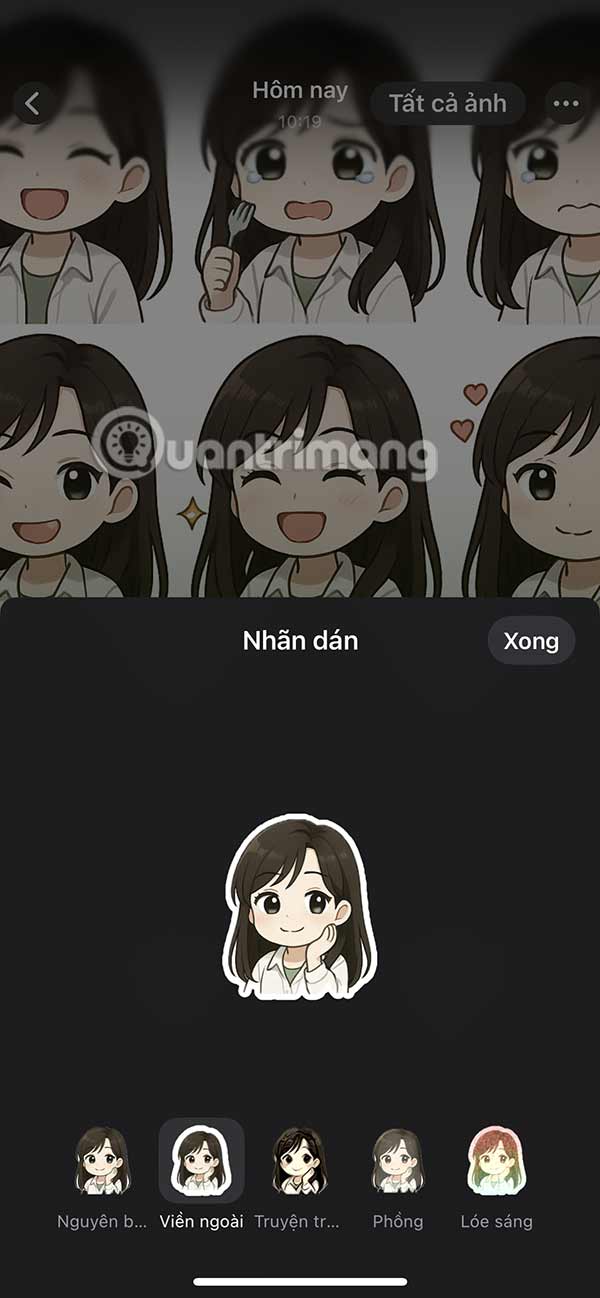
In general, if you use the mode to create stickers from photos on iPhone, there are still small errors. You can fix it by adding borders to the stickers as shown below.
Step 5:
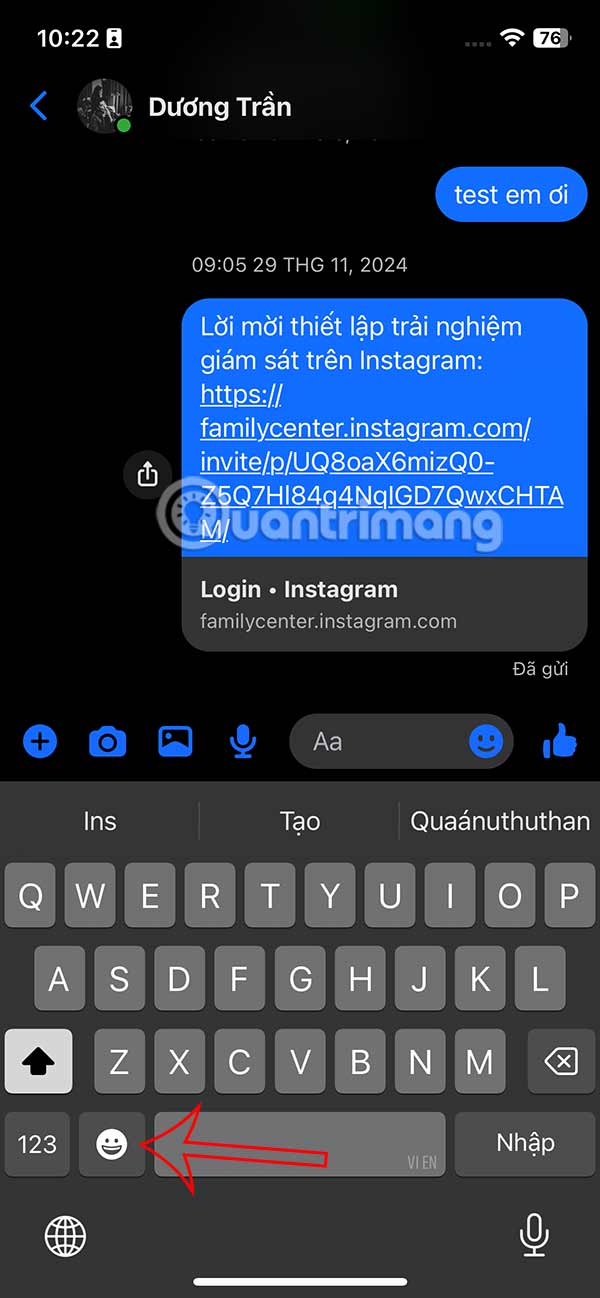
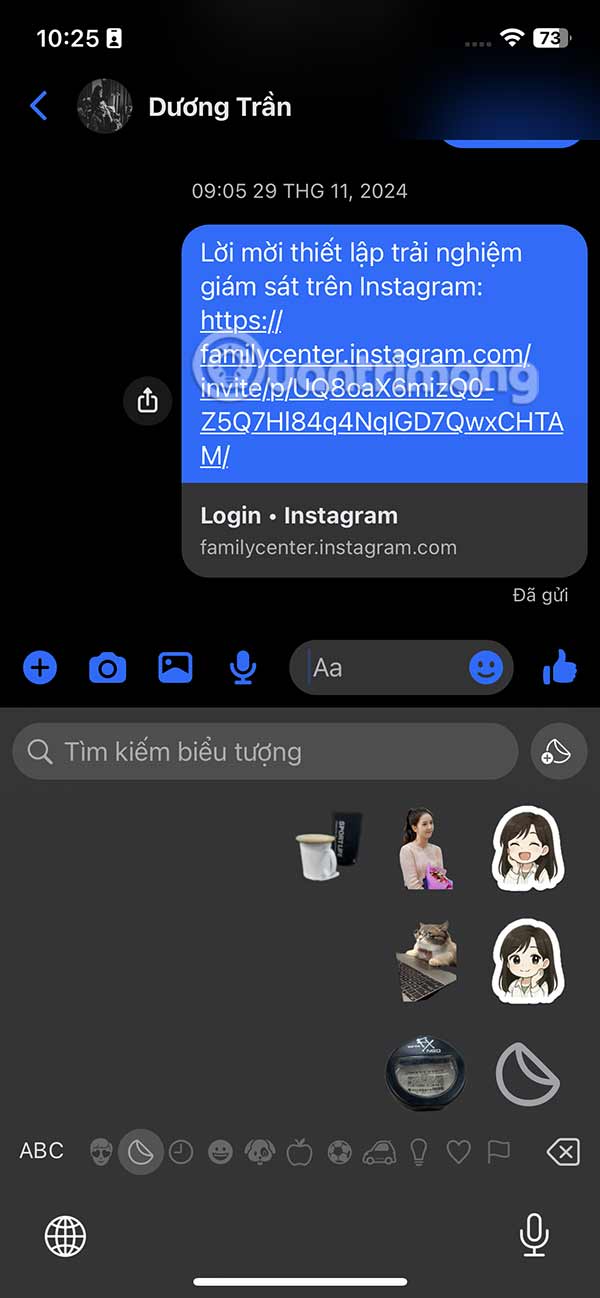
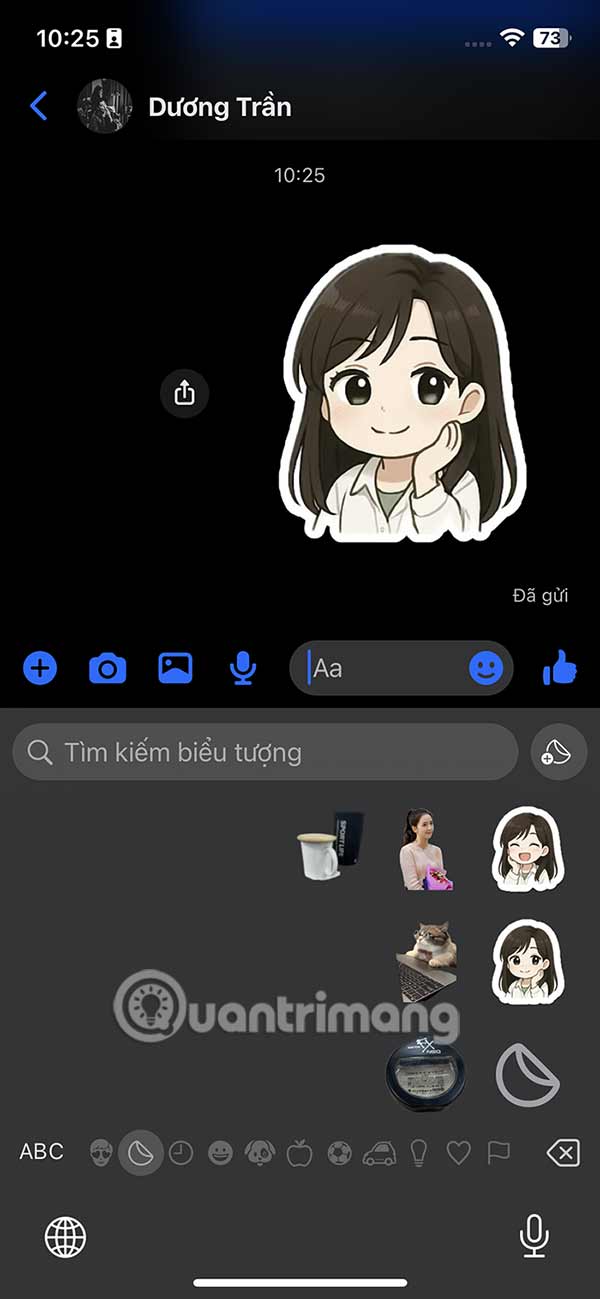
You open the chat application as usual and then click on the smiley icon to open the keyboard interface. Then the user will see the sticker created on ChatGPT that he has saved. Now you click to send the sticker as usual.