Instructions for creating stickers from photos on Messenger
The new Messenger has an option to create stickers from photos so you can choose any photo you like to create stickers..
The new Messenger has an option to create stickers from photos so you can choose any photo you like to create a sticker. After you select a photo and upload it, the Messenger app automatically removes the background and unnecessary details, leaving only the subject in the photo. And stickers created from photos on Messenger also have the option to add stickers or draw on the photo. Here are instructions for creating stickers from photos on Messenger.
How to create stickers from photos on Messenger
Step 1:
At the interface on the Messenger application, you click on the icon in the chat box. Next, display the icons below, we will click on the sticker icon to access the sticker on the application.


Step 2:
Now you will click on the pen icon to switch to the mode of creating stickers from photos on Messenger. Click on the photo you want to create a sticker , then you will see the sticker making interface as shown below. Now Messenger automatically selects the subject . You can click to deselect or select more subjects, then click Next to perform.


Step 3:
Messenger offers two options for stickers, borderless stickers and white border stickers . By default, there will only be a white border in the sticker and it cannot be changed.

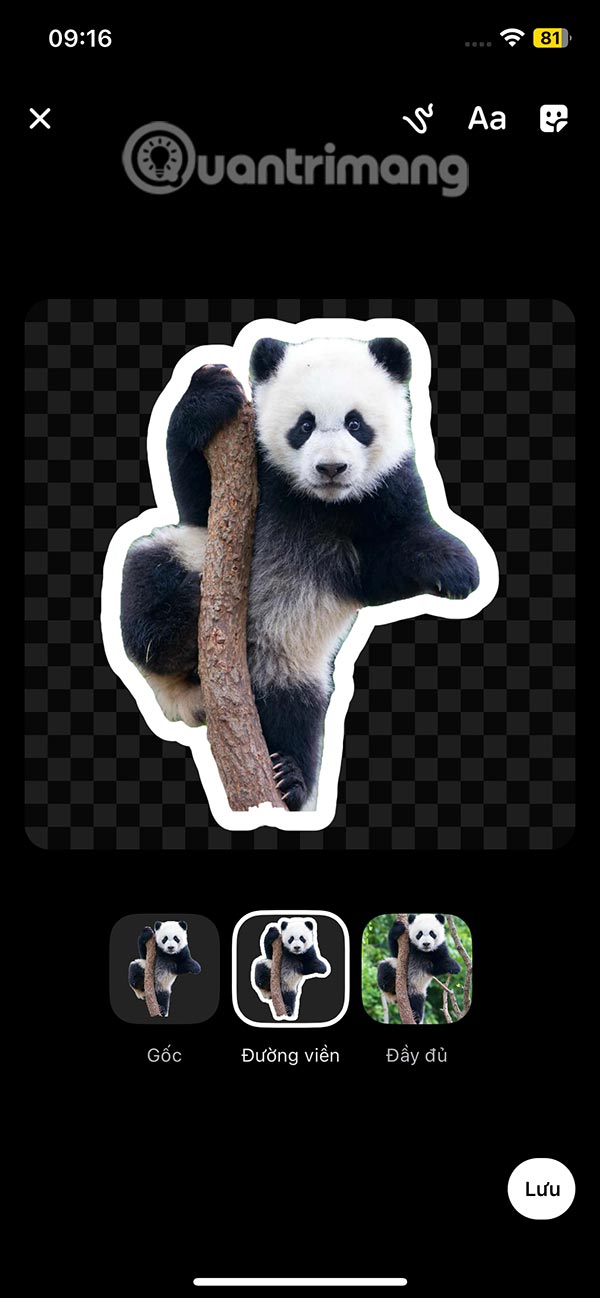
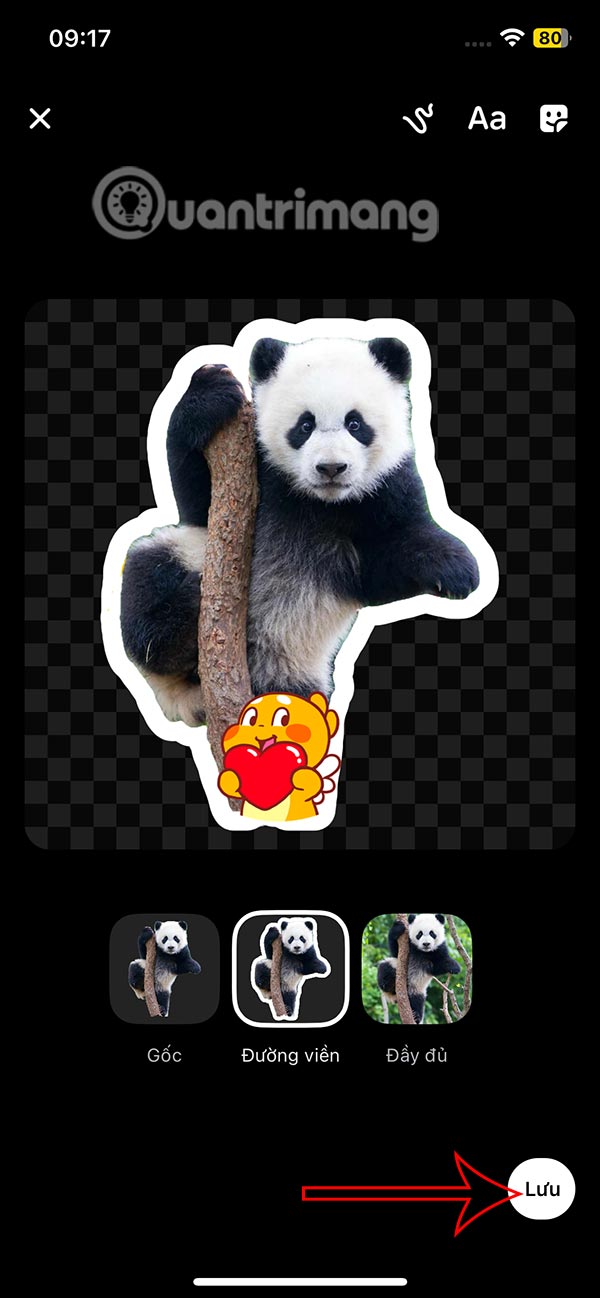
If you want you can add stickers to the sticker, then press Save to save it .
Step 4:
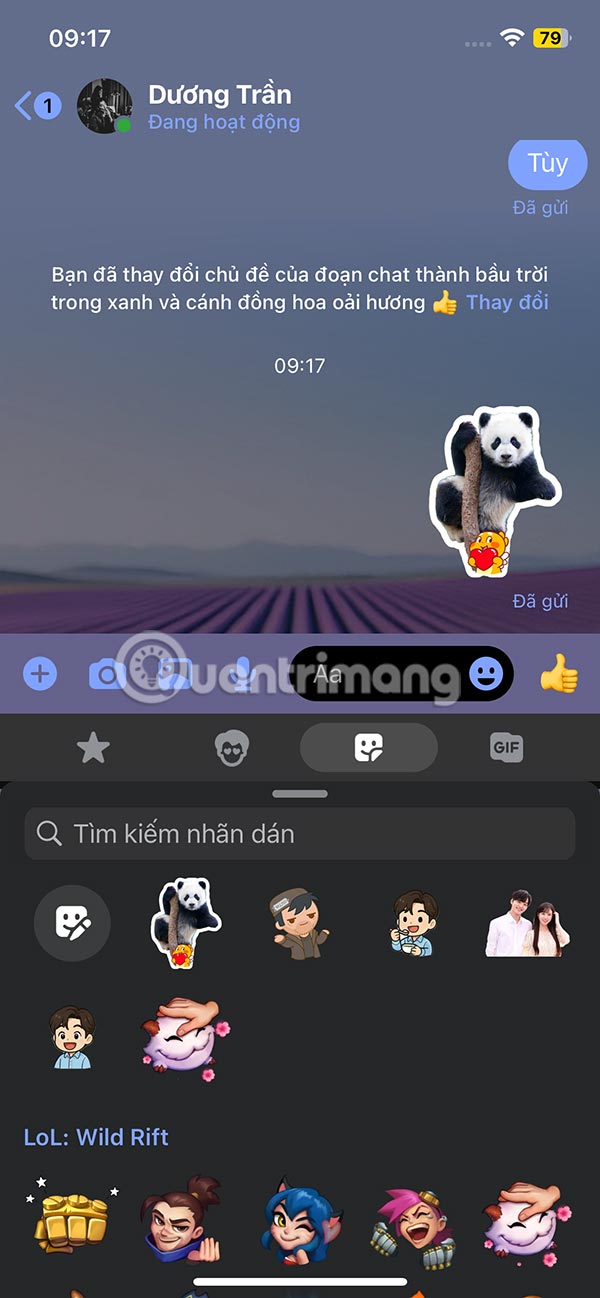
Finally, return to the Messenger interface, click on the newly created sticker and send as usual.