Instructions on creating an automatically updating timeline in Google Sheets
If you have a timetable and want to switch to a timeline that automatically updates when the date changes in Google Sheets, it's very simple.
Table of Contents
If you have a timetable and want to switch to an automatically updating timeline in Google Sheets when the date changes, it's very simple. This makes the timetable look more professional and visually appealing, instead of just basic date and time text. Below is a guide on how to create an automatically updating timeline in Google Sheets.
How to create an automatically updating timeline in Google Sheets
Step 1:
First, you need to prepare a data table with the execution time, start and end times, and the name of the task. Then, add columns for Task Status and detailed task descriptions.

Step 2:
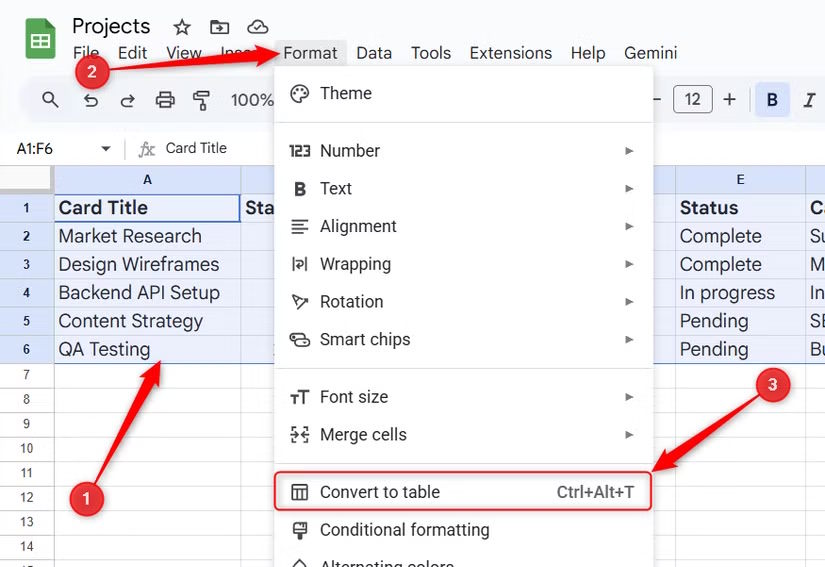
Next, you need to convert the data into a table . Select the entire dataset, including the headers, then click the Format tab, and click Convert to Table .
Step 3:
We select any cell in the data table, then click the Insert tab , and then select Timeline .
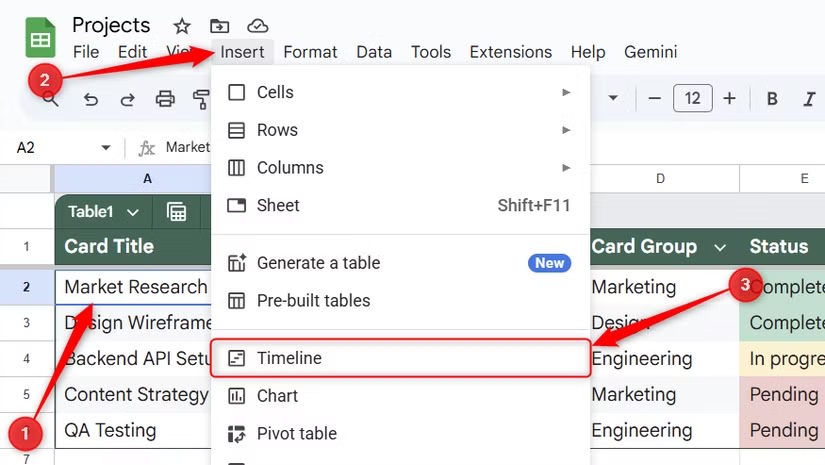
A selection area will then appear in Google Sheets to create an automatically updating timeline; click OK to proceed with creating the timeline chart.
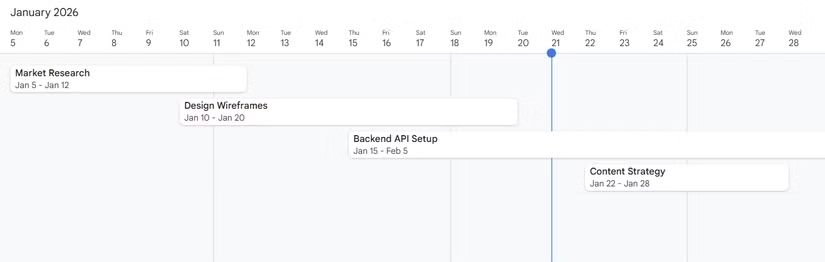
As a result, we get a timeline that automatically updates over time, as shown below.

Step 4:
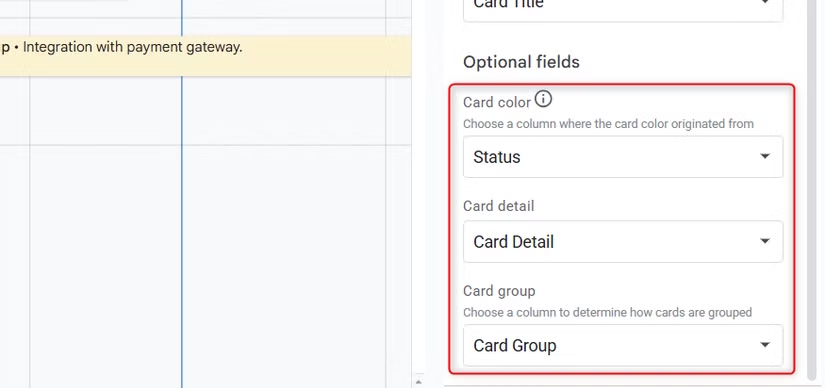
When you click on the Timeline chart, customization options will appear on the side. We can change the content color for each area.
Was this article helpful?
Your feedback helps us improve.
Related Articles
 Instructions for creating a Client ID and Client Secret in Google Sheets6 minutes read
 Create complex formulas3 minutes read
 Instructions on using Gemini to create images in Sheets3 minutes read
 How to enter 0 in Google Sheets3 minutes read
 How to view editing history on Google Sheets3 minutes read
 Guide to creating AI Sheets spreadsheets in Genspark6 minutes read
Reader Comments 0
Sign in with email or Google to join the discussion.