Table of Contents
The process for use screen recorder plus to record and record videos on is straightforward once you know where to find the right controls. The steps below explain what to do and what to check.
Screen recording software, or recording software, are varied for users to choose from. You can choose Camtasia to record screen video, Bandicam Screen or record screen video using VLC Media Player. For recording, you can choose Audacity, Adobe Audition or use the Sound Recorder recorder available on your computer.
And if you do not want to install the app, you can use Screen Recorder Plus, UWP application on Windows 10. This application allows video recording screen and recording with popular formats today. the app's user interface is very simple, not much customizable like other software. Current Note Screen Recorder Plus is being downloaded for free in a short time. Quickly download to experience the app.
- How to use TinyTake to capture screen video
- Ways to take screen shots of Windows 10
- Instructions for filming the screen with CyberLink Youcam
Instructions for recording videos, recording with Screen Recorder Plus
Step 1:
Users click the link below to install the Screen Recorder Plus application on the computer.
- Download the Screen Recorder Plus app
Step 2:
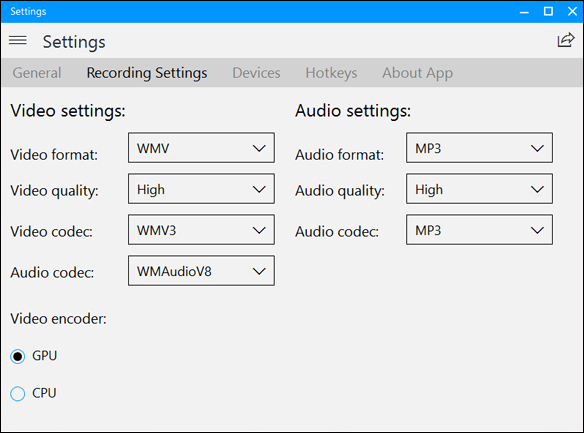
At the main interface of the app, click The 3 dashes icon And select Settings> Recording Settings To customize the recording and video recording.

Step 3:
In the setting interface Recording Settings Select video quality, format for output video,. at Video settings . With Audio settings Also choose quality, save format for audio files after recording.
Step 4:
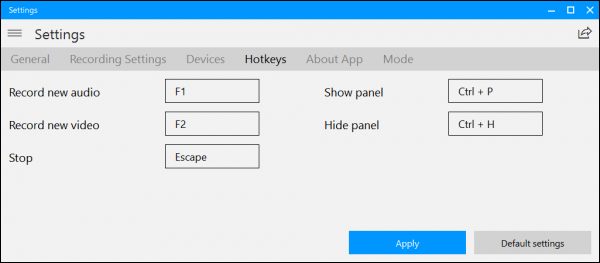
Besides, the app also supports shortcuts during recording and video recording screen. Clicking on The Hotkeys item Will see shortcuts. Finally click Apply To save the changes if any.
Step 5:
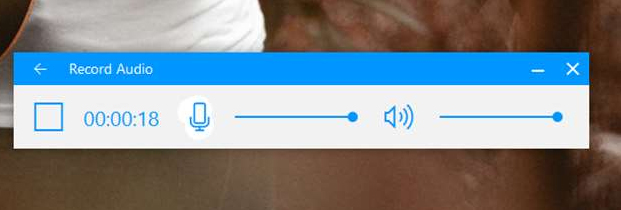
Go back to the main interface of the app and click Record Audio To start recording. the app will record the sounds on the computer including the sound from the microphone.
If you do not want to record audio from the microphone, click the mic icon to turn it off, or adjust the volume to 0. Press The round button to record . After the tone is finished press the square to stop and choose where to save the audio file.
Step 6:
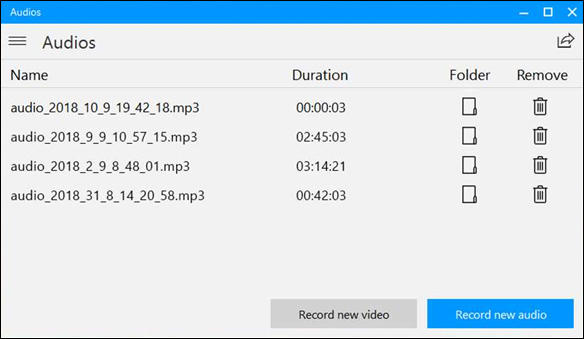
After saving the recorded audio management interface, it displays. You will know the duration of each recording, file storage folder and trash icon to delete the file.
Step 7:
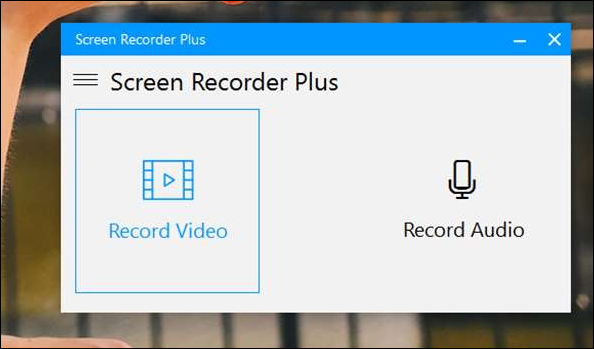
Go back to the main interface of the app and Press Record video To make a video recording of the screen.
Step 8:
The app will record full screen. when needed to Adjust the recording size, Click Fullscreen to select the recording frame size like 1280 x 720, 1920 x 1080, Custom. If you click Custom, enter the size into 2 cells.
Press the round button to record the video screen on the computer.

Step 9:
When the video is saved, the video management interface appears. The interface is similar to the audio management interface.
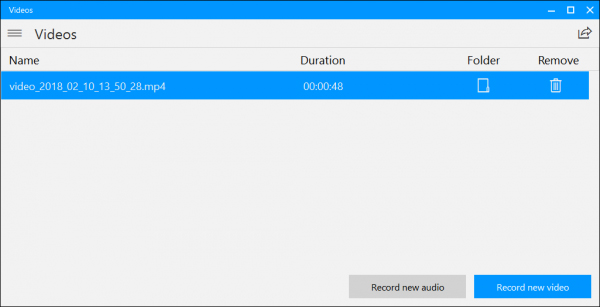
Screen Recorder Plus does not have many options when recording as well as recording. The settings are at a basic level such as selecting video and audio formats, selecting frames when recording or selecting microphone recording.
- Top 6 quality Android phone screen video recording applications
- How to rotate the screen with iOS 11 audio microphone
- How to turn off automatic screen rotation in Windows 10
I wish you all success!
FAQ
What should I prepare before I use screen recorder plus to record and record videos on?
Review the requirements in the guide, confirm that your device or software is compatible, and save important work before changing settings related to use screen recorder plus to record and record videos on.
Why might use screen recorder plus to record and record videos on not work as expected?
The most common causes are incompatible versions, missing permissions, incorrect settings, or an interrupted internet connection. Recheck each step and restart the app or device when appropriate.
Can beginners follow these use screen recorder plus to record and record videos on steps?
Yes. Follow the steps in order, avoid skipping confirmation screens, and compare your interface with the screenshots because labels may differ slightly between versions.
Related Articles
 Screen Recorder Online Using Recordcast5 minutes read
 Guide to Recording Android Screen Videos with AZ Screen Recorder7 minutes read
 Fluent Screen Recorder: Explained7 minutes read
 The Best Free Screen Recorder in 2021 - Iobit Screen11 minutes read
 Steps to Record Screen Video on Mac5 minutes read
 Instructions for Recording Secret Videos When Turning Off the10 minutes read
Reader Comments 0
Sign in with email or Google to join the discussion.