Table of Contents
This updated guide examines How to Use Any Sound Recorder to Record on Windows 10 and organizes the essential facts, background, and practical takeaways in clear American English.
- Recording software on the computer
- How to record using Audacity on a computer
- How to use Screen Recorder Plus to record and record videos on Windows 10
- The best recording app for Android
Recording instructions on Any Sound Recorder
Step 1:
Users click on the link below to install the Any Sound Recorder application on Windows 10.
- Download the Any Sound Recorder application

Step 2:
After installation is complete, we start the application. At the Any Sound Recorder interface, users need to reset the recording mode. At Select recording source you select the source to record from:
- Sound coming from your device: Record audio from your device.
- Microphone: Record audio from a microphone.
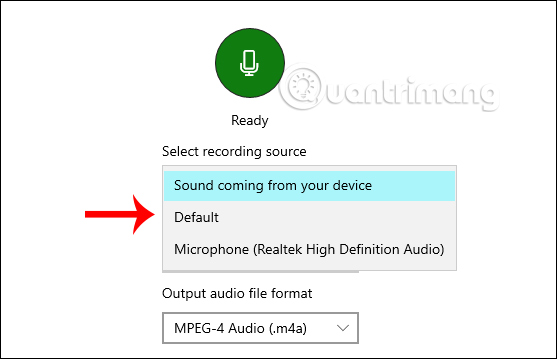
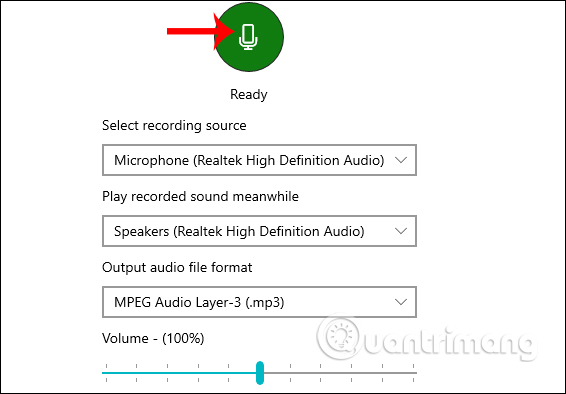
- Play recorded sound meanwhile: if you choose a microphone source, choose Speakers.
- Audio output file format: select the save format for audio recording.
- Volume: customize audio volume level.
Once set, click the Ready button to proceed with the recording.
Step 3:
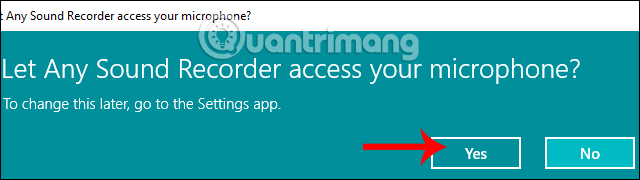
Then we need to agree to the application to use the microphone on the device , press OK.
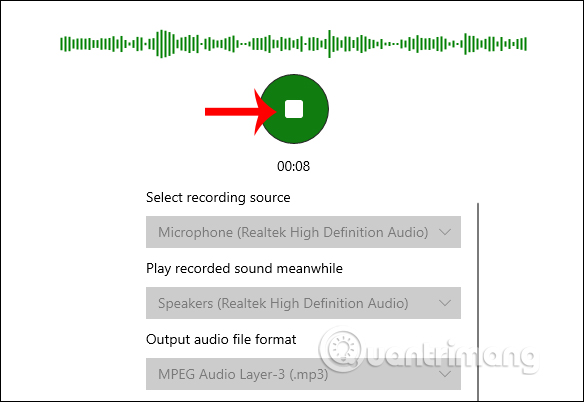
The audio recording process takes place immediately afterwards. Audio recording time displayed on the screen. To stop recording, click on the Stop icon .
Step 4:
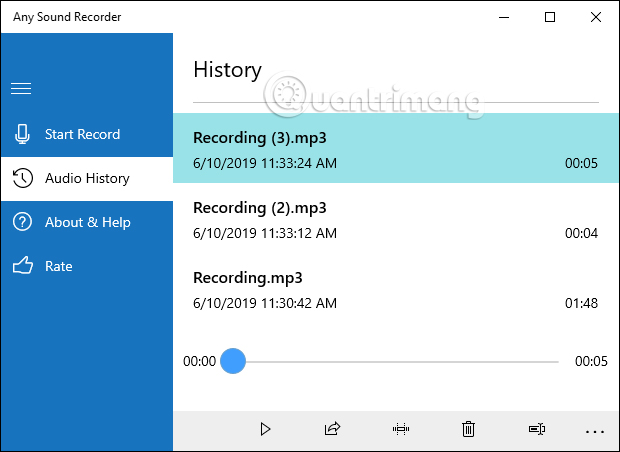
Users are immediately transferred to the Audio History interface to review all recorded audio tracks. Sound clips are recorded in detail about the recording date, recording time. To continue recording, click on Start Record.
Step 5:
In this interface we listen to the audio file again to adjust it if desired. Below are the tools used to edit audio files.
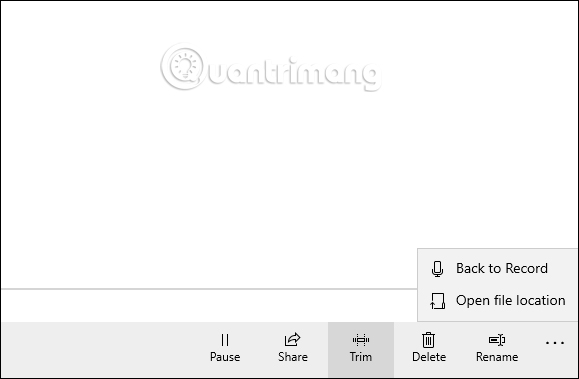
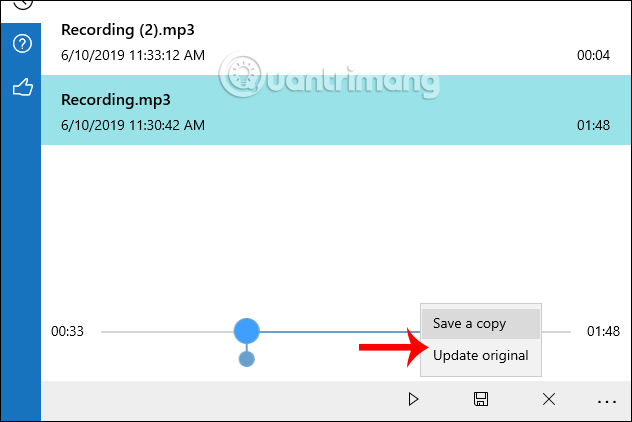
If you want to cut the sound , click on the Trim tool, then select the audio track you want, by moving the 2 ends of the circle, then click Save below to save it. We have 2 options: save under copy (Save a copy) or overwrite the original file.
If saved as a copy, a new recording file is created.
Step 6:
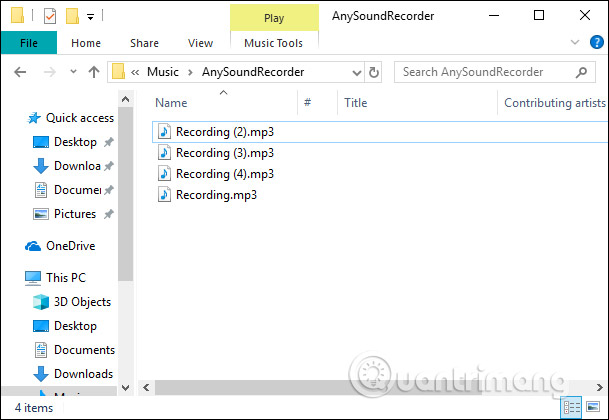
The recorded audio files will automatically save to the Music> AnySoundRecorder folder .
Any Sound Recorder has a very simple usage that is not too complicated. The audio recording on the application has additional retouching as you like.
I wish you all success!
FAQ
What is How to Use Any Sound Recorder to Record on Windows 10 about?
It provides a structured overview of Any Sound Recorder, explains the main context, and highlights practical takeaways for readers.
Why does this topic matter?
Understanding the main concepts helps readers evaluate the issue, avoid common mistakes, and make better-informed decisions.
How should readers use this information?
Use the guidance as a practical starting point, confirm details that may have changed, and follow current product, safety, or security recommendations.
Related Articles
 Instructions for Recording Using the Sound Recorder Software Are Available3 minutes read
 Screen Recorder Online Using Recordcast5 minutes read
 Why Is the Voice in the Recorder Different from the Real Voice3 minutes read
 How to Record Audio Files in Windows 105 minutes read
 How to Record Windows 11 Screen with Sound (AutoRecovered)5 minutes read
 How to Access and Use the Voice Recorder Application in3 minutes read
Reader Comments 0
Sign in with email or Google to join the discussion.