Table of Contents
Understanding Flickr requires more than a headline. The overview below breaks down the key facts, changes, and user impact.
Flickr Overview
Step 1: Access the Flickr homepage and click on the Upload icon in the upper right corner

Step 2: Click Choose photos and videos then find the folder containing the photos to upload

Step 3: You can customize these photos before uploading to Flickr, such as adding descriptions or limiting viewing rights ( only for yourself, family, friends or everyone ).

Step 4: Click the Upload photos button in the upper right corner to upload photos

Step 5: In the dialog that appears, click Next Upload

Step 6: After uploading photos, copy the code at the end of the address bar as below

Step 7: Access the Argote Flickr homepage and paste the above code (note this is your Flickr account ID, you can still use this code next time). Then press Find my Photos
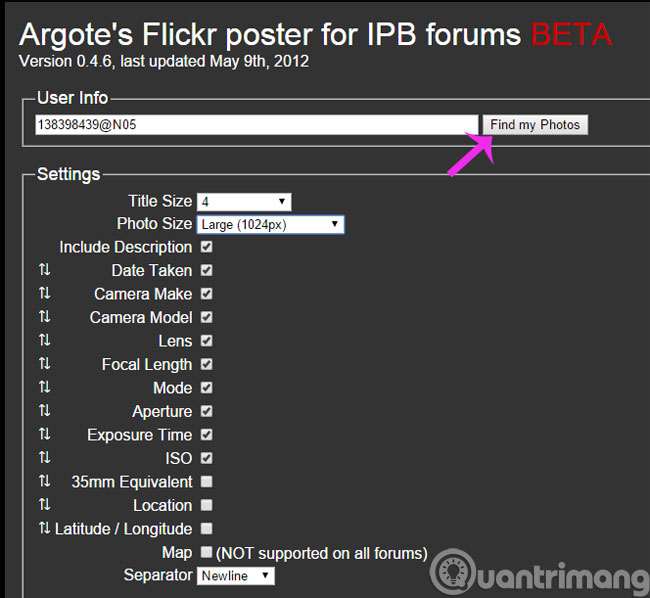
Step 8: The photos you have uploaded will be listed (the most recent photos will be at the top ), now copy the link between the tag [img] [/ img]
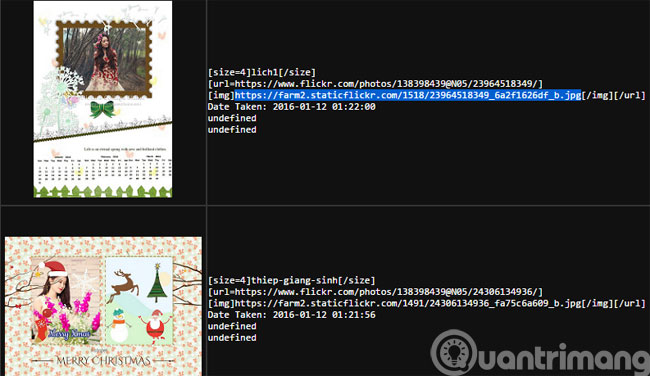
Then, insert this link into the Blog, the forum is done. For other photos, you do the same.
- Notes when choosing online photo backup service
- Instructions for registering a Flickr account
- Compare 4 free online photo hosting services
Good luck!
In the previous article, TipsMake. Com guided you how to register a Flickr account. Today, we will share with you how to upload photos to this famous hosting service as well as how to insert photos from it into blogs, forums we want. Please consult.
FAQ
How does Flickr work?
Understanding Flickr requires more than a headline.
What should you prepare before using this method?
The overview below breaks down the key facts, changes, and user impact.
What should you do if the process does not work as expected?
Flickr Overview Step 1: Access the Flickr homepage and click on the Upload icon in the upper right corner Step 2: Click Choose photos and videos then find the folder containing the photos to upload Step 3: You can customize these photos before uploading to.
Related Articles
 How to Download All Photos on Flickr: Upload Photos on Flickr4 minutes read
 Flickr Extends the Time for Deleting Photos of Free Accounts3 minutes read
 Flickr Limits Users to Only 1,000 Photos/videos4 minutes read
 Flickr Is Notorious for Selling Users' Photos4 minutes read
 Instructions for Fixing Errors Do Not Download Photos from iPhone4 minutes read
 Flickr, Extension Helps You Get a Beautiful and Unique Picture Every2 minutes read
Reader Comments 0
Sign in with email or Google to join the discussion.