Table of Contents
This updated guide examines How to Stitch Photos in Perspective in Photoshop and organizes the essential facts, background, and practical takeaways in clear American English.
How to stitch photos using Vanishing Point in Photoshop
Step 1:
We open the perspective image and the file to be stitched in Photoshop. In the perspective image we click the Create a New Layer icon to create a new layer as shown below.
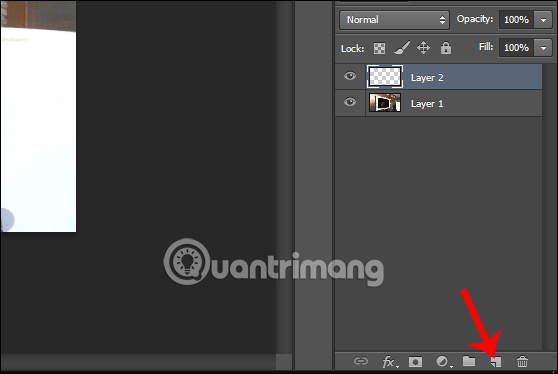
Step 2:
Click on the image to pair then press Ctrl + A and then press Ctrl + C to copy the image. Back to the perspective image , click Filter> Vanishing Point , or press Alt + Ctrl + V.
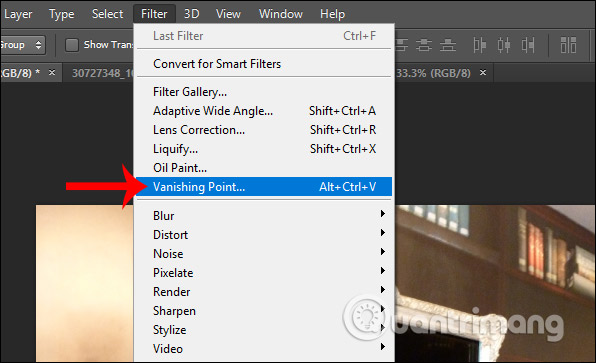
Step 3:
Now display the dialog interface, we click on the Create Plane Tool as shown below.
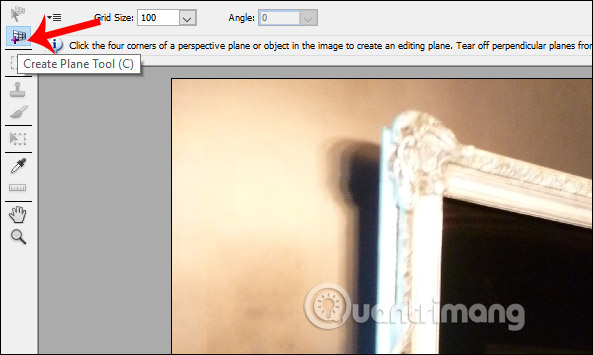
Step 4:
Next we press Ctrl key and then click on the four corners of the canvas as shown below to create the grid area.
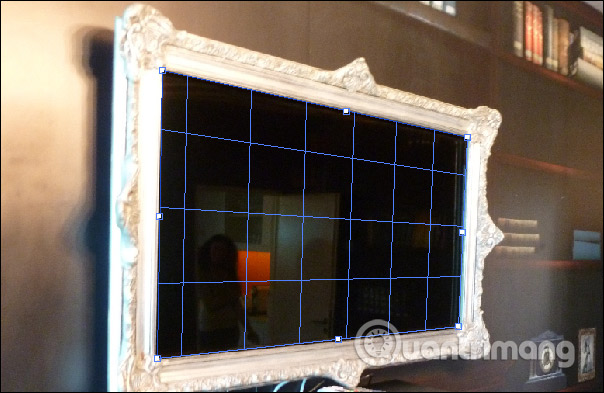
We press Ctrl + V to copy the image to be merged into the perspective frame . Press Ctrl + T and use your mouse to zoom out the image . When the image is in the grid area, the image will automatically tilt according to the perspective of the frame we blend. Click OK to save.
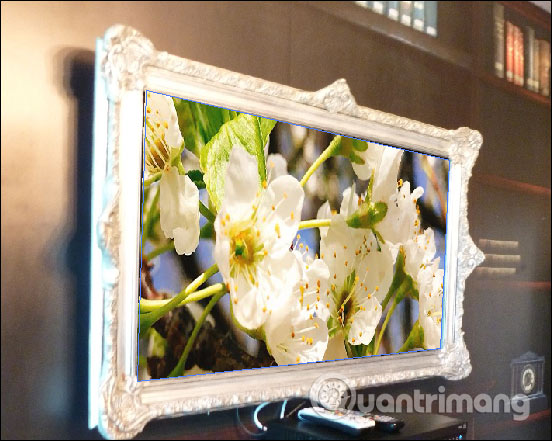
The result is that we have a composite image as shown below.
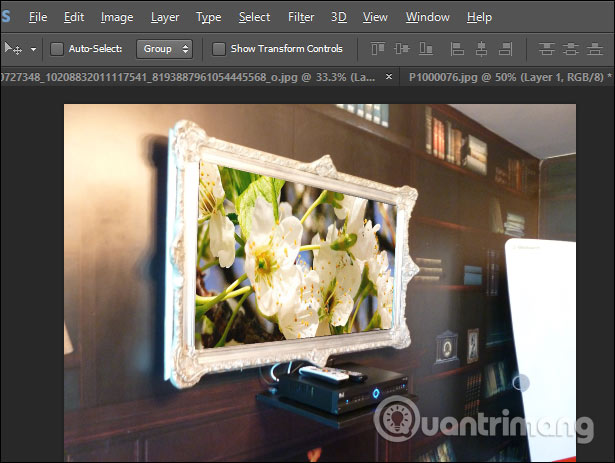
With the Vanishing Point tool, stitching photos in a perspective view in Photoshop. The remaining is that you will decorate or add other content to complete your interior design.
:
- How to stitch photos in Photoshop from 2 different images
- How to integrate images into text in Photoshop
- How to create a photo frame effects in Photoshop
- How to crop a circular image in Photoshop
I wish you successful implementation!
FAQ
What is How to Stitch Photos in Perspective in Photoshop about?
It provides a structured overview of stitching photos in photoshop, explains the main context, and highlights practical takeaways for readers.
Why does this topic matter?
Understanding the main concepts helps readers evaluate the issue, avoid common mistakes, and make better-informed decisions.
How should readers use this information?
Use the guidance as a practical starting point, confirm details that may have changed, and follow current product, safety, or security recommendations.
Related Articles
 How to Create Film Effects, Scratched Photos in Photoshop2 minutes read
 How to Stitch Photos, Cut Photos with Paint7 minutes read
 How to Crop Photos in Photoshop8 minutes read
 Stitch Text into Photos with Photoshop, Insert Text into Photos with3 minutes read
 How to Stitch Photos on the Phone Very Beautiful7 minutes read
 Lilo & Stitch Review: Unnecessary Remake or Successful Live - Action?6 minutes read
Reader Comments 0
Sign in with email or Google to join the discussion.