Instructions for cutting and stitching photos in Photoshop
Instructions for cutting and stitching photos in Photoshop. Cropping and collage is a feature that has a lot of attention in Photoshop. You can combine an object from one image to another, giving the object a new background, bringing a new and interesting combination.
Table of Contents
Cropping and collage is a feature that has a lot of attention in Photoshop. You can combine an object from one image to another, giving the object a new background, bringing a new and interesting combination.
Today Thuthuatphanmem.vn will guide you to cut and stitch photos in Photoshop basically so you can understand how it works.
Cut, merge photos in Photoshop
Step 1 : Prepare the 2 photos you want to cut and merge, open both in Photoshop.
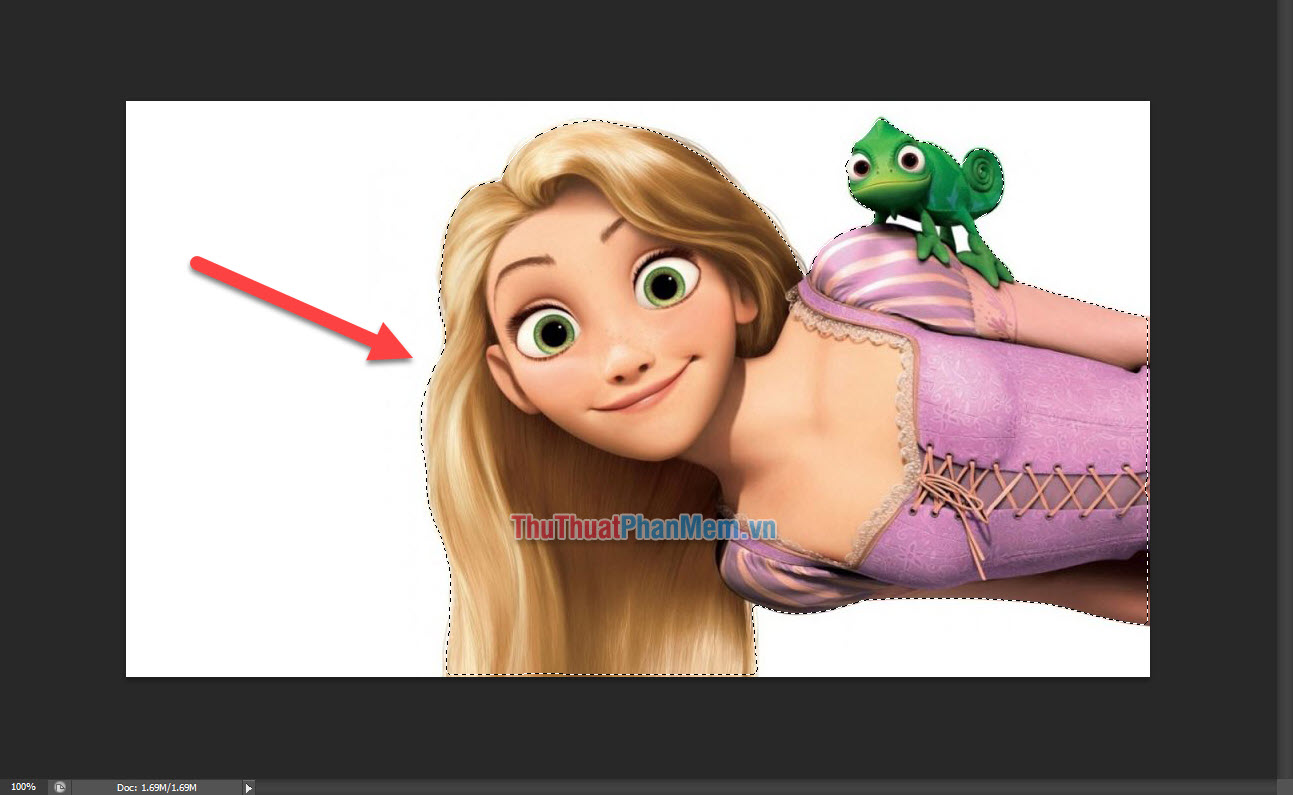
Step 2: Select the Magnetic Lasso Tool (L).

Point at any point on the object border and then drag the mouse along the border, the tool will automatically capture images for you.
If the tool catches the wrong point just press 'Backspace' and mark it again for the right point.

When you have surrounded the whole image:
Step 3 : Press V to select Move tool, drag object to new background. Or simply select the object, press Ctrl + C to copy, to the new background press Ctrl + V to paste.


Step 4: Resize or flip the object by selecting Edit >> Transform.
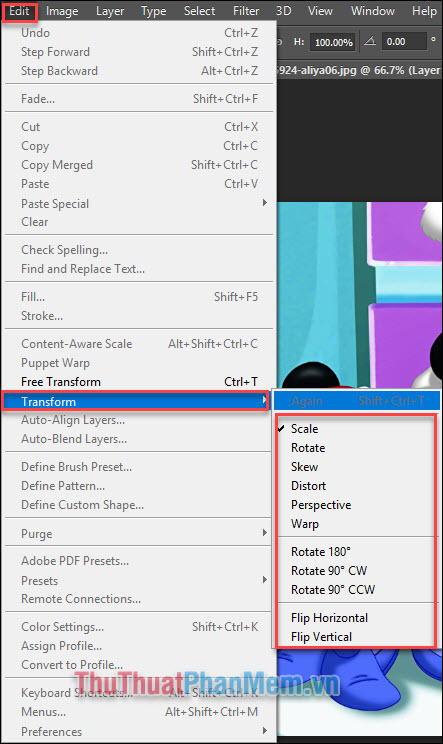
- Scale : Resize
- Rotate : Rotate
- Flip : Flip the picture

To change the brightness and color effects, select Image >> Adjustments >> Brightness / Contract . and Hue / Saturation . Please carefully adjust this step to make the object more realistic and more suitable for the background.

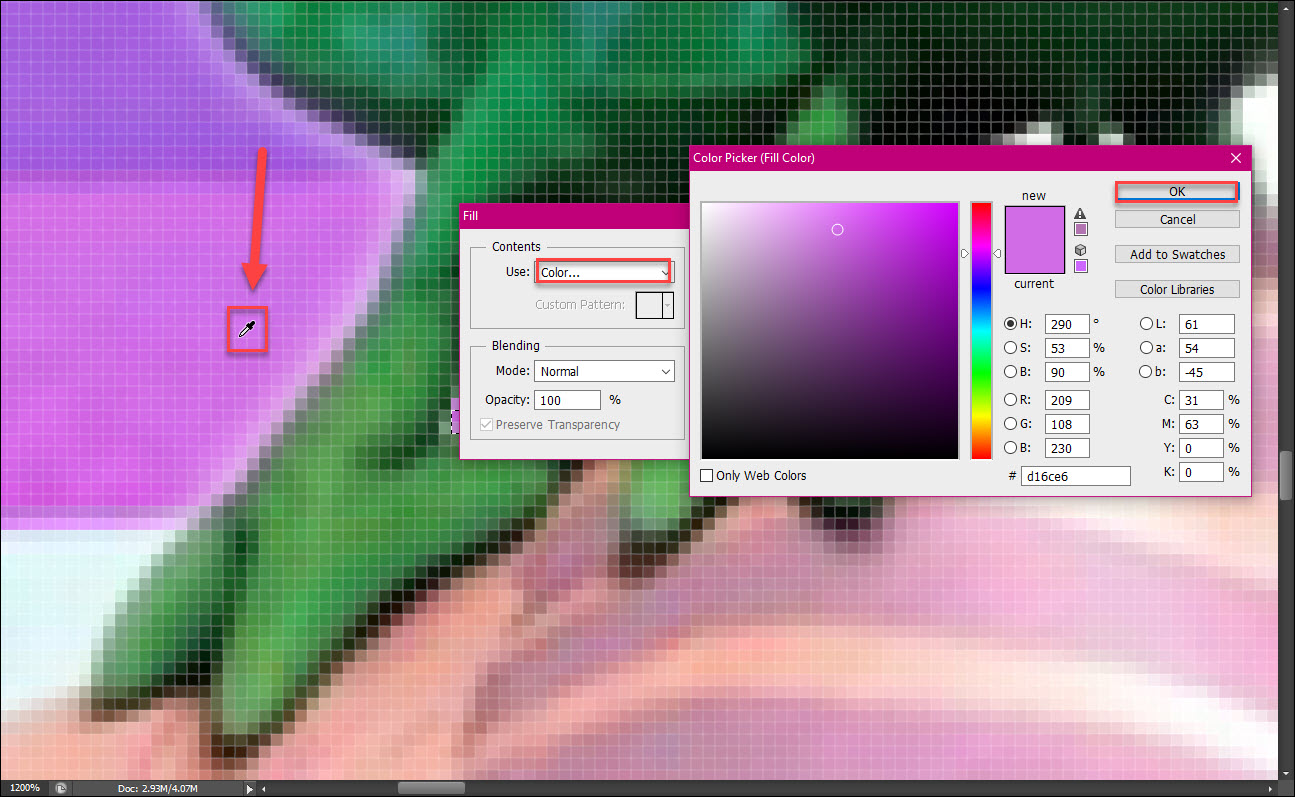
Step 5: Delete the leftovers. As you can see, there are still some redundant arrays in the object and we need to delete it to make the object fit into the background.
Select an empty spot with the Magnetic Lasso Tool as in step 2.

Right click, choose Fill .
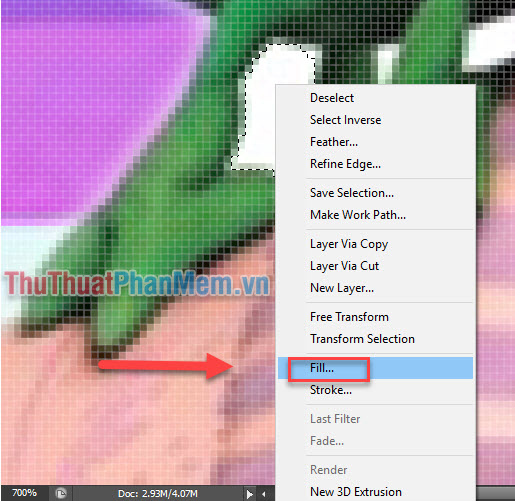
Choose Color . suck the color from the backgound with Eyedrop >> OK.
Result:

Step 6: When you have a picture like that, you publish the following: Choose File >> Save As .

Select the JPG file format , then Save.
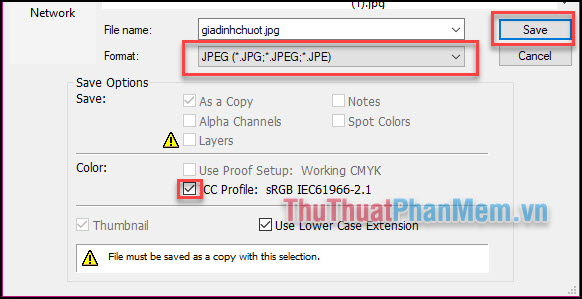
Select image quality >> OK.

Conclusion
Above is a simple way to cut and stitch photos using Photoshop. However, these two pictures are relatively easy, with clear objects. For photos with subjects that do not stand out from the background, or photos that are poor in quality, you need to have higher skills to be able to quickly process photos. Therefore, to master Photoshop and create beautiful works you need to practice hard.
Was this article helpful?
Your feedback helps us improve.
Related Articles
 How to stitch photos in perspective in Photoshop3 minutes read
 How to crop photos in Photoshop8 minutes read
 Photoshop CS: Cutting edges and creating photo frames (Part I)3 minutes read
 How to cut circular images in Photoshop4 minutes read
 Photoshop CS: Decorate photos5 minutes read
 How to use Photoshop CS5 - Part 6: Digital art8 minutes read
Reader Comments 0
Sign in with email or Google to join the discussion.