How to cut circular images in Photoshop
For those who use Photoshop, photo manipulation is very simple and extremely familiar. Even on Photoshop, there is a photo cutting tool for you to adjust the image to your liking. We can enter dimensions to crop the image to the right size, or cut the image freely without any fixed size.
However, the usual types of image slices are rectangular or square. So what if you want to crop the image in a circle? If used according to Photoshop image cropping tools, this option is usually not available, but users need to use it differently. The following article of Network Administrator will guide you how to cut circular images in Photoshop.
- How to cut photos using Microsoft PowerPoint
- Photoshop CS: Cutting edges and creating photo frames (Part I)
- How to split photos with Photoshop
- How to combine photos in Photoshop from 2 different images
Instructions for cropping photos of Photoshop circles
Step 1:
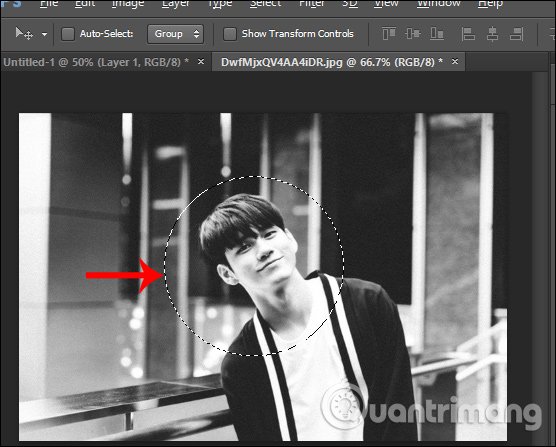
First, open the image you want to cut in a circle. Next in the toolbar on the left of the screen click on the Rectangular Marquee Tool icon then select the Elliptical Marquee Tool to create a round frame on the image.

Step 2:
Continue pressing and holding down the Shift key to create a circle on the image. If you don't hold down Shift, the circle will be distorted and form Ellip. Please select the correct area of the image you want to cut into a circle and drag the frame according to the needs as well as the area of the image you want to take.

Once you have a circle, release the Shift key and move the circle to whatever position you want to crop.

Step 3:
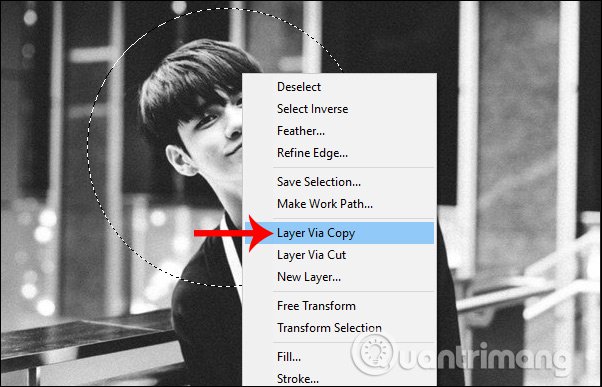
After you've selected the area and aligned, right-click on the image and select Layer Via Copy or press Ctrl + J to create a new layer for the rounded image to be cut.

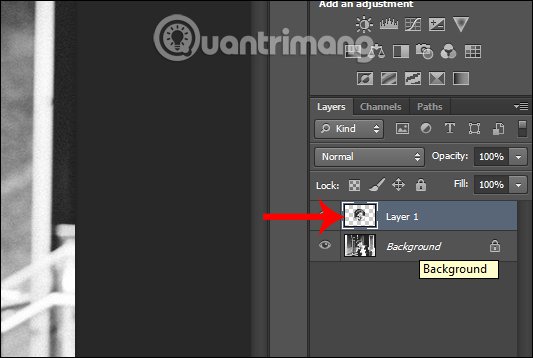
The result will have a new layer as shown below. Click the eye icon in the original image layer to hide it, otherwise the two image layers will overlap.

The circle image after cutting will be as shown below, the newly created circle image layer will be separate from the original image layer.

Step 4:
Continue using Crop crop tool to edit the image, remove the excess image.

The final image after being cut to a circle and edited is as follows. You can insert pictures or integrate pictures into other images if you want. Save the image with the usual steps.

Instead of using the cropping tool as you normally do in Photoshop, to create a circular image, we first need to create a circular frame for the image, then proceed to the cut. The steps are also very simple and not too complicated to implement.
I wish you all success!