How to set up and use PPPoE Internet connection on Windows 10
Many Internet service providers provide customers with a Point-to-Point Protocol over Ethernet (PPPoE) connection. This article will show you how to configure Windows to connect to the Internet via PPPoE.
Table of Contents
Many Internet service providers provide customers with a Point-to-Point Protocol over Ethernet (PPPoE) connection. To be able to use this type of Internet connection, Internet service providers often give customers a unique username and password to use to connect to their network. This article will show you how to configure Windows to connect to the Internet via PPPoE.
Open the Connect to the Internet wizard
To establish a PPPoE connection on Windows 10, you need to open the Connect to the Internet wizard. First, you need to open the Settings application (press Win + I ).
In the Settings window, open the Network & Internet section , access Dial-up on the left of the window and click the Set up a new connection link from the right.
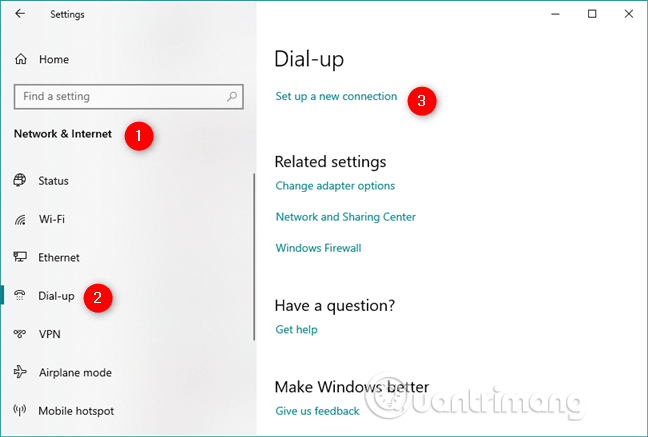
You will see the Set Up a Connection or Network wizard.
You can also open the Connect to the Internet wizard from Control Panel. In the Control Panel, go to Network and Internet and open the Network and Sharing Center , then click or tap the Set up a new connection or network link from the Change your networking settings section .

How to set up PPPoE Internet connection in Windows 10
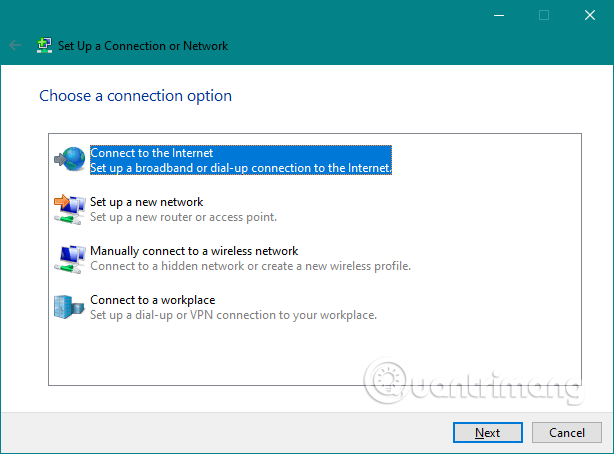
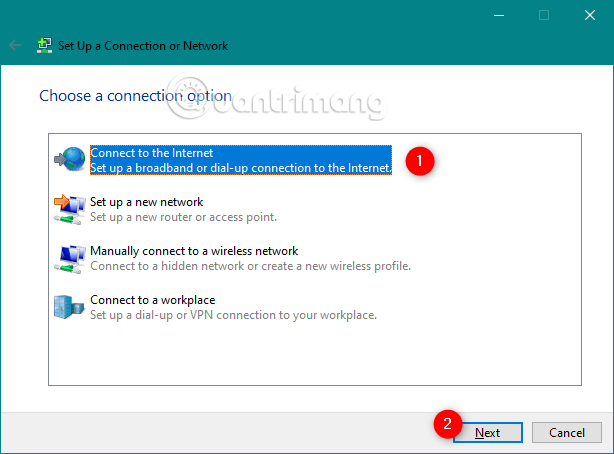
In the list of available connection options, select Connect to the Internet and click Next .
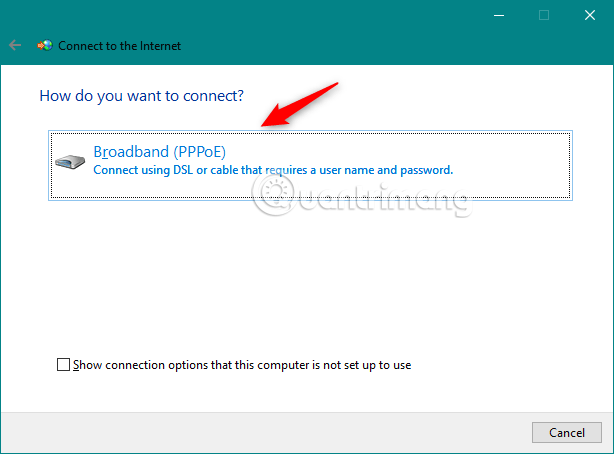
In the Connect to the Internet window, click Broadband (PPPoE) .
You will be redirected to the PPPoE connection settings. Here, type the username and password of your Internet service provider.
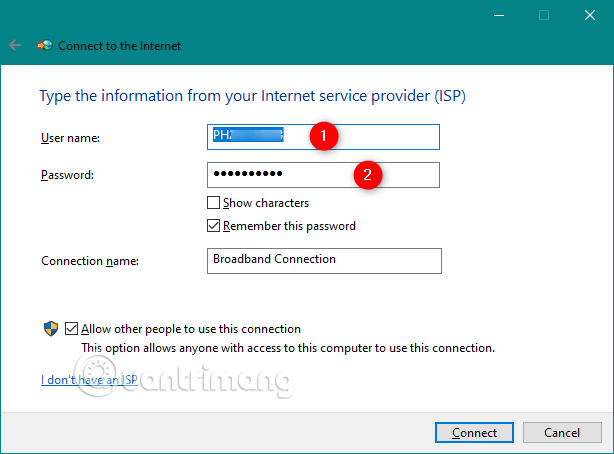
There are several options you can change:
- You can check the Show characters option if you want to see the password and make sure you type it correctly.
- If you don't want your Windows 10 computer to ask you for a password every time you connect to the Internet, you can make it remember your password by selecting the Remember this password option.
- By default, Windows 10 provides PPPoE connectivity under the Broadband Connection name. However, if you want to use another name, enter the name you want in the Connection name text field.
Finally, if you want to set up a new PPPoE connection for everyone who has access to your computer, select the last option Allow other people to use this connection . However, if you enable this option, you need administrative rights.
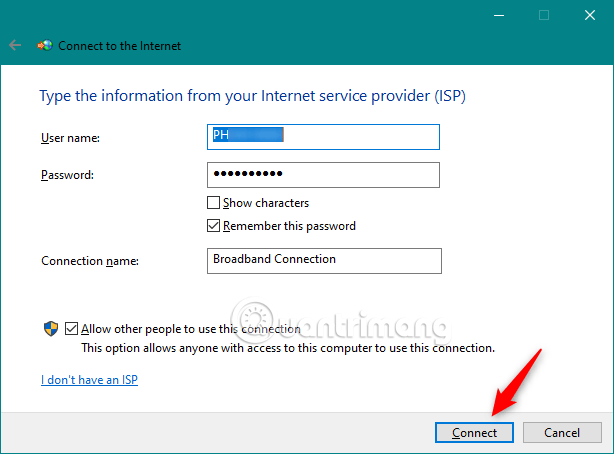
Once you have changed the settings, click Connect.
The wizard will take a few steps, verify your username and password and check your internet connection.
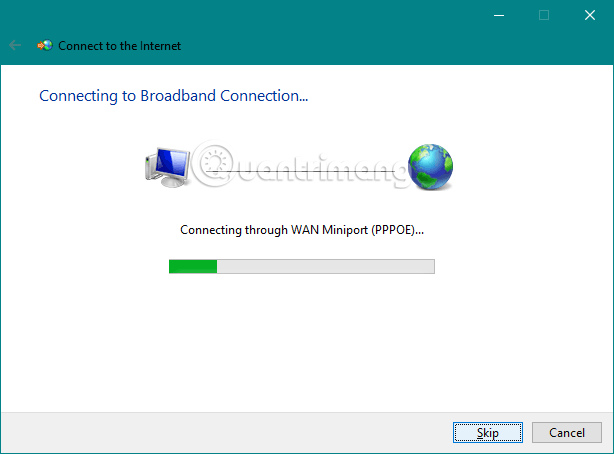
If everything works well, the wizard will inform you. The connection to the Internet is ready to use .

Close the wizard and the PPPoE connection that is currently active. You can continue and use any web browser or Windows application that needs the Internet.
Turn on PPPoE Internet connection on Windows 10
Now, you have established a PPPoE network connection and used it whenever you want to access the Internet. However, there is one downside: to use it, you have to connect to it every time you need it. And here's how.
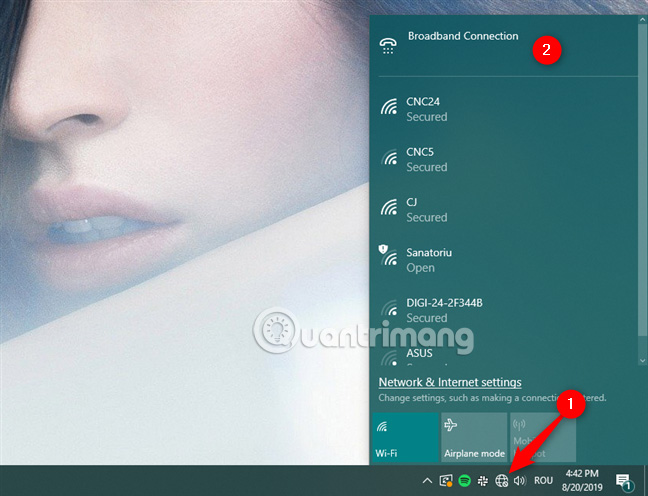
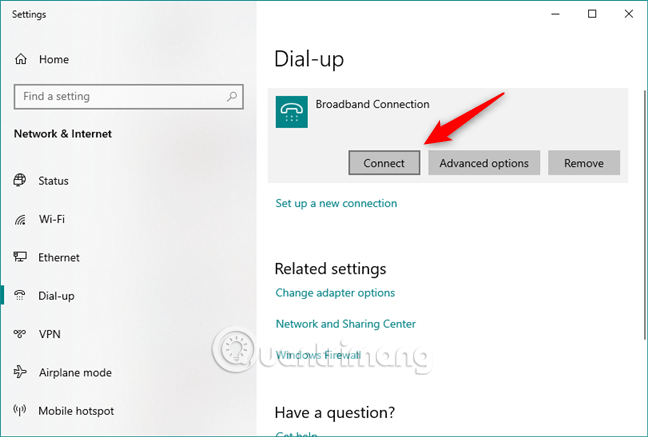
Click on the Network icon from the notification area on the Taskbar and then click and the PPPoE connection wants to connect. If you don't change the default name, the connection will be Broadband Connection.
This will open the Settings application and access Dial-up. Click on the PPPoE link on the right side of the window and click Connect .
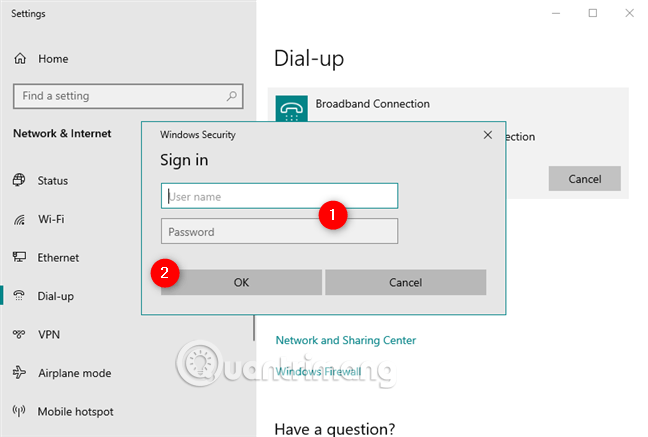
If Windows 10 requires remembering PPPoE connection information when setting up, the computer will automatically connect to the Internet. However, if not, you must enter the username and password for the PPPoE connection.
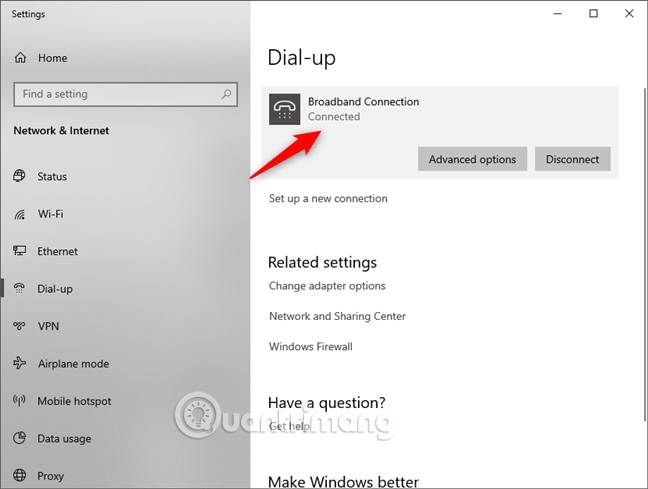
When Windows 10 connects to the Internet, you will return to the Network & Internet section of Settings. Here, you can see the Connected message displayed below the PPPoE connection.
How to disconnect from PPPoE Internet connection on Windows 10
To disconnect from the PPPoE connection running in Windows 10, click on the Network icon from the Taskbar and then click or tap the PPPoE connection. Finally, go to the Dial-up section and click Disconnect.
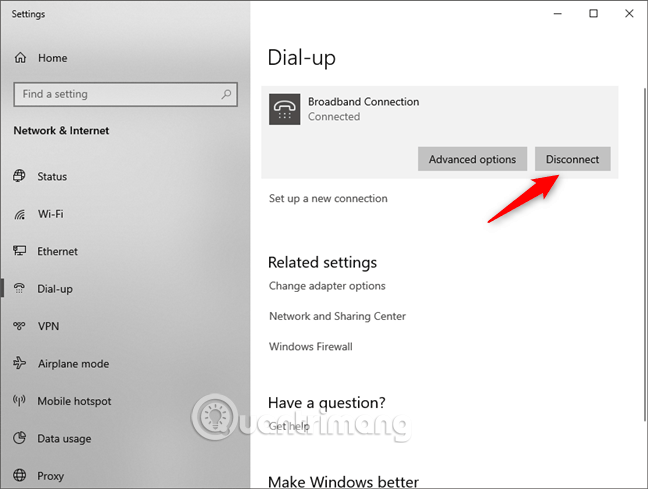
Windows 10 will immediately close the connection.
How to delete PPPoE connection from Windows 10
If you decide to completely delete the PPPoE connection, go to the Settings app, go to Network & Internet> Dial-up . If necessary, you can disconnect the PPPoE and then click the Remove button.

Windows 10 will notify you if you remove this VPN connection, you'll need to set it up again to reconnect (If you delete this VPN connection, you need to reset it to connect).
If you want to continue, click Remove to delete the PPPoE connection permanently.

The above article has instructed you to set up, use and delete PPPoE connection on Windows 10.
I wish you all success!
Was this article helpful?
Your feedback helps us improve.
Related Articles
 How to configure PPPoE connection on TP-Link WiFi 6 router7 minutes read
 What is PPPOE? What is the role of PPPOE?5 minutes read
 How to set up and use a PPPoE connection on a Windows computer7 minutes read
 Your Windows 10 computer is slow to connect to the Internet, this is a fix5 minutes read
 Internet connection sharing - Internet Connection Sharing5 minutes read
 How to turn off Internet Connection Sharing on Windows2 minutes read
Reader Comments 0
Sign in with email or Google to join the discussion.