How to configure PPPoE connection on TP-Link WiFi 6 router
Do you have a PPPoE Internet connection and TP-Link router with WiFi 6 that needs setup? Do you want your router to properly connect to the Internet and share it with your entire network? Do you need to adjust some PPPoE settings and use a custom DNS server or a different MAC address for your TP-Link WiFi 6 router?.
In this guide, TipsMake will share everything there is to know about setting up PPPoE on a TP-Link router. Let's get It Started!
Note : If you are not familiar with PPPoE Internet connections, read the article: What is PPPOE? What is the role of PPPOE? This guide was created on the TP-Link Archer AX10 router. The steps involved are the same on all WiFi 6 routers coming from TP-Link.
How to set up PPPoE Internet connection in TP-Link Quick Setup wizard
When you buy a TP-Link WiFi 6 router and need to set it up for the first time, you have to go through the Quick Setup wizard.
After you create the admin password for your TP-Link router, select the time zone. You will be prompted to select the type of Internet connection you want to use. Since you have a PPPoE connection, select this and click Next.

You are then asked to enter a username and password for your Internet connection. These details are provided to you by your Internet service provider (ISP) when you contract with them. You will receive a piece of paper with your connection details. The username associated with your customer account can be up to 11 characters long, including case-sensitive letters and numbers. If you don't have these details, contact your ISP's technical support service and ask them to give it to you.

In some countries like Australia, Singapore, Portugal or New Zealand, the PPPoE internet provider uses a custom configuration. To see if your TP-Link WiFi 6 router has a special configuration for the connection, click Special ISP Settings (IPTV/VLAN) , then on the ISP Profile drop-down list and scroll through it. If you find your country and Internet service provider in the list, select it and click Next.

Then continue with the Quick Setup wizard, which includes setting up WiFi and updating the router's firmware.
How to configure PPPoE Internet connection after initial setup
Maybe you skipped the Quick Setup wizard initially or you didn't and then you need to change your Internet connection type to PPPoE , or you might have changed the account details with your ISP. Whatever the reason, you can quickly change the PPPoE settings.
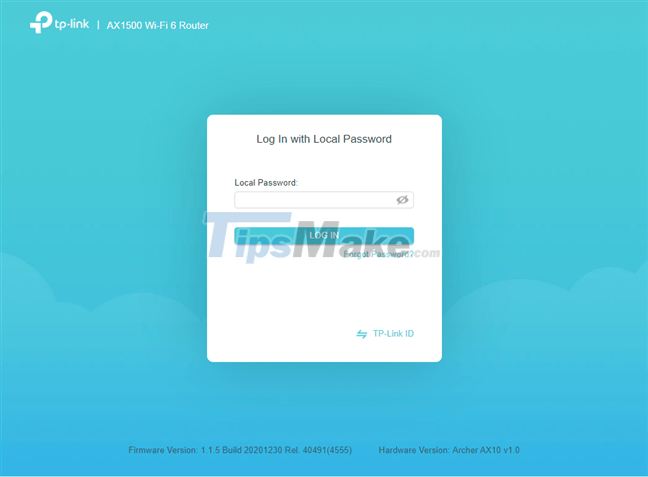
On a laptop or PC connected to a network managed by your TP-Link WiFi 6 router, visit tplinkwifi.net or 192.168.0.1. This will load the user interface for managing the router and begin by asking you to enter your admin password. Enter it and press LOG IN .

Tip : If the login prompt above doesn't load, your TP-Link router may have a different IP address than the one we mentioned earlier. To help you find it, read the article: How to find the router's IP address?
When you see the user interface for managing your router, click on the Internet section at the top.
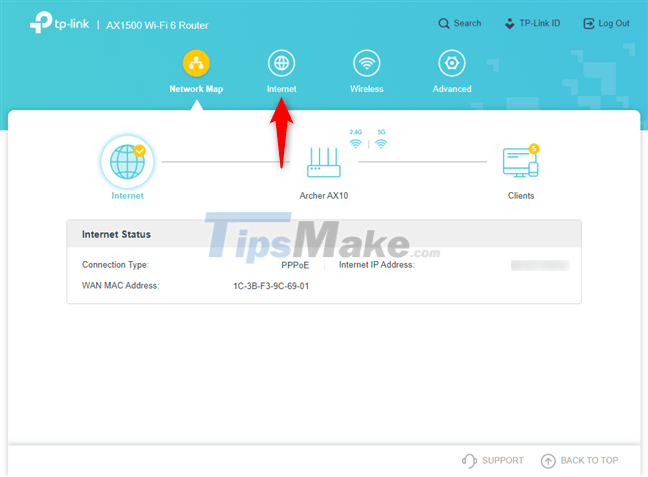
This will load the basic settings for configuring the Internet connection used by your router. First, in the 'Internet Connection Type' drop-down list , select PPPoE. Then enter the username and password for your Internet connection (not for WiFi) and press Save.

Your TP-Link router should now take some time to connect to the Internet, using your newly entered details.
How to Configure PPPoE Internet Connection from Tether App
If you want to use the Tether mobile app on Android or iOS, activate it on your smartphone. Your device must be connected to the WiFi emitted by the TP-Link WiFi 6 router, or the Tether app must use the TP-Link ID to remotely connect to the router anywhere in the world. In the Tether app, tap your router's name.

Then, click the Tools button in the bottom right corner.
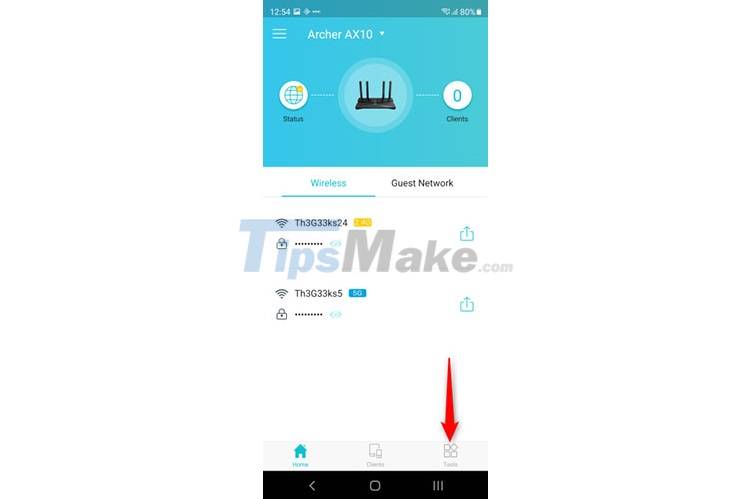
In the Tools list , click Internet Connection.

Here you can set the Internet connection type and enter the required connection details. Select PPPoE and when you're done entering the data, hit Save.

Your router will take a few seconds to apply the new PPPoE connection settings and try to connect to the Internet.
How to configure advanced settings for PPPoE . Internet connection
The previously shared methods only work to set up the basic settings for your PPPoE Internet connection. If you want to set up more advanced settings, such as the DNS server used for PPPoE connections or the MAC address used by the TP-Link WiFi 6 router, you need to do it another way:
On a laptop or PC connected to a network managed by your TP-Link WiFi 6 router, go to tplinkwifi.net or 192.168.0.1. Router requires admin password. Enter it and press LOG IN .
Once you're signed in, click or tap Advanced at the top.

In the left column, select Network and click Internet. On the right, you see all the settings related to your Internet connection. Under Internet Connection Type , enter the username and password for your client account. After a few seconds, if you click Connect , you will see the IP address assigned to the TP-Link router by your ISP and the default DNS servers used by your Internet connection. If you want to customize Advanced Settings , click the link with the same name.

Scroll down and you see a lot of settings. You can change the IP address used by your router or DNS Addresses. Instead of Get Dynamically from ISP , click and select 'User the following…' , and then manually enter the IP address you want to use.

If you scroll down further, you can also set the MAC address used by the router to a custom address, enable or disable NAT (Network Address Translation), or manually set the speed of the Internet gateway on the back of the TP-Link WiFi router. your 6.

Don't forget to hit Save in the bottom right corner when you want to save everything.
Hope you are succesful.