Table of Contents
#first. What Is Pppoe?
This practical guide explains how to set up and use a pppoe connection on a windows computer with clear steps and useful context. It also covers common requirements, potential problems, and the details that can help you get better results.
Although it was born very early (in 1999), so far, PPPoE is still one of the network management, sharing and provisioning protocols selected and used by major carriers.
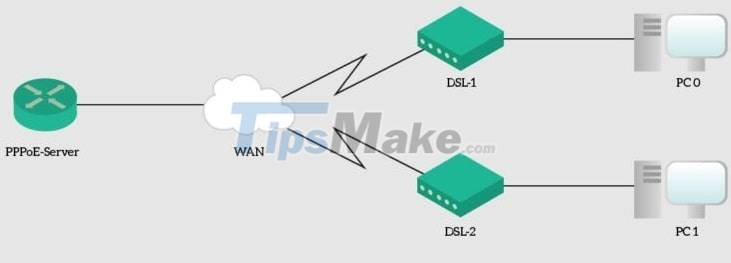
PPPoE is a network protocol that supports connecting multiple computer users on a local network by network cable with a remote site through a modem, which makes it possible for multiple devices to access a single server. provider at the same time and use the network at the same time.
And with the PPPoE protocol, it is also easier for service providers to manage more customer systems, easily authenticate their access to their services, as well as track the usage of customer data. row.
In addition, PPPoE also supports services such as encryption and data compression.
To be able to use the above connection protocol, Internet service providers will usually provide their customers with a unique username and password to connect to the network.
And in this article, I will show you how to set up Windows to use the Internet through a PPPoE connection.
#2. Set Up Pppoe Connection on Windows Computer
This article I made on Windows 10, on Windows 11 you apply the same. In addition, in the further reading section below, I also show you how to apply it to all Win (7, 8, 8/1.)
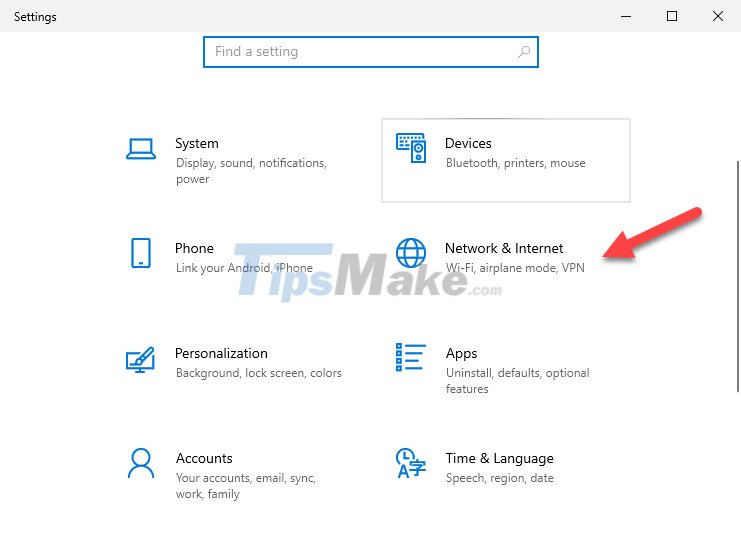
+ Step 1: To start the setup, first press the Win + I key combination to boot into Windows Settings.
+ Step 2: Then you click on the Network & Internet section.
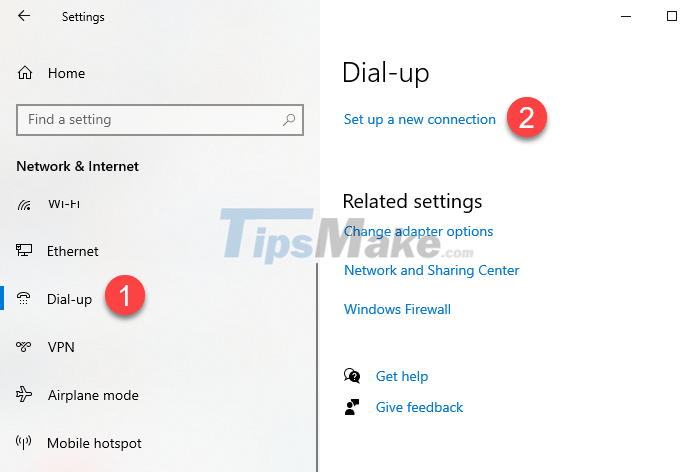
+ Step 3: Next, select Dial-up item on the left side of the window => then select Set up a new connection.
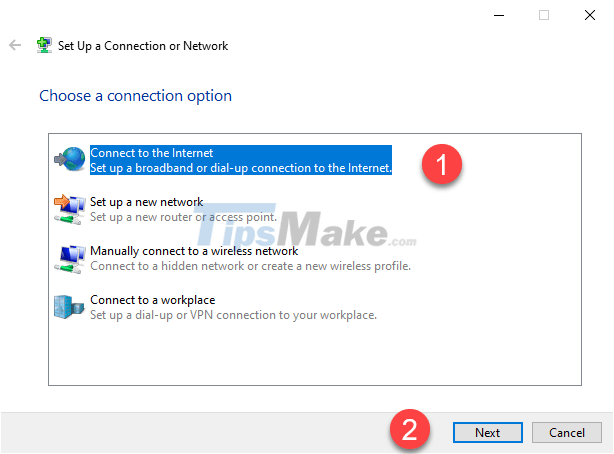
+ Step 4: You select Connect to the Internet => then click Next.
Alternatively, you can access the Set Up a Connection Network window in the following way. This method applies to all versions of Windows.
Go to Control Panel by pressing the Windows + R key combination to open the Run dialog box => enter the control command => (select the View by view type is Large icons) => you find the Network and Sharing Center.
Or another way to open the Network and Sharing Center window is to right-click the network icon => select Open Network and Sharing Center

+ Step 5: Then you click Set up a new connection anyway.
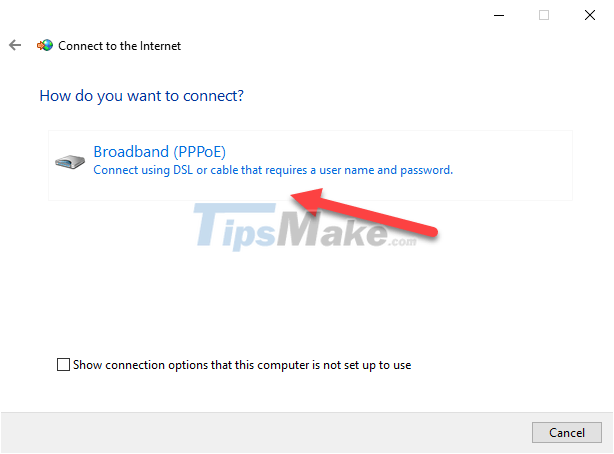
+ Step 6: And click on Broadband (PPPoE)
+ Step 7: Enter the username and password provided to you by your Internet service provider.
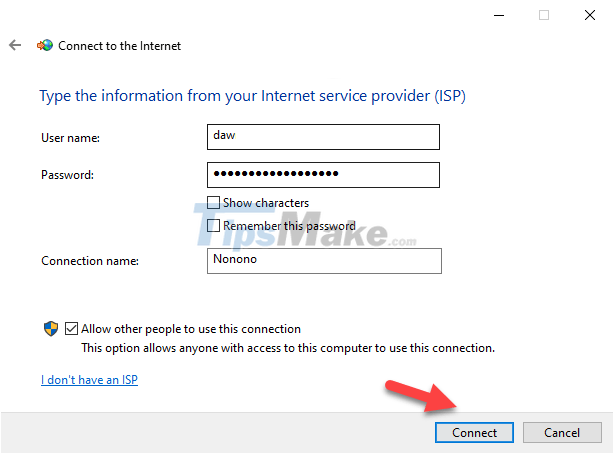
- You can check the Show characters option if you want to see the password to make sure you typed it correctly.
- If you don't want Windows to ask for your password again every time you connect to the Internet, you can check the Remember this password option so that the system remembers the password.
- Normally, Windows computers when providing PPPoE connection will have the default name of Broadband Connection. However, if you want to use a different name, you can change the name in the Connection name box.
- If you want to set up this PPPoE connection for everyone who has permission to use your computer, then check the Allow other people to use this connection option. However, if you want to enable this option, you need to have administrative rights in the account you are using.
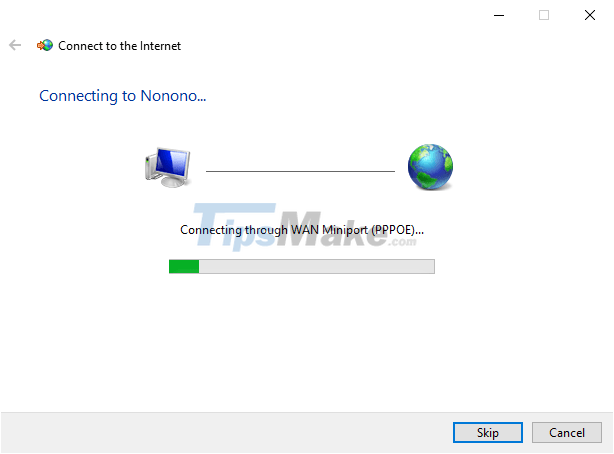
+ Step 8: After completing the setup, click Connect. And now you just have to wait for the connection.
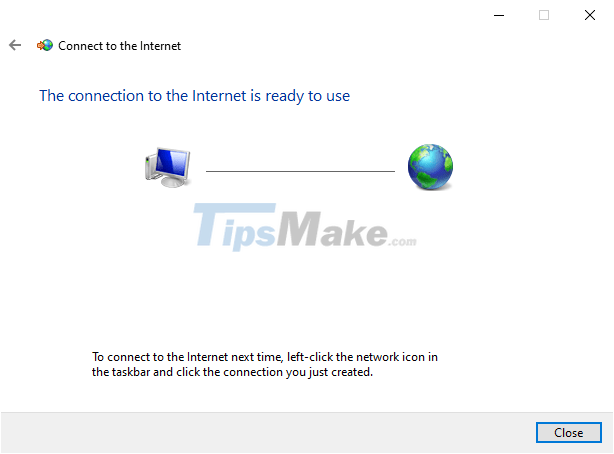
And this is what it looks like after completing the setup. So we have finished setting up PPPoE already!
#3. How to Connect Pppoe on Windows 10
Now, you can connect to the PPPoE network and use it whenever you want to access the Internet.
However, there is a big drawback is that to be able to use the above connection, you need to connect to it every time you use it. That was a pretty big inconvenience indeed. And this is how to make PPPoE connection on Windows 10.
You can do the same for other operating systems.
+ Step 1: Click the Network icon on the Taskbar => then click on the PPPoE connection you want to use. In my case, the PPPoE name that I set will be Nonono. If you don't change the default name, it will be named Broadband Connection.

+ Step 2: After you complete step 1, the Settings window will appear and access the Dial-up section.
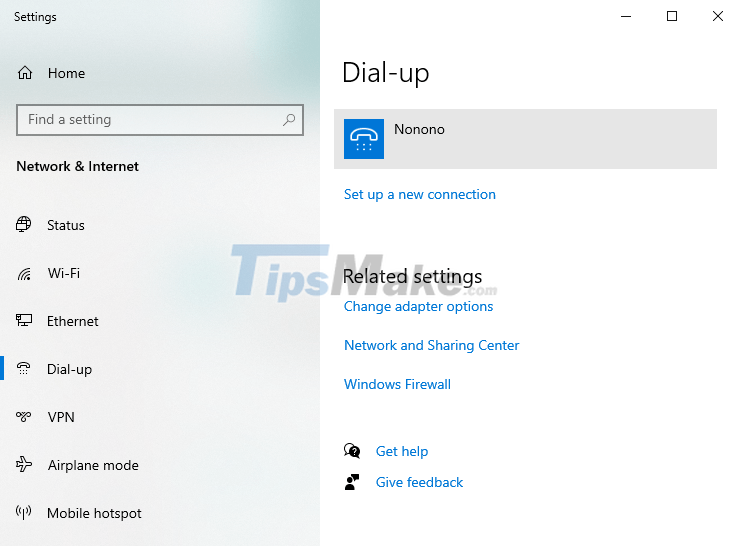
+ Step 3: Select the PPPoE you want to connect => then select Connect.
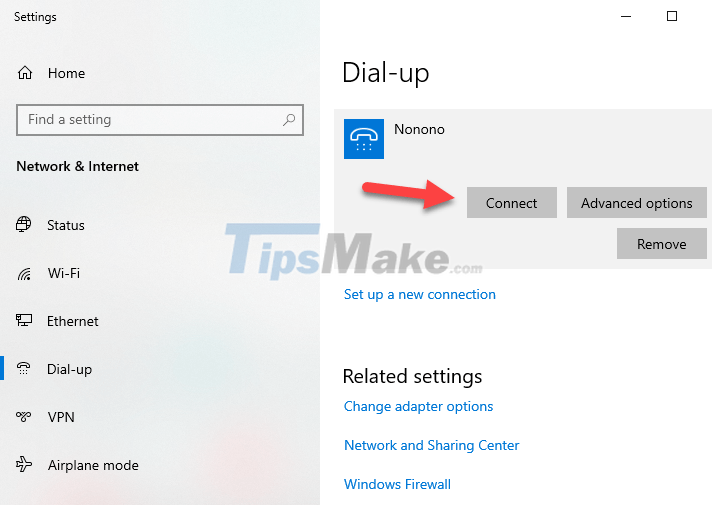
+ Step 4: Enter the account and password provided by the service provider. If you have Remember this password checked in the settings, it will connect immediately for you without further asking. Once done, you can connect to the Internet completely normally.
#4. How to Remove Pppoe Connection from Windows
If for some reason you decide to completely remove the PPPoE connection from Windows 10, follow these steps:
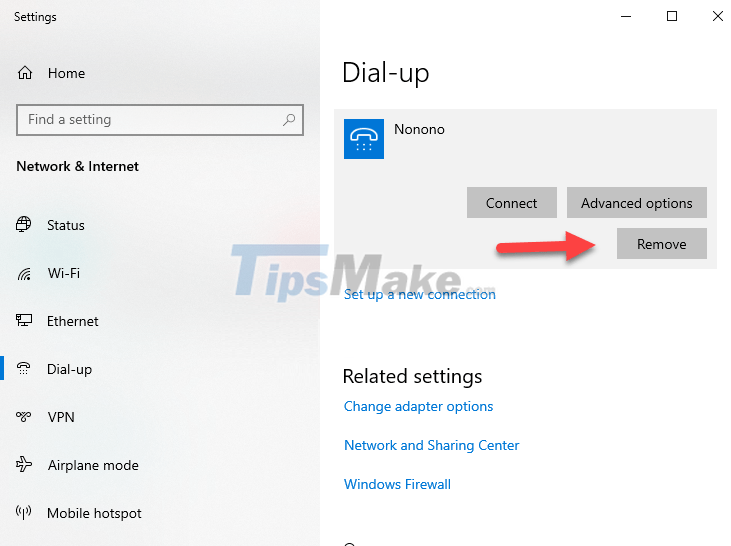
+ Step 1: Go back to the Dial-up section as instructed above. If necessary, you can disconnect PPPoE by pressing the Disconnect button => and then click the Remove button to remove PPPoE from the system.
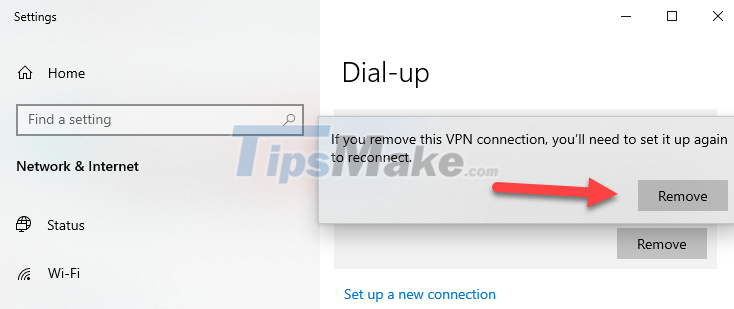
+ Step 2: Windows 10 will have a message to confirm whether you are sure you want to delete this connection or not. Click Remove to confirm deletion.
#5. Conclusion
Ok, in general, setting up PPPoE on a Windows computer and connecting to a PPPoE network is not difficult at all. Hope this article will be useful to you. Wish you all success!
Conclusion
Understanding Pppoe makes it easier to compare options, avoid common mistakes, and apply the information in this guide more effectively. Review the relevant requirements before making changes or choosing a solution.
Frequently Asked Questions
How do you set up and use a pppoe connection on a windows computer?
Follow the steps in this guide in order, confirm the required settings or tools, and verify the result before making additional changes.
Is it safe to set up and use a pppoe connection on a windows computer?
It is generally safe when you follow the recommended instructions, use trusted tools, and avoid changing settings you do not understand.
What should you do if the process does not work?
Recheck the requirements, restart the device or application when appropriate, and review each step for missed settings or compatibility issues.
Was this article helpful?
Your feedback helps us improve.
Related Articles
 How to Set up and Use Pppoe Internet Connection on Windows 106 minutes read
 How to Configure Pppoe Connection on Tp-link Wi-Fi 6 Router8 minutes read
 What Is Pppoe? What Is the Role of Pppoe?5 minutes read
 Your Windows 10 Computer Is Slow to Connect to the Internet, This6 minutes read
 Steps to Connect Windows Computer Bluetooth with Speakers6 minutes read
 Windows 11 Still Often Throws the Error of Losing Internet4 minutes read
Reader Comments 0
Sign in with email or Google to join the discussion.