How to run VM on Raspberry Pi using Proxmox
Proxmox is an open source enterprise server management and virtualization platform that provides a user-friendly web interface for virtual machine and container management..
If you have previously used VirtualBox, VMWare, or Hyper-V, Proxmox offers a similar experience with a focus on open source technologies.
Although Proxmox is not compatible or available directly for the Raspberry Pi, you can use the Pimox project to install and set up a Proxmox port designed for the Raspberry Pi and use it to build a Proxmox cluster or Combined Raspberry Pi board assembly and x86 hardware.
Things you will need
- Raspberry Pi 3, 4 or 5
- Debian 64-bit or Raspberry Pi OS 64-bit Lite (Bullseye or later)
- MicroSD card 32GB or larger. You can also enable Raspberry 4 or 5 to boot externally for larger and faster storage capacity
- Connect to the Internet via or
- Source
Note : Proxmox on Raspberry Pi may not provide the same level of stability and performance as on traditional hardware. Consider this installation as an experiment. Do not use this tool to run mission-critical servers in a production environment.
Install Proxmox on Raspberry Pi
After installing the operating system using the Raspberry Pi Imager tool, open a Terminal window - or connect to the remote Raspberry Pi via SSH (using PuTTY for Windows) - and run the following commands to download and install the latest packages and security updates.
sudo apt-get update sudo apt-get upgrade -y
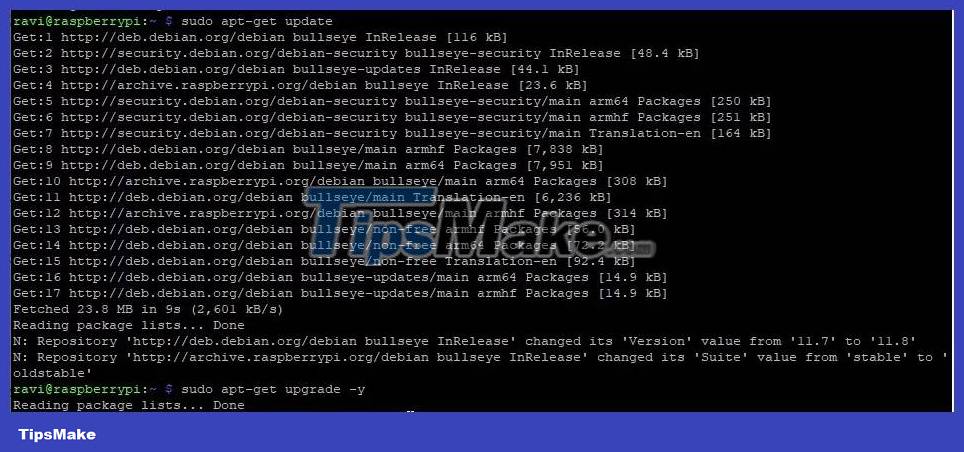
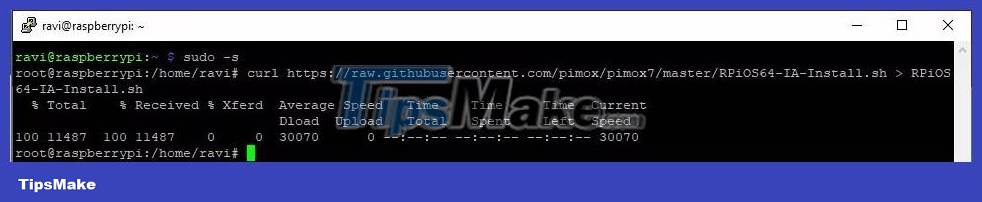
This process will take some time to complete depending on your Raspberry Pi model and network speed. Once done, run the following commands to switch to the root user, then download the Pimox script and execute it to install Pimox.
sudo -s curl https://raw.githubusercontent.com/pimox/pimox7/master/RPiOS64-IA-Install.sh > RPiOS64-IA-Install.sh
Open the RPiOS64-IA-Install.sh script with the Nano text editor and modify the following lines to match your network settings. This step is optional and can be performed later in the installation process.
# RPI_IP="192.168.1.100" # Replace with your desired IP address # GATEWAY="192.168.1.1" # Replace with your gateway/router's IP addressAfter making these changes, press Ctrl + X followed by Y and Enter. This will save the changes to the file and exit the editor. Next, we will run the Pimox script. To do so, run the following commands.
chmod +x RPiOS64-IA-Install.sh ./RPiOS64-IA-Install.sh
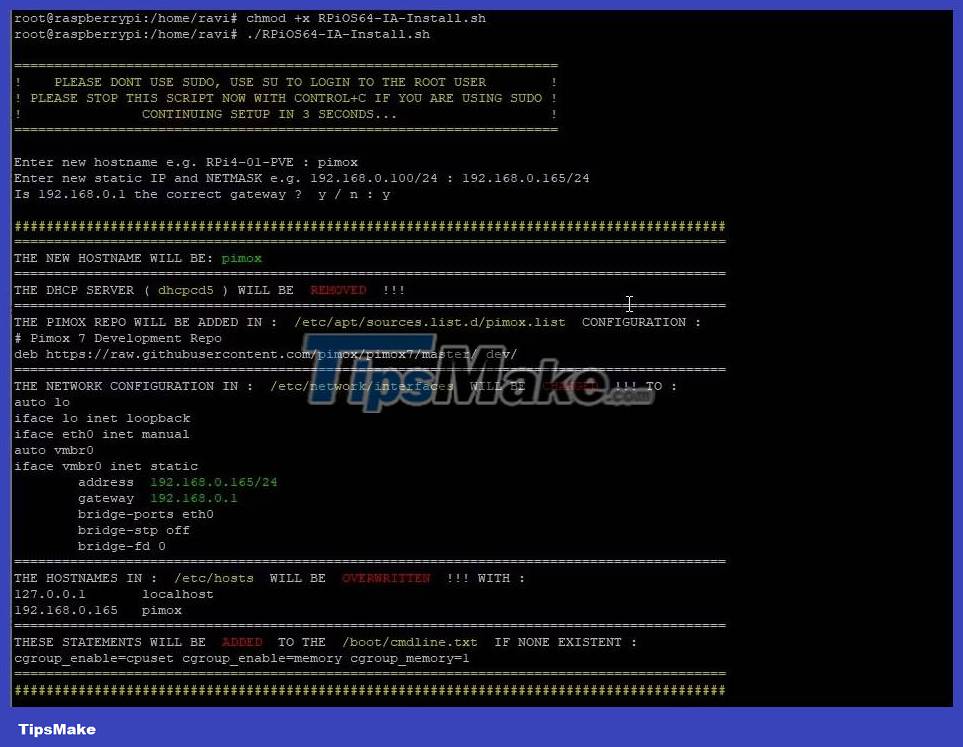
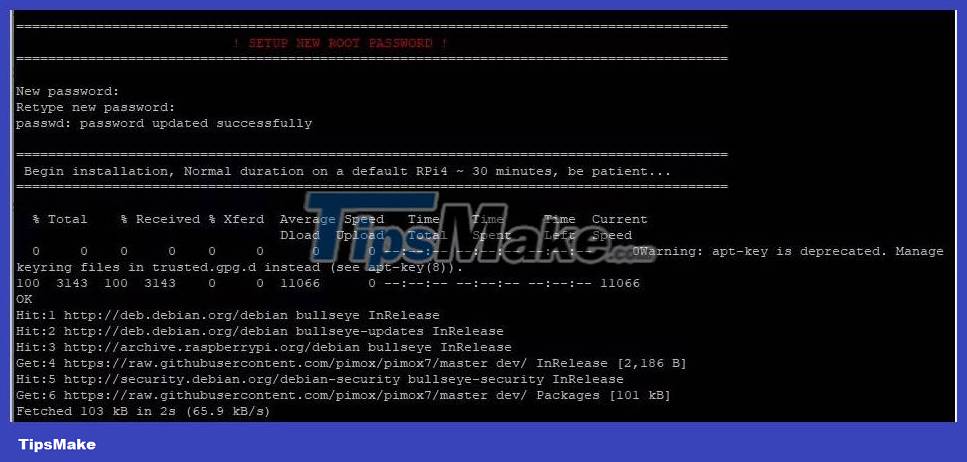
Continue following the prompts to complete the installation process. During the installation process, you will need to set up a root password, which you will later require to access the Proxmox web interface. Also, make sure to select default values while prompted. The installation will begin and take a while to complete, so please be patient.
After installation is complete, Raspberry Pi will automatically reboot. After rebooting, Proxmox will be ready to use. If your Raspberry Pi doesn't reboot automatically, you can try restarting it manually.

You should install Proxmox on a Raspberry Pi running Debian or Raspberry Pi OS Lite version. If you use the Desktop version, it will consume less resources to run Proxmox efficiently. Also, make sure to use an SSD or a dedicated microSD card for this. Do not install it on your current Raspberry Pi desktop OS version as it will change the wallpaper and remove some network tools.
Access the Proxmox web interface from a web browser
To access the Proxmox web interface running on the Raspberry Pi, open a web browser on your PC or laptop and go to https://IPAddressOfPi:8006.
You may see SSL errors or security certificate errors on your web browser. You need to bypass this by clicking Advanced > Proceed Anyway .
You will see a login screen where you need to enter the following details:
- Login: root
- Password: The password you set during Proxmox installation
After logging in, you can click OK on the notification and then access the Proxmox management interface.
Create and manage virtual machines and containers
You can start by uploading the ISO image of the operating system you want to install and run on Proxmox. To do so, you can download the ISO to the appropriate location with the following commands:
cd /var/lib/vz/template/iso/This will help you ensure that the operating system files will show up immediately in the web interface for installation. To create a virtual machine in Proxmox on Raspberry Pi, follow these steps:
1. Click Create VM in the upper right corner of the Proxmox interface.
2. In the General section , enter a name for your virtual machine.

3. Click OS and select Do not use any media .
4. In the System tab , leave all default values as they are.
5. In Disks , make sure you select SCSI for the hard drive. Adjust drive size if necessary.
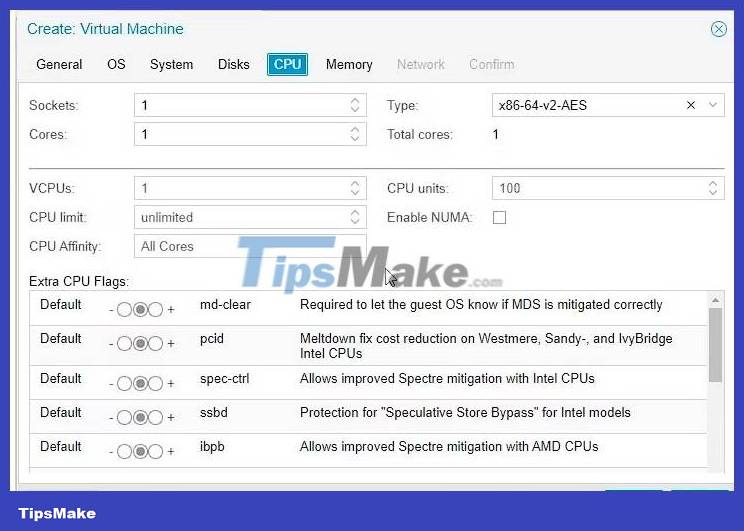
6. Click CPU , tweak processor and memory settings. Please note that Raspberry Pi has limited resources depending on the model you have.
7. Under Network , you can keep everything as default or create a network bridge, based on your needs.
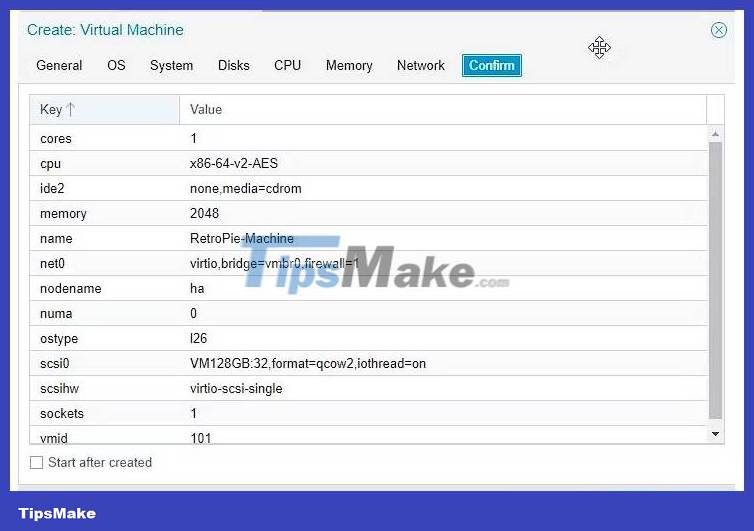
8. After configuring the VM settings, click Next or the Confirm tab and click Finish .
9. Select the virtual machine in the left menu and click Hardware .
10. Double-click CD/DVD Drive and select Use CD/DVD disc image file (iso) .
11. Click the Storage drop-down menu and select default storage, then ISO image.

12. Click OK .
13. Click Summary and then click the Start button in the upper right corner of the Proxmox interface when the VM is selected, to start the VM and begin the installation.
14. After installation, you can start the virtual machine and use the desired operating system.
If required, you can adjust hardware settings, such as processor, memory, and storage, based on your requirements.