How to restore files quarantined by Windows Defender
If you know the origin and developer of the file involved, you can easily recover deleted items from Windows Defender following the article below..
Windows Defender is one of the built-in antivirus tools on your computer. However, sometimes it also fails and can quarantine important files. If you know the origin and developer of the file in question, you can easily restore quarantined items from Windows Defender according to the article below.
Restore quarantined items directly from Windows Defender
Step 1:
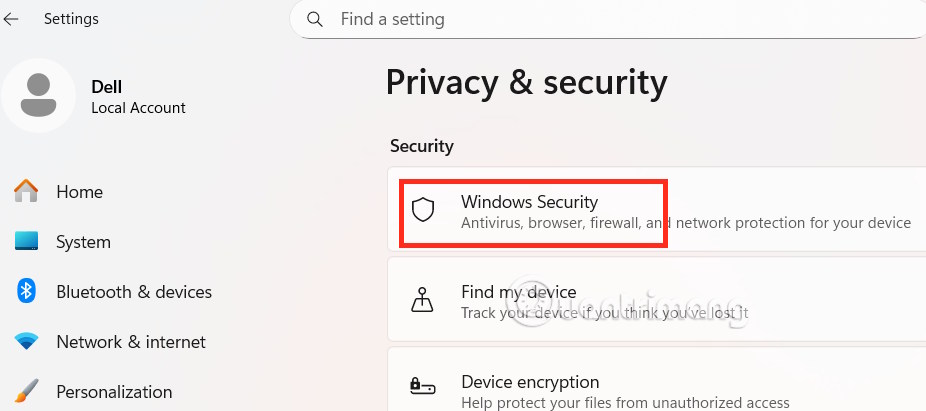
Open Settings on your computer, select Privacy & security , then click Windows Security .
Step 2:
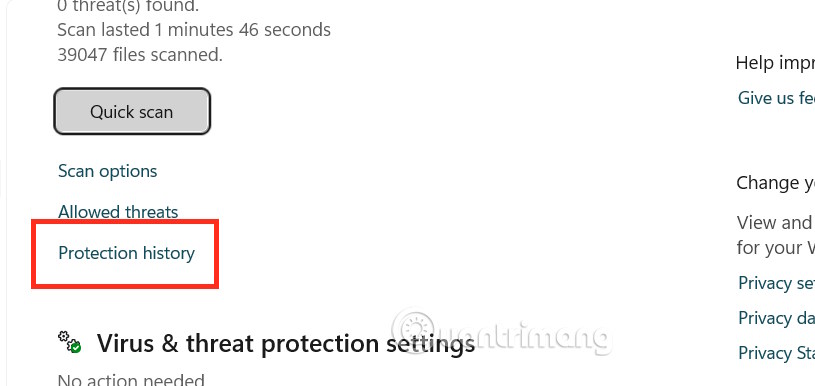
Problematic files will be managed by Windows Defender in a separate section called Virus & threat protection .

Next, select Protection history in the Current threats management section.
Step 3:
The user will then see the files that have been quarantined due to problems. Click on Quarantined items, then select the file that is definitely safe and click on Restore .
This will return the file to its original destination file location (usually the folder where your browser saves downloaded files).
Use Windows Downloader to compress quarantined files
If you're unsure about running a file after it's been unquarantined, you can restore quarantined items in Windows Defender directly using a ZIP file, where they can be password-locked and transferred to another computer.
We also need to access Windows Defender then click on Protection history. Here you click on the Download option from the feedback options. You will see a small pop-up window asking you to enter the password for the new ZIP file and state the reason for restoring the file from quarantine.
The ZIP code will be sent in place of the original item in the previous location.
How to add an exclusion in Windows Defender
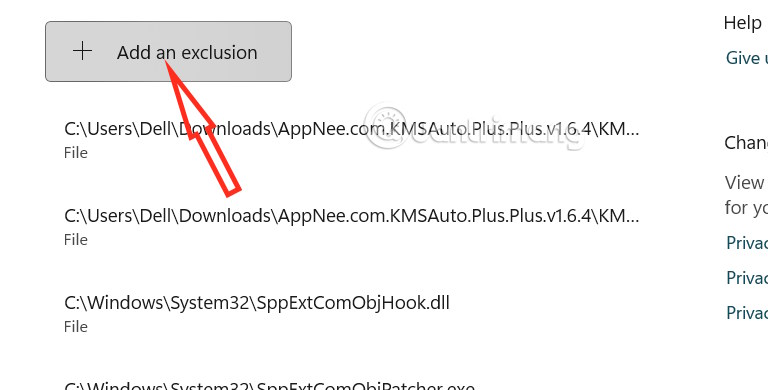
If you need to download a file or similar file periodically and Windows Defender has previously quarantined it, it will usually automatically re-download it each time it runs in the background. You can add an exception to check the file name and source to bypass the security check entirely.
Step 1:
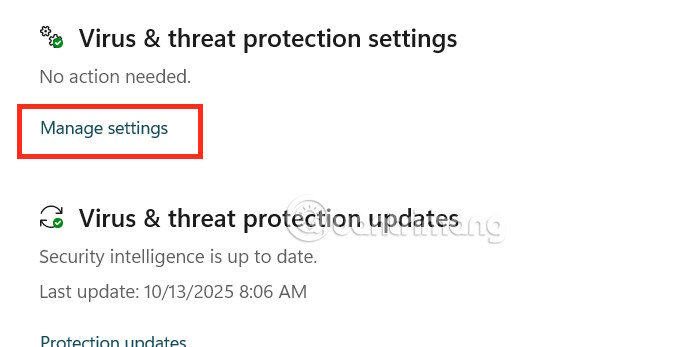
Also in the Windows Defender interface , click on Virus & threat detection settings and then select Manage settings .
Step 2:
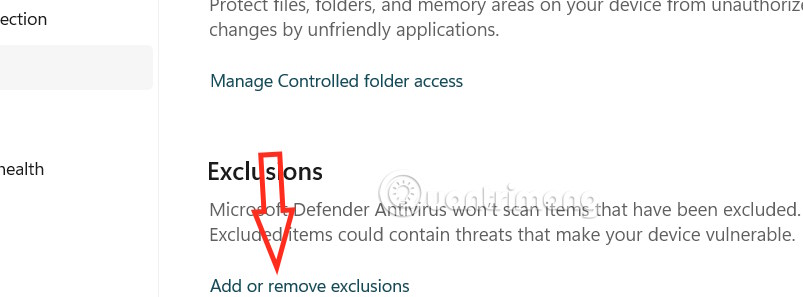
Continue clicking Add or remove exclusions as shown below.
Then click Add exclusion to add exception files you do not want Windows Defender to quarantine.