How to record Skype calls on Windows 10
On Windows 10, Skype comes with an option to record calls directly from the app, which can be useful in many situations.
The recording option is very simple on Windows 10 or any supported platform. You can use it to record voice and video calls from Skype to Skype for up to 24 hours. The recording takes place in the cloud, meaning no local storage is needed. When the recording starts, everyone in the call will receive a notification that the call is being recorded.
In this tutorial, readers will learn the steps to record a Skype call as well as how to download and save recordings on the device or delete them later if not needed anymore.
How to record a voice or video call on Skype
To record a Skype call on Windows 10, follow these steps:
Important note : Before proceeding, make sure the people in the call know that you are going to start recording. When using this feature, you will upload the record to Microsoft servers, where it will save at least 30 days. In addition, this feature is only available when recording calls from Skype to Skype.
1. Open Skype.
2. Select a person from the contact list.
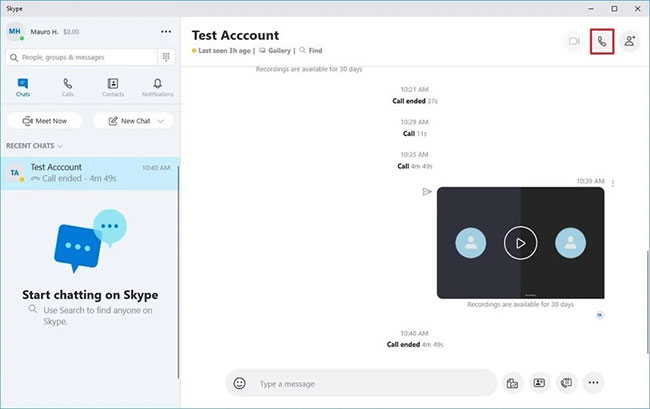
3. Click the Video call or Audio call button to start the session.
 Click the Video call or Audio call button
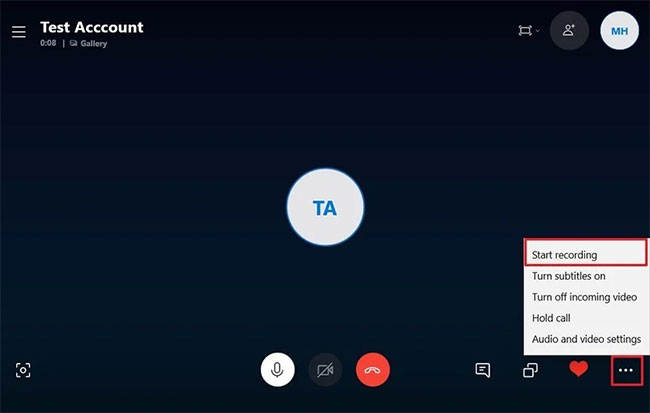
 4. Click the menu button (three dots) from the lower right corner.
5. Select the Start recording option .
 Select the Start recording option
 6. Click the menu button (three dots) from the lower right corner.
Note : You can also click the Stop recording option from the top left corner of the screen.
7. Select the Stop recording option .
When you complete the steps, Skype will start recording the call, whether you are using voice or video.
How to download voice or video recordings on Skype
After you stop recording, the conversation will automatically appear in the Skype chat timeline for anyone in the call to review. However, the log is only available for 30 days, so if you want to keep it, you will need to download the file manually.
To download Skype records, follow these steps:
1. Open Skype.
2. Select the conversation from the Recent Chats section on the left.
3. Hover over the record to open the menu button.
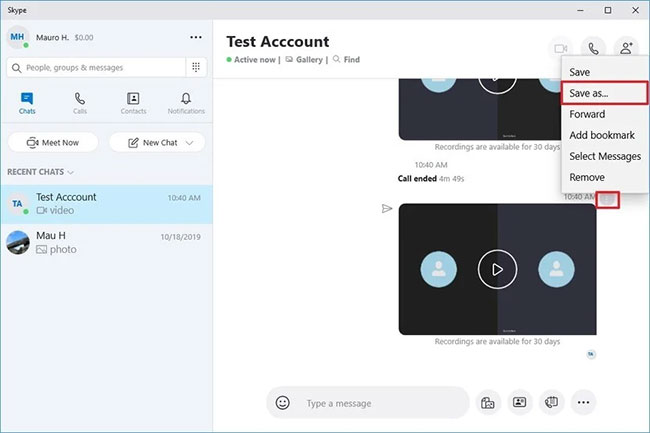
4. Click the menu button (three dots) from the top right.
5. Select the Save as option .
 Select the Save as option
 6. Select the destination folder.
7. Specify a descriptive name for the file. For example: "work_presentation_april_2020."
8. Click the Save button .
After you complete the steps, the Skype record will be saved as an MP4 file. You can play files with almost any media player.
If you plan to share the recording with call participants, you can use the Photos app to cut and edit video files.
How to delete voice or video recordings on Skype
To delete a Skype record, follow these steps:
1. Open Skype.
2. Select the conversation from the Recent Chats section on the left.
3. Hover over the record to open the menu button.
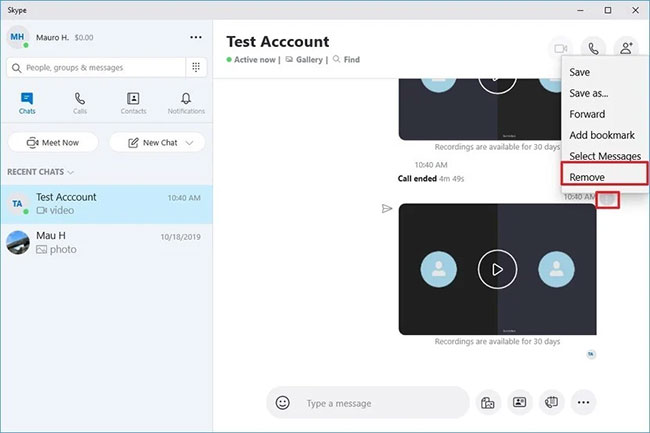
4. Click the menu button (three dots) from the top right.
5. Select the Remove button .
 Select the Remove button
 6. Click the Remove button again.
Once you complete the steps, the recording will no longer be available in Skype's chat history.