Instructions to reset Skype on Windows 10
In addition to downloading and installing Skype software, we can download the Skype application version right from the Windows Store. And in the process of using, encountering some errors such as unable to log in, unable to send or receive messages on Skype will make it difficult for users to use this chat and texting service. If you encounter a Skype error on Windows 10, we can use a way to reset Skype on Windows 10.
Step 1:
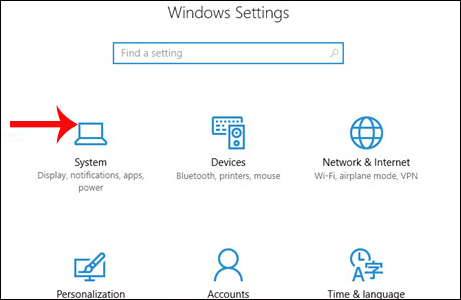
First of all, press the Windows + I key combination to open the Windows Settings interface on the computer. Then we click on the System icon.

Step 2:
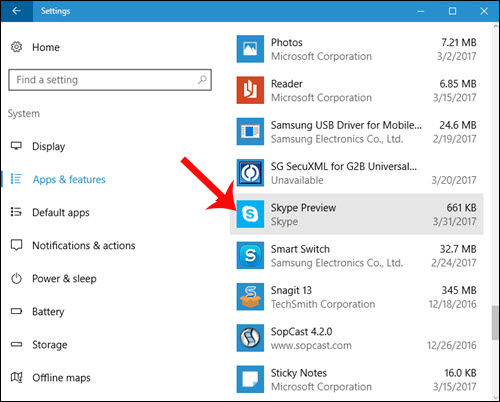
Appears a list of options set on the system to the left of the interface, users click on Apps & features and then find the Skype application in the right content.

Step 3:
Click on the application and then select the Advance Option to expand the advanced options for Skype application.

Step 4:
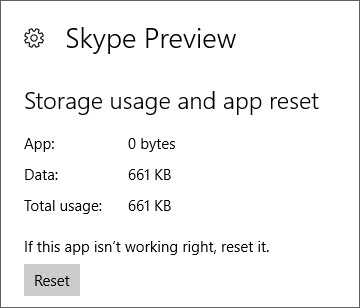
Finally, we just need to click on the Reset button to restart the Skype application, bring the application to its original state.

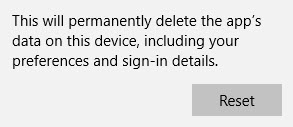
Click on Reset to agree to restart the application.

Restarting the Skype application means that important data and information and temporary files stored on Skype will be deleted. So users need to back up before proceeding to reset the application. If you try to reboot but the application still has errors, you need to uninstall and reload the Skype application on the Windows Store.
When you perform a Skype reset operation on Windows 10 according to the above tutorial, the application will be restarted completely, all data will be gone and from there the errors will be fixed. We just need to restart the Skype application and then log in to the account to use. The way to reset Skype on Windows 10 can be applied to applications installed on the system, if there is an error, it cannot be used.
Hope this article is useful to you!