How to Permanently Delete Files on macOS Without Sending to Trash
No need to move files to Trash, macOS lets you delete them immediately using keyboard shortcuts, the Finder menu, or create your own 'Delete Immediately' option. Detailed instructions with safety warnings for use.
The Trash on macOS is where files you delete are temporarily kept—making it easy to restore things you no longer need without having to dig through a backup. It also virtually eliminates the risk of accidentally deleting something.
However, if you want to immediately delete a file without sending it to the Trash, macOS still allows you to do that.
Delete files with keyboard shortcuts
Normally, to move a file to the Trash, you use Command + Backspace .
But if you want to skip that step and delete it permanently , use Option + Command + Backspace .
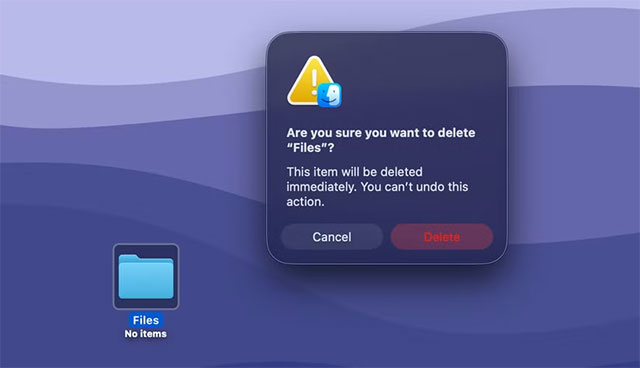
Just select the file or folder you want to delete, then press the above key combination. A dialog box will appear to confirm the action, warning you that you can't undo it .
Press Delete to delete it, or Cancel if you change your mind.
The Option key is a 'magic' key in macOS — it hides a lot of useful extra features that people often overlook. If you have the time, try holding it in menus to discover some cool hidden options.
Delete directly via Finder menu
If you don't like keyboard shortcuts, Finder has a similar option available.
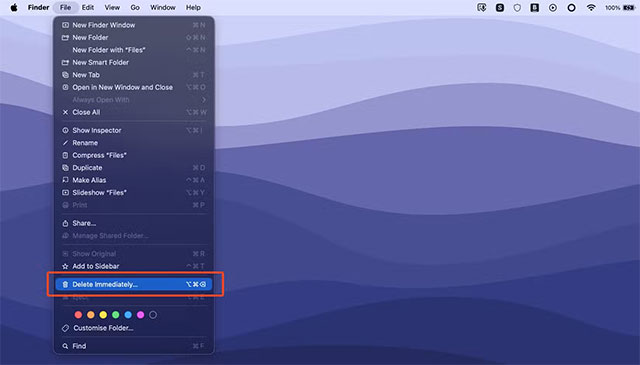
Select the file you want to delete, open the File menu , then hold down the Option key —the Move to Trash line will then change to Delete Immediately . Select this and confirm to delete it immediately.
Create 'Delete Now' option in right-click menu
If you are an advanced user, you can add the 'Delete Immediately' feature to the right-click menu in Finder using the Shortcuts app . This option allows you to delete files without confirmation , so be extremely careful when using it.
How to do it:
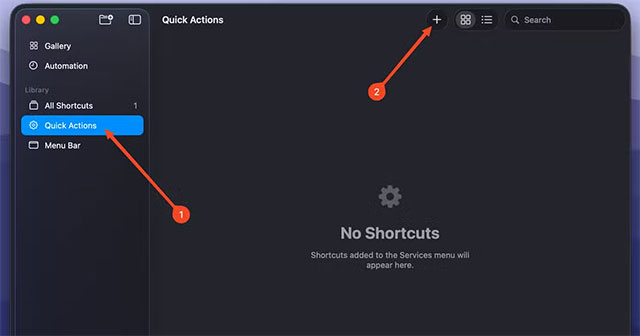
1. Open the Shortcuts app , select Quick Actions in the sidebar, then tap the + sign to create a new action.
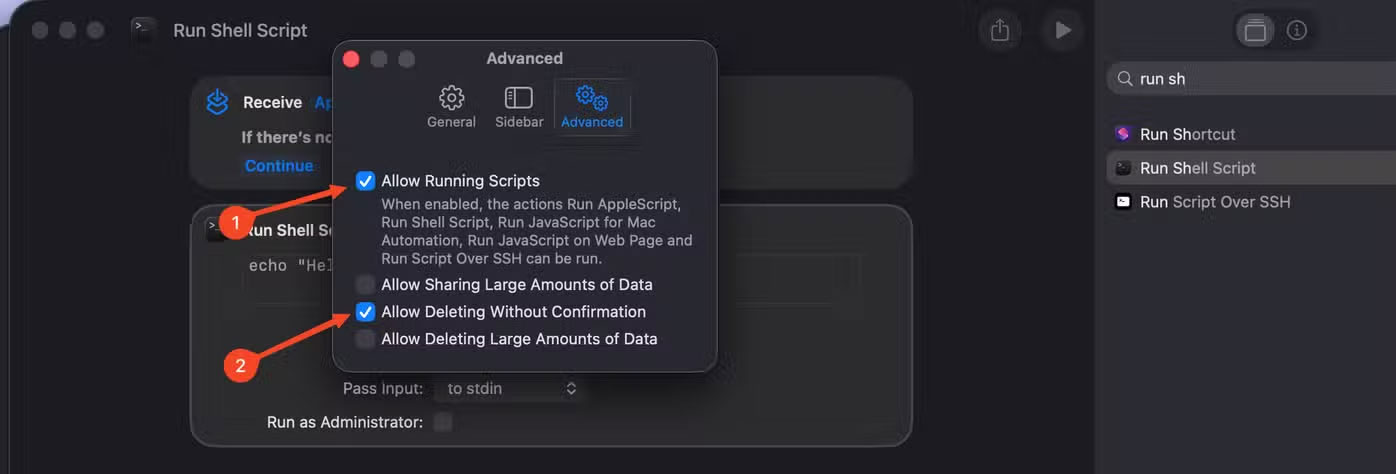
2. In the Search Actions box , type 'Run Shell Script' and double-click to add.
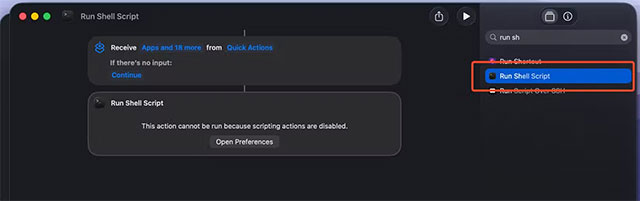
3. If this is your first time using this feature, macOS may give you an error because execution permissions are not enabled. Click Open Preferences , then enable Allow Running Scripts and Allow Deleting Without Confirmation .

4. In the 'Run Shell Script' box, select Shell: zsh and Pass Input: as arguments .
5. Paste the following code into the content box:
#!/bin/zsh for f in "$@"; do /bin/rm -rf -- "$f" done This script will immediately delete the selected file or folder without asking again .
If you want to add a confirmation step, use the version with the following message:
#!/bin/zsh response=$(osascript -e 'display dialog "Permanently delete selected file(s)? This cannot be undone." buttons {"Cancel", "Delete"} default button "Cancel"') if [[ "$response" == *"Delete"* ]]; then for f in "$@"; do /bin/rm -rf -- "$f" done fi 6. Close the window, right-click on the newly created Quick Action, select Rename to rename it — for example, 'Delete Immediately'.
You can change the color, add an icon for easy recognition.
7. To enable, right-click any file → Quick Actions → Customize , enable 'Delete Immediately' and select Done .
From now on, when you need to delete quickly, just right-click → Quick Actions → Delete Immediately . If you use the unsigned version, the file will disappear immediately; but if there is a dialog box, just press Delete to finish.
You can also use the Shortcuts app to create more convenient actions for macOS — from automatically organizing files, converting image formats, to managing your system.
Be careful with the 'permanent delete' operation
Before we wrap up, it's important to note that skipping the Recycle Bin will permanently delete a file. You can't undo or restore it. So use this feature sparingly, and avoid making the Option + Command + Backspace key combination a subconscious reflex.
One wrong press could mean you lose important data forever.
However, this deletion method is still extremely convenient, especially when you regularly deal with large files such as videos or photos, which take up a lot of space and quickly fill up both the Recycle Bin and SSD.
- How to add trash to permanently delete files on Windows 10/11
- Delete files on Mac directly without the Trash trash
- How to delete trash automatically on Mac
- How to recover deleted files permanently in the trash
- 2 ways to permanently delete files on Windows
- Delete Files on Mac - Empty Trash or Secure Empty Trash?
- How to recover deleted files on macOS
- 6 ways to permanently delete files on Windows - You will not be able to get that file back again
- How to Permanently Remove Sensitive Files and Data from a Computer
- Delete the most 'stubborn' files on Windows
- How to master battery management features on Mac
- 18 useful features on macOS operating system you may not know yet
- How to hide, display files and folders on macOS
- 5 steps to fix a crashed and inactive Mac error
- How to bring Night Shift feature to Mac with F.lux
- How to fix signature errors when upgrading macOS
- Instructions for automatic login on Mac
- How to bring Gmail shortcuts to macOS Mail application
- How to prevent Apple Mail from automatically turning on when opening email on macOS
- How to use the Tyke macOS note application
-
 How to delete macros in Excel, quickly disable macros.
-
DROP DATABASE command in SQL
-
Grok chat history deletion guide
-
Instructions on how to delete Copilot history in Edge Windows
-
Instructions on how to delete the Windows Installer folder on Windows
-
How to delete multiple phone numbers from your iPhone contacts.
 How to delete macros in Excel, quickly disable macros.
 DROP DATABASE command in SQL
 Grok chat history deletion guide
 Instructions on how to delete Copilot history in Edge Windows
 Instructions on how to delete the Windows Installer folder on Windows
 How to delete multiple phone numbers from your iPhone contacts.