Instructions on how to delete the Windows Installer folder on Windows
The Windows Installer folder contains a significant amount of installation files. We can delete the hidden installation folder within Windows Installer to free up computer space..
Windows still retains some files to ensure you can restore applications and programs to a previous version when you want to reinstall them. The Windows Installer folder contains quite a lot of installation files. We can delete the hidden installation folder in Windows Installer to free up computer space .
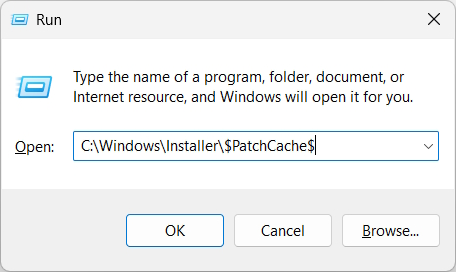
Manually delete the Windows Installer folder.
Open the Run dialog box and enter the following path.
C:WindowsInstaller$PatchCache$
We'll proceed to delete each folder one by one over several days. You shouldn't delete them completely; instead, move them to the Recycle Bin, or create a backup on another drive if possible.
If you encounter a problem with a program, simply return the file to the Recycle Bin folder.
Use Disk Cleanup to delete the Windows Installer folder.
The built-in Disk Cleanup tool can delete some leftover files when the Disk Cleanup folder becomes too large.
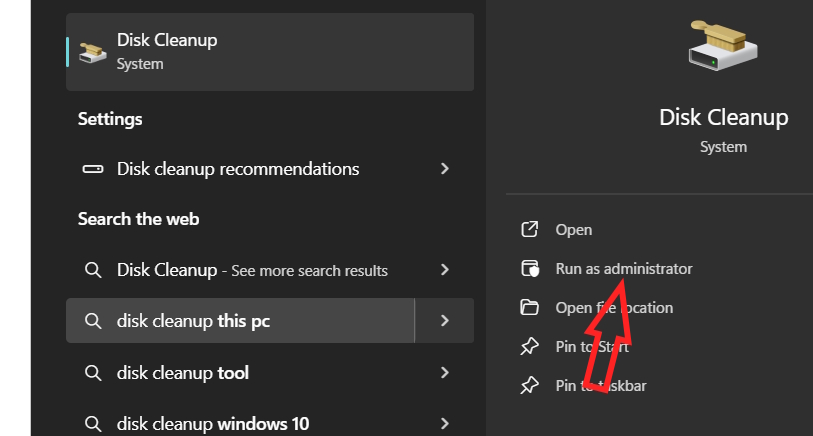
Step 1:
Type "Disk Cleanup" into the search bar , then click "Run as administrator" to run it with administrator privileges.
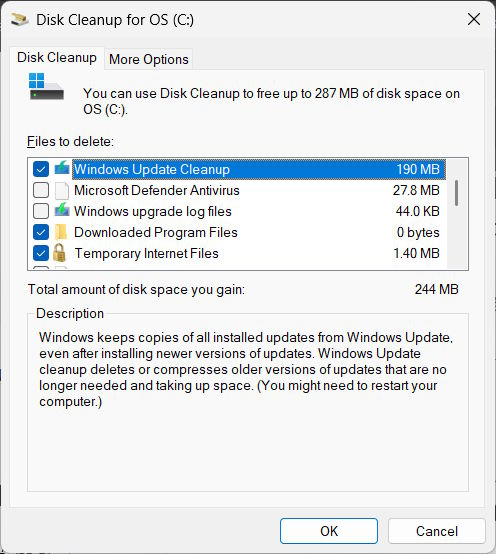
Step 2:
We will check the Windows Update Cleanup box , then click OK and wait for the process to complete.
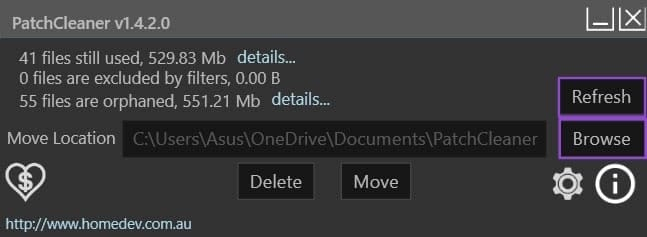
Using third-party tools
There are several tools available to delete old files that are taking up computer space. For example, the PatchCleaner tool, which can be downloaded from the link below.
https://sourceforge.net/projects/patchcleaner/files/PatchCleaner/v1.4.2.0/PatchCleaner_1.4.2.0.exe/download
You can choose whether to delete the files or move them to another location if there is free space on another drive to use. If you want to move the files to an empty Windows Installer folder, click Browse to find the destination folder.
Finally, press Refresh to refresh the system.