Instructions to remove the All apps option on Windows 10 Start Menu
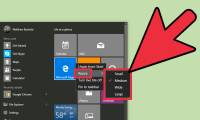
On Windows 10, Start Menu is designed quite modern and friendly. In the left pane, users will see some useful programs and quick access options and All Apps options. When you click on the All Apps option on the Start Menu, will display all the programs you have installed on the system.
Table of Contents
On Windows 10, Start Menu is designed quite modern and friendly. In the left pane, users will see some useful programs and quick access options and All Apps options. When you click on the All Apps option on the Start Menu, will display all the programs you have installed on the system.

Assuming that for some reason you want to remove the All Apps option on the Start Menu, you can use Registry Editor or Group Policy Editor to remove the All Apps option on the Start Menu.

1. Use Registry Editor to remove the All Apps option on the Start Menu
To remove the All Apps option on the Windows 10 Start Menu using the Registry Editor, all you need to do is create a new value.
To do this, first press the Windows + R key combination to open the Run command window, then enter regedit in the Run command window and press Enter to open the Registry Editor.

On the Registry Editor window, navigate to the key:
HKEY_CURRENT_USERSOFTWAREMicrosoft WindowsCurrentVersionPolicies

Here you right-click the Policies key, select New and then select Key to create a new key.
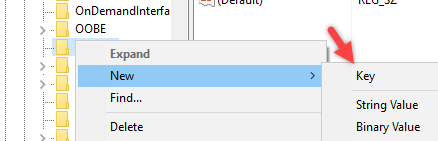
Name this key Explorer.
Next right-click on the right pane, select New => DWORD (32-bit) Value to create a new DWORD.
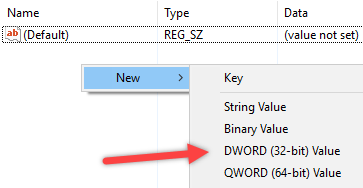
Next name the Value you just created as NoStartMenuMorePrograms and then press Enter .

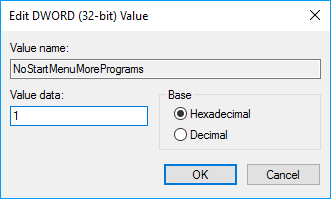
By default, the new Value you just created is set to 0 in the Value Data frame, your task is to change this value. To do this, double click on the value you just created to open the Edit value window. Here you reset the value in the Value Data frame to 1 and then click OK to save the change.
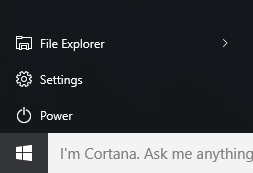
Finally proceed to restart your computer and check on the Start Menu, the All apps option (all applications) is now completely gone.
If you want to re-display the All apps option on the Start Menu, follow the same steps and change the value in the Value Data box to 0 or simply delete the new Value you created.
2. Use Group Policy Editor
If you use Windows Pro or Enterprise version, you can use Group Policy Editor to remove the All Apps option on Start Menu.
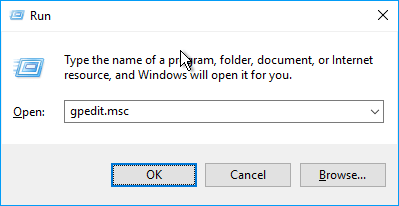
First, press the Windows + R key combination to open the Run command window, then enter gpedit.msc in the Run command window and press Enter to open the Group Policy Editor.
Next on the Group Policy Editor window, in the left pane you navigate to the key:
User Configuration -> Administrative Templates -> Start Menu and Taskbar
Find and double-click Remove All Programs list from the Start menu in the right pane to open the options properties window.

On the properties window of the option, click Enabled , then click OK to save the changes.

Just restart your computer or log out and log back in to see the All Apps option disappeared on the Start Menu.
If you want to re-display the All Apps option on the Start Menu, follow the same steps, then on the properties window click on Disabled or Not configured.
Refer to some of the following articles:
- Speed up Windows 10 from boot to shutdown
- Summary of some ways to fix USB Device Not Recognized on Windows 7, 8 and 10
- Some tips to free up Windows 10 computer hard drive space
Good luck!
Was this article helpful?
Your feedback helps us improve.
Related Articles
 How to Disable Suggested Apps from Start Menu in Windows 102 minutes read
 How to disable the uninstall app option in the Windows 11 Start menu.2 minutes read
 How to remove recently added apps from the Windows 10 Start menu2 minutes read
 Windows 11 is hiding a second Start menu: Why should you use it?7 minutes read
 2 simple ways to remove SkyDrive Pro option in Windows 10 Right-click Menu3 minutes read
 How to Use the Windows 10 Start Menu7 minutes read
Reader Comments 0
Sign in with email or Google to join the discussion.