How to Hide Any Specific Drive in Windows
In this article you will learn how to use Local Group Policy to allow you to hide any Windows drive you want to secure the drive for example.
Table of Contents
You can easily edit some settings in Local Group Policy to block editing Control Panel on your computer, prevent access to hard drives,. And in this article you will know how to use Local Group Policy to allow you to hide any drive you want to secure the drive, for example.
Instructions for hiding drives on Windows
Step 1:
Users open the Run dialog box then type gpedit.msc to open Local Group Policy. Next, you access the path User Configuration > Administrative Templates > Windows Components > File Explorer .

Step 2:
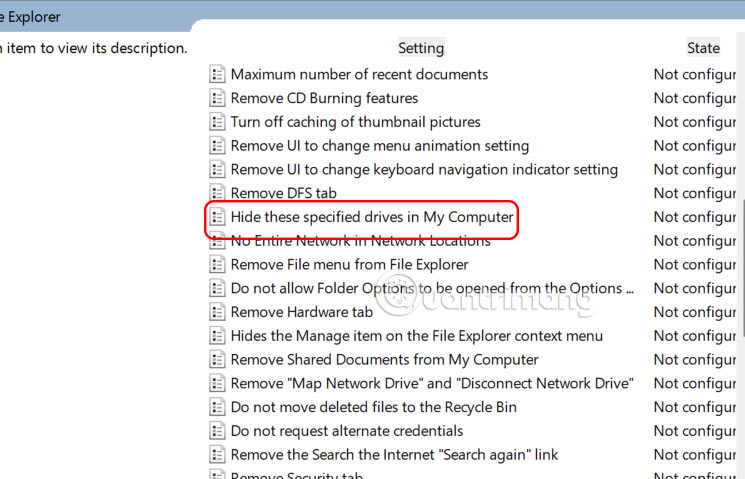
Look at the content next to it and click on Hide these specified drives in My Computer to adjust the drive hiding mode on your computer.
Step 3:
In the new interface, the user clicks on Enabled and then looks down at the Pick one of the following combinations section and selects the drive you want to hide on the computer.
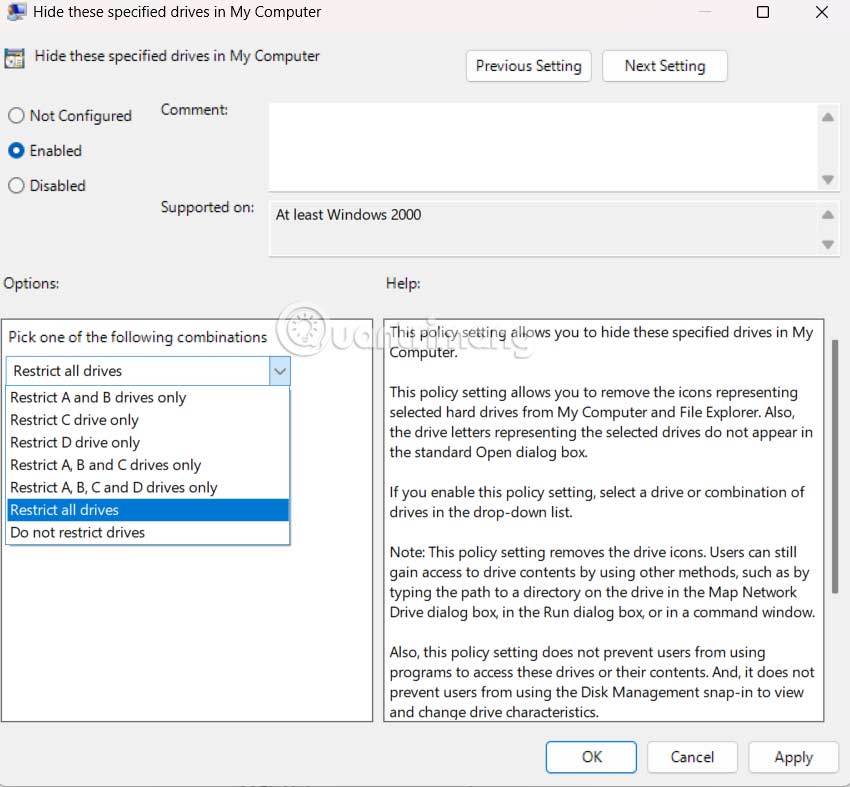
After selecting the drive you want to hide, click Apply to save the changes.
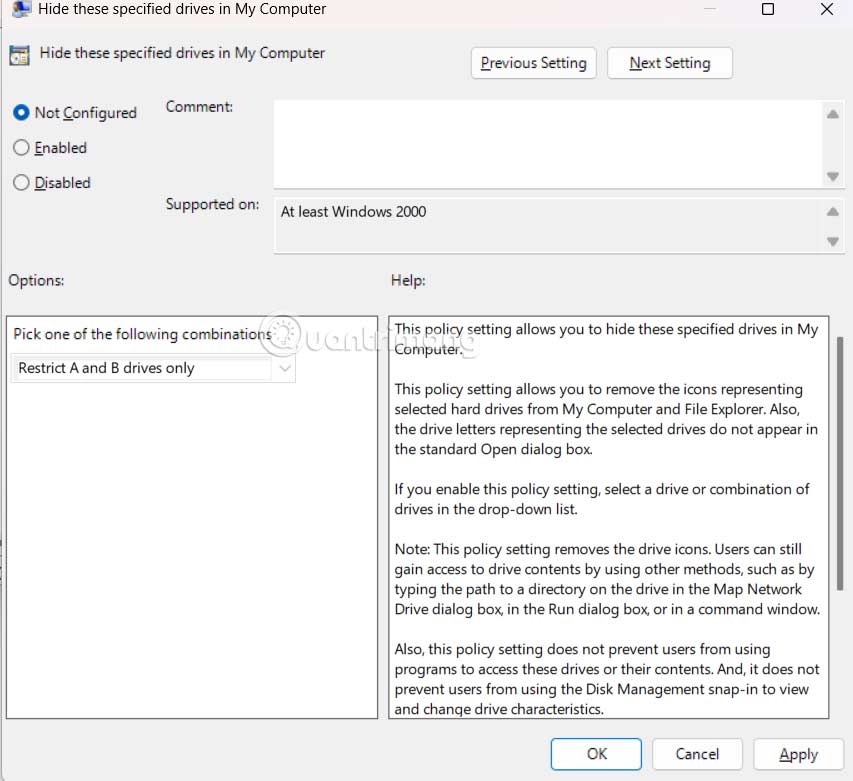
To return to the old settings, unhide the drive on the computer, click on Not Configured and then click Apply to save the changes.
Was this article helpful?
Your feedback helps us improve.
Related Articles
 Hide the drive in Windows XP2 minutes read
 How to hide background processes in Windows 112 minutes read
 How to hide specific file types from search results on Windows 113 minutes read
 How to show / hide fonts in Windows 10/83 minutes read
 2 ways to hide hard disk partitions on Windows2 minutes read
 How to hide a specific folder from search results on Windows 112 minutes read
Reader Comments 0
Sign in with email or Google to join the discussion.