Table of Contents
Learn how to change ownership of onedrive files and folders with clear steps, practical tips, and troubleshooting guidance for a reliable result.
Instructions on changing OneDrive file ownership
Step 1
First, you need to create a new folder in OneDrive to transfer the files whose ownership you want to change.
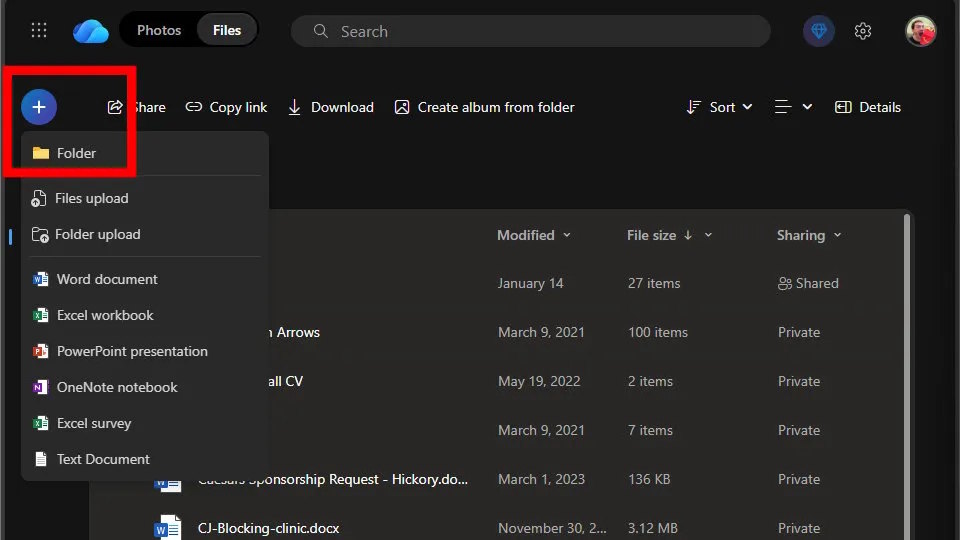
Step 2
Move the files whose ownership needs to be changed into the newly created folder, then proceed to send them to the person you want to send them to by pressing Send.
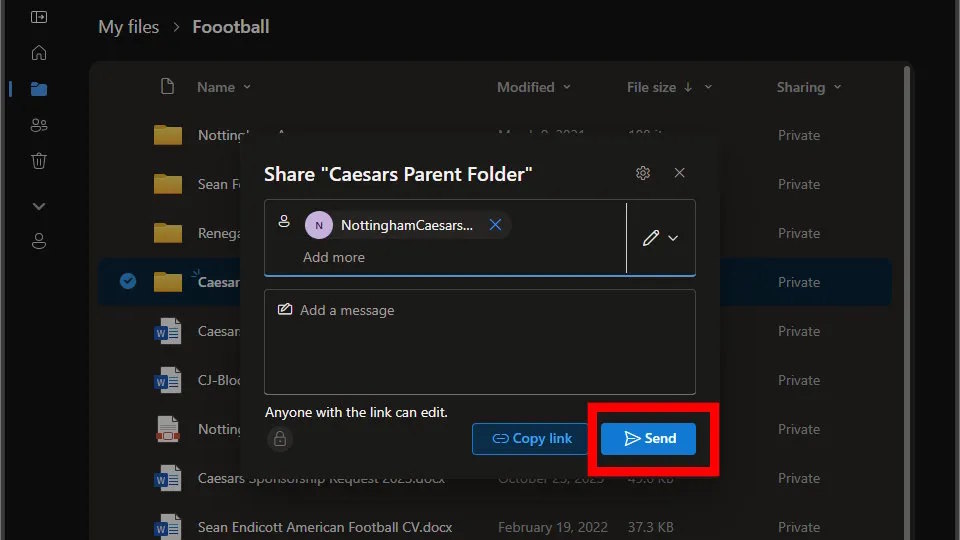
Step 3
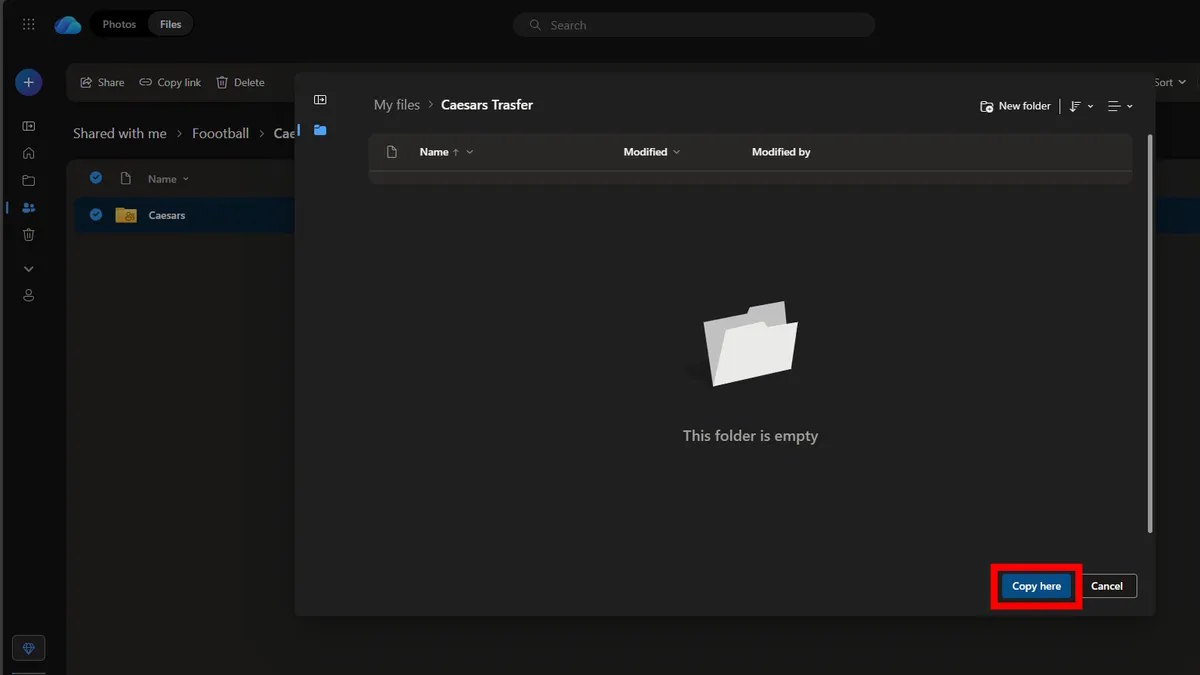
In the newly received OneDrive account, select the folder containing those files , then tap the three-dot icon, and select "Copy to" to move those files to another folder .
Finally, select "Move here" to move it to the new folder, and you're done.
Final Thoughts
Use this guide as a practical checklist for how to change ownership of onedrive files and folders. Work through the steps in order, verify each result, and adjust the options to match your needs.
FAQ
What do you need before following this How to Change Ownership of OneDrive Files and Folders guide?
Review the required tools, accounts, settings, or materials mentioned in the article. Learn how to change ownership of onedrive files and folders with clear steps, practical tips, and troubleshooting guidance for a reliable result.
What are the main steps for how to change ownership of onedrive files and folders?
Follow the sections in order, especially Instructions on changing OneDrive file ownership, Step 1, Step 2. Complete each step before continuing and verify the result as you go.
What should you do if the process does not work as expected?
Recheck the prerequisites, update the relevant app or service, review the settings, and repeat the step that caused the issue. Use any troubleshooting notes included in the guide.
Related Articles
 How to Change Folder Ownership in Google Drive4 minutes read
 OneDrive Launches File Protection for Windows 10 Users4 minutes read
 Fix the Error That Onedrive Files or Folders Could Not Be Deleted7 minutes read
 5 Ways to Share Files and Folders from Onedrive in Windows 109 minutes read
 How to Prevent Windows from Saving Files to Onedrive5 minutes read
 Add Take Ownership Option to Right-click Menu on Windows 104 minutes read
Reader Comments 0
Sign in with email or Google to join the discussion.