Table of Contents
This practical guide explains how to hide and show files in Windows 11 without software. Follow the steps in order, review the requirements first, and use the troubleshooting notes when a setting or option does not work as expected.
Hide files in Windows 11 from File Explorer
Step 1:
We open File Explorer on the computer, then right-select the file or folder you want to hide and select Properties .
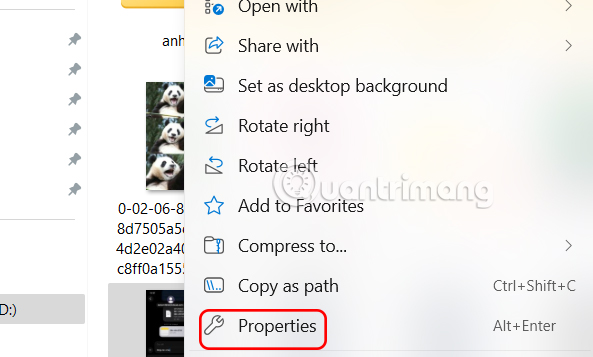
Step 2:
Move to the new folder, select the General tab and look down below, select Hidden to hide this file and select Apply to save the settings.
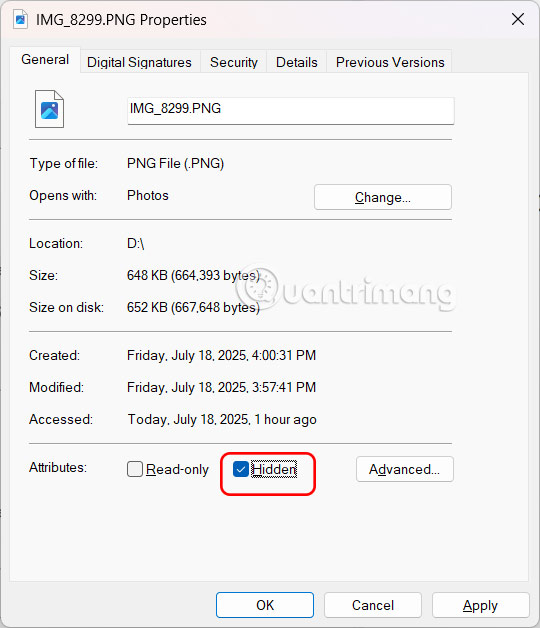
How to displaying files in File Explorer
Step 1:
In the folder where the hidden file is saved, or the drive containing the folder, click View and select Show > Hidden Items to display hidden files.
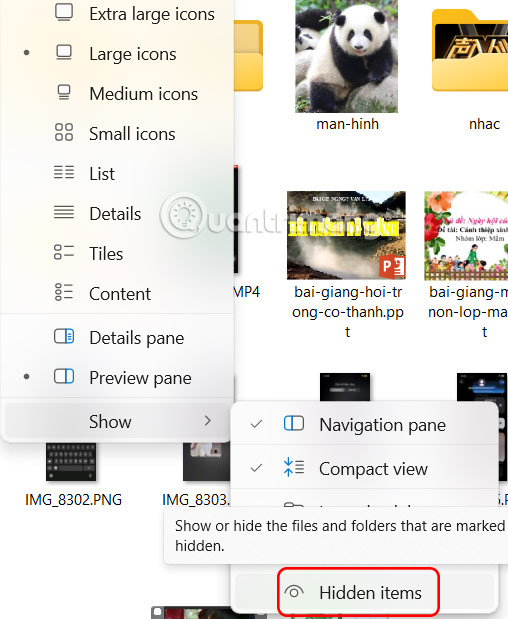
Step 2:
Now you will see the hidden file is blurred. Right select the file and select Properties. Then select the General tab, uncheck Hidden and click Apply .
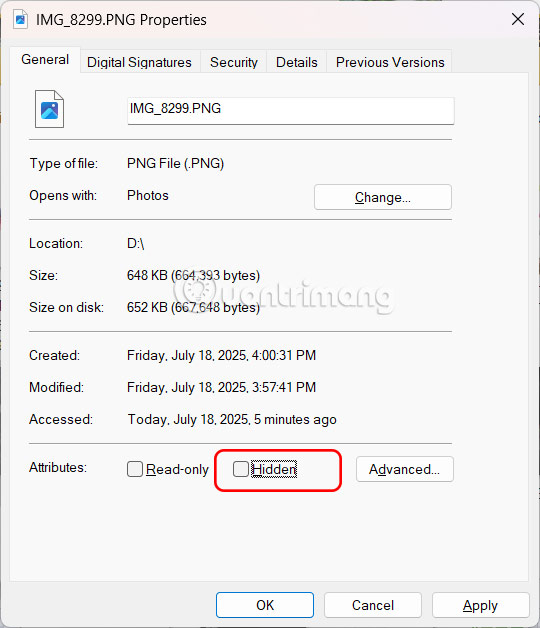
How to hide and show files in Windows 11 using Command Prompt
Step 1:
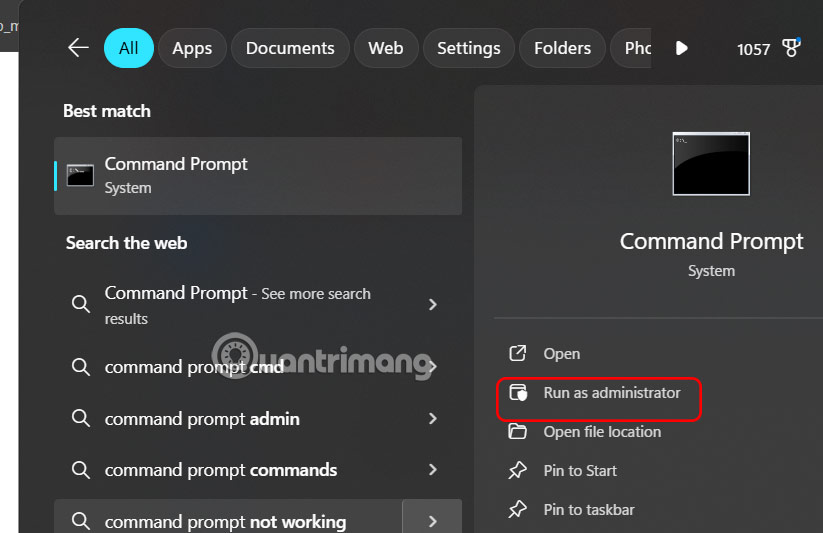
Type Command Prompt in the search bar and click Run as administrator to open it.
Step 2:
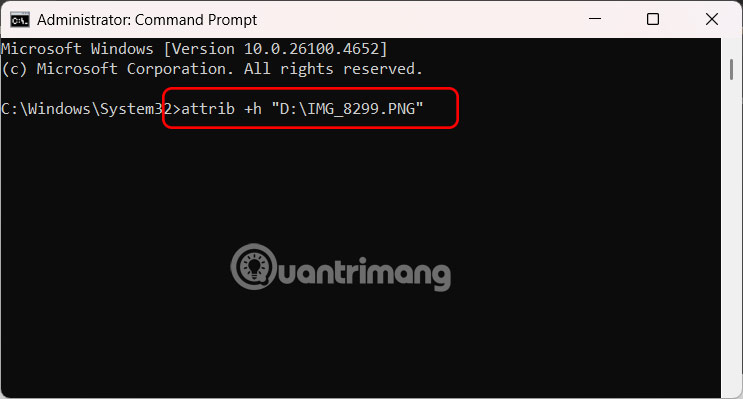
Display the Command Prompt interface, you type attrib +h 'path of the file/folder you want to hide . This will immediately hide your file or folder.
Step 3:
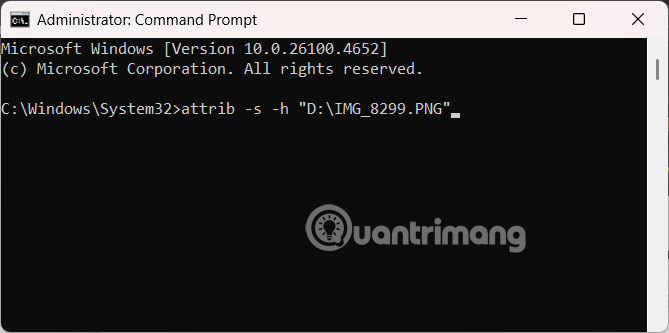
To display the file again, enter the command attrib -s -h 'file path to display'.
FAQ
What should you know about hide files in Windows 11 from File Explorer?
We open File Explorer on the computer, then right-select the file or folder you want to hide and select Properties.
How to displaying files in File Explorer?
In the folder where the hidden file is saved, or the drive containing the folder, click View and select Show > Hidden Items to display hidden files.
How to hide and show files in Windows 11 using Command Prompt?
Type Command Prompt in the search bar and click Run as administrator to open it.
Related Articles
 How to Show and Hide Files in Windows 103 minutes read
 How to Show or Hide Files in Windows 73 minutes read
 How to Show Hidden Files and Folders on Windows 10/8/74 minutes read
 How to Hide Files, Show Hidden Files, View Hidden Folders and5 minutes read
 How to HIDE / SHOW Files and Folders by CMD Command on Win6 minutes read
 How to Use Media Lock to Hide Files on Windows 103 minutes read
Reader Comments 0
Sign in with email or Google to join the discussion.