How to export printing images in Photoshop
Photoshop provides users with many options to export image files, not only the option to save images to a computer. You can use images to print as advertisements, post on social networks or print as complete files. Or if you want to export image files to send via email, you can also convert photos as PDF or lower quality JPG images to easily send via email. The following article will guide you how to export image files in Photoshop.
1. Export Photoshop image file to print
To bring the image to print, we set the image to the highest quality level. The color model used will be the CMYK standard.
At the Photoshop image you want to export, click Edit and select Convert to Profile .

Then the user selects to go to Profile as Working CMYK as shown and then click OK to continue.

Users proceed to save the image, click Save As and then select the file format to save as JPEG .

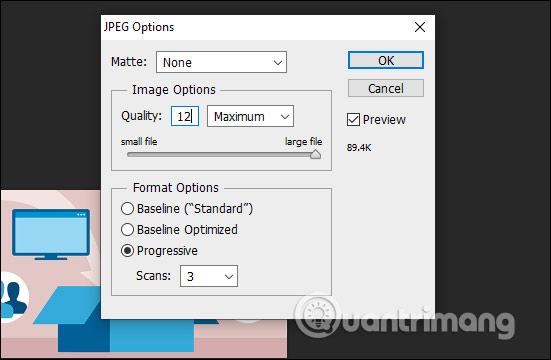
Now display the image custom interface, the Quality section is Maximum or at levels 10 - 12 .

2. Export images to Facebook or website
Images uploaded to the website should ensure good image quality but not too large image size.
Method 1: Save the image manually
We click Save As to save the image in JPEG format to save the image file with a low capacity. In the JPEG Options section, choose Quality at 6-8 level for good image quality and not blurry but not too high capacity.

Method 2: Set images automatically for websites
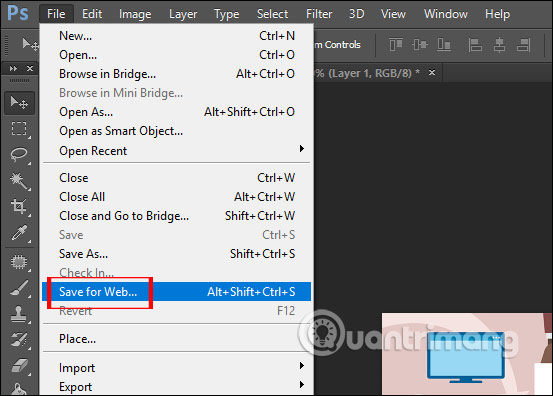
Click on File and then click Save for Web .

Then click on the Optimized tab . Continue with the Preset section to select J PEG Low, Medium or PNG to export images with good quality but not too high image size. Click Save to save.

3. Export photos by email
Images when emailed should be smaller than A4-sized images, using low-quality image files.
Method 1: Export low-quality JPG images
Click Save A to save the image in JPEG format , then the Quality section is low and select from 1-3 .

Method 2: Export images in PDF format
We click Save As and select the save format as Photoshop PDF (* .PDF, * .PDP) .

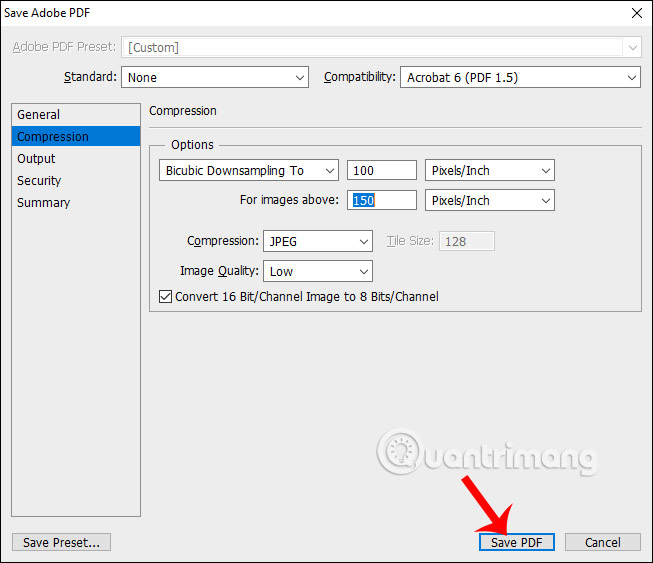
At the new Compression interface we look to the side of the Image Quality section select Low and then click Save PDF is done.

See more:
- Instructions for creating animations, GIFs with Adobe Photoshop
- How to sharpen images in Photoshop in 2 ways
- How to crop a circular image in Photoshop
- Instructions to reduce the image size in bulk Photoshop
I wish you successful implementation!