Table of Contents
This guide explains how to export Photos, Save Photos in Photoshop, with clear steps, practical tips, and important checks before you begin.
I. How to save photos in Photoshop
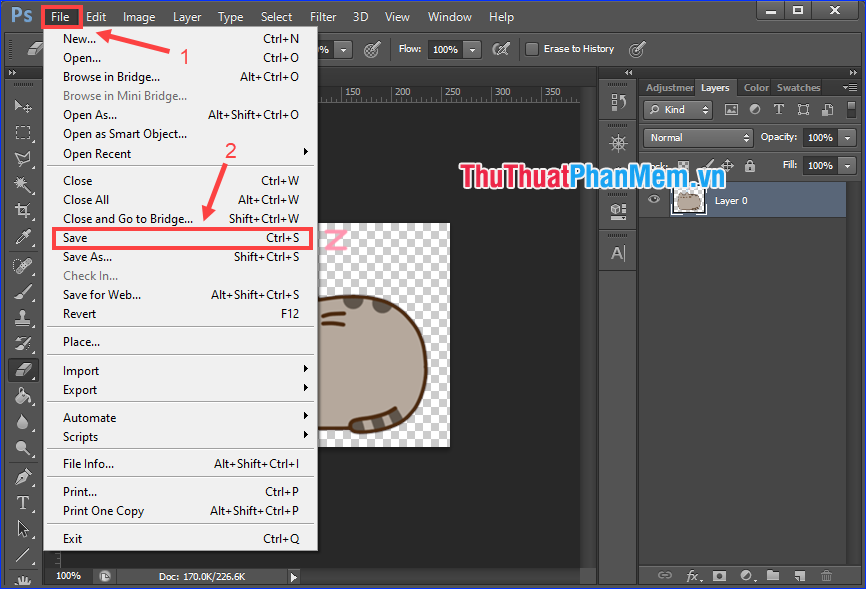
In Photoshop, to save their working files, please click on File > Save or pressing Ctrl + S .
Select the folder containing the file, name the file, select the format as. PSD and then click Save .
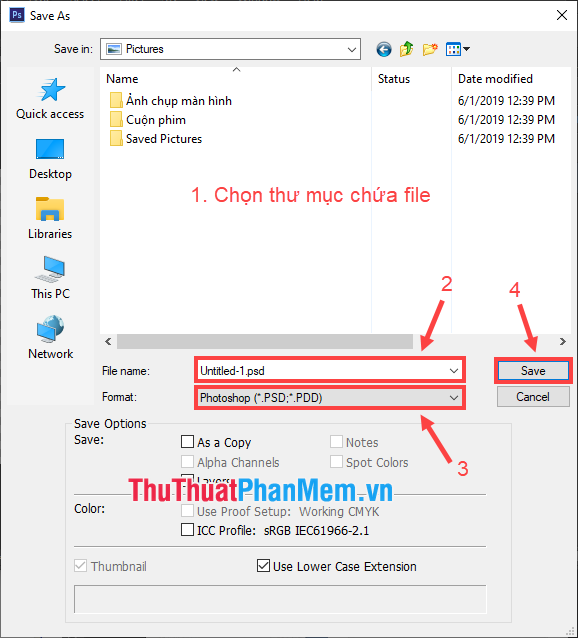
Only the first time you save the file, you have to customize many of the above. The next time you save you just press Ctrl + S, all changes will automatically be applied to the created file. Because the operation is much simpler, you should formulate a habit for yourself to regularly save files while working, to prevent problems such as power outages, crashes, etc. begin again.
II. How to export images in Photoshop
Saving a. PSD file only saves your work in Photoshop, so it can only be opened by Photoshop. The ultimate purpose of photo editing is to produce an image that can be viewed by other devices, so after the editing is complete you need to export the file to an image format, such as. JPG or. PNG.
Photoshop provides two options for exporting images: for general purpose and for web.
1. Export photos for normal purposes
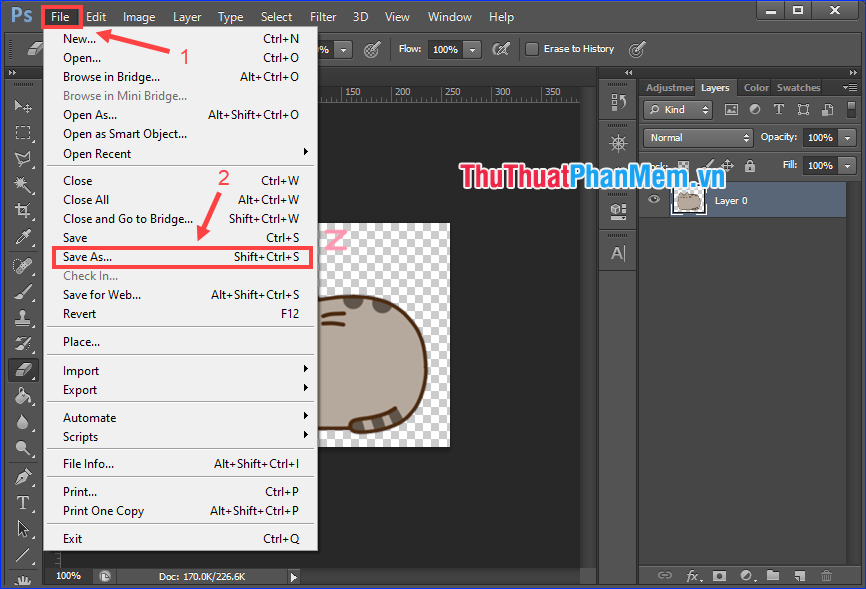
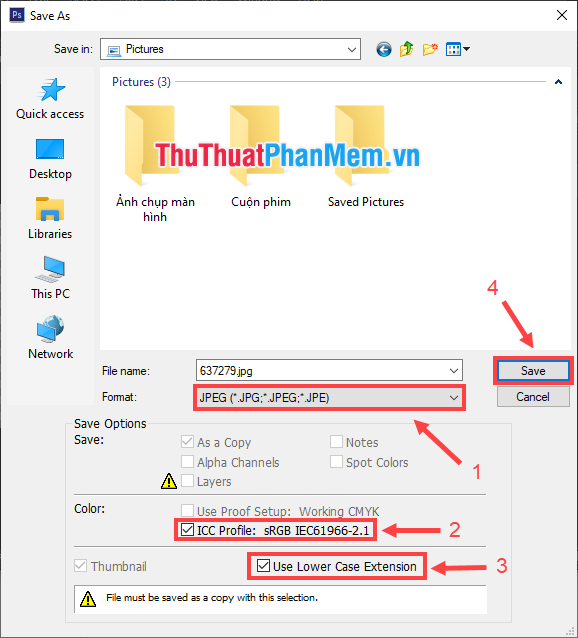
To export an image, click on File > Save As. or press Shift + Ctrl + S .
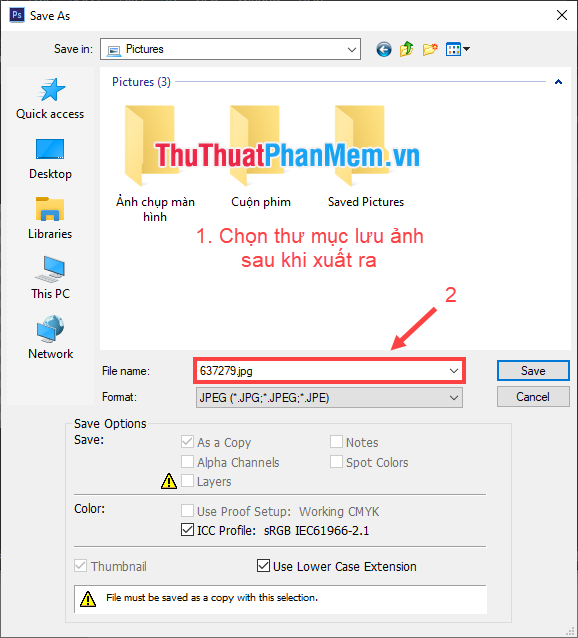
Select a folder to save the exported image, give the file a name, and choose a file format. The two most common image formats for common use are JPEG and PNG.
a) Case 1: If exporting in JPEG format
- Check the box ICC Profile: sRGB IEC61966-2.1 (to help prevent color errors when printing or uploading) and Use Lower Case Extension (the extension is written in lowercase, this is mandatory in a number of cases, such as saving images on the web), then press Save .
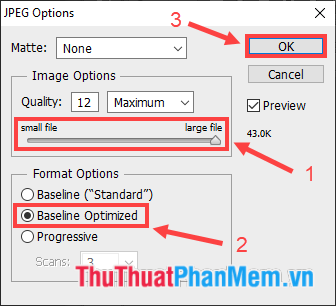
- In the JPEG Options dialog box, drag the Quality bar to change the image quality up or down depending on your needs. Select Baseline Optimized if you want to optimize the image. Finally click on OK .
* Note: Images saved in JPEG format will lose transparent areas.
b) Case 2: If exported in PNG format
- Check the box Use Lower Case Extension (the extension is written in lowercase, this is required in some cases, such as saving images on the web), then press Save .

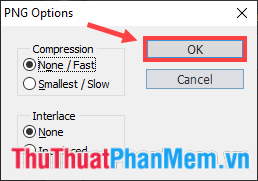
- In the PNG Options dialog box, under Compression , select None if you do not want to compress the image (or Smallest if necessary to reduce the size). For Interlace, select None . Finally click OK .
2. Export images to optimize for the web
Typically, the larger the image, the higher the quality. However, when displaying images on the web, we need to optimize the image size so that the page load does not take too much time, making viewers feel uncomfortable.
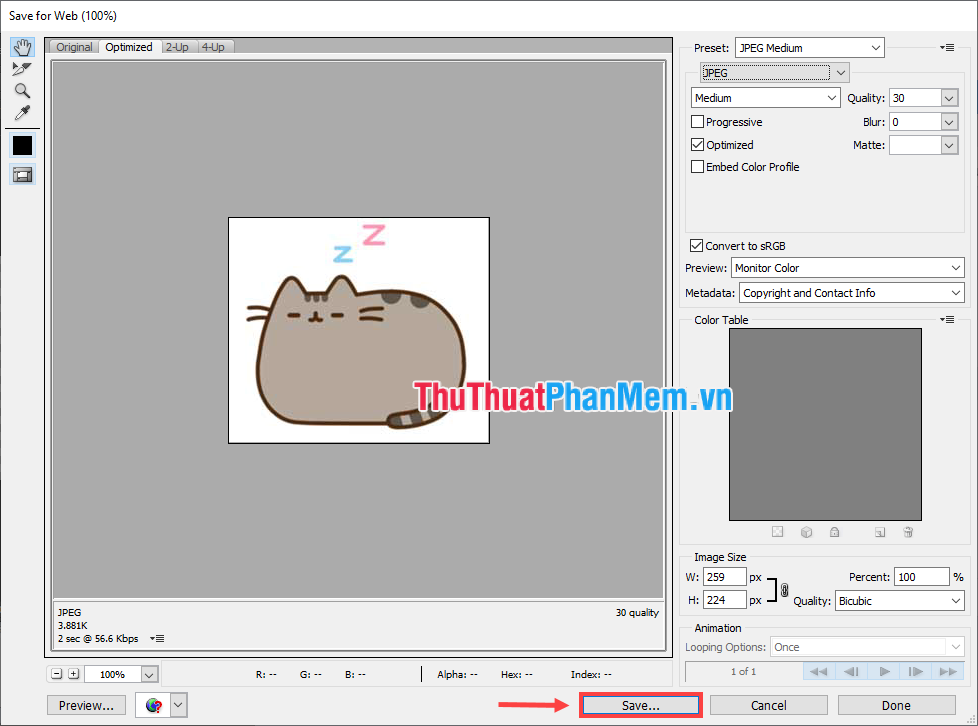
To do this in Photoshop, click on File > Save for Web. or press Alt + Shift + Ctrl + S .

In the window that appears, you can choose the image format, customize the quality, optimize, size. The preview image on the left will help you track changes before deciding to export. photo out. Finally click on Save .
Through his article on how to save photos, export photos in Photoshop so that the output image best suits your needs. I wish you soon become proficient in this job!
FAQ
What should I know about Export Photos, Save Photos in Photoshop?
Focus on the key features, requirements, limitations, and practical use cases explained in this guide.
How do I get the best results with Export Photos, Save Photos in Photoshop?
Follow the recommended steps, use current software or information, confirm compatibility, and review settings before major changes.
Are there any risks or limitations?
Potential limitations depend on compatibility, data quality, cost, privacy, support, and how the product or method is used.
Related Articles
 How to Export Printing Images in Photoshop3 minutes read
 How to Set up and Use the Quick Export Feature in Photoshop5 minutes read
 How to Cut Circular Images in Photoshop: Cut Photos on Photoshop4 minutes read
 How to Create SVG from PNG or JPG in Photoshop4 minutes read
 How to Export Google Photos Library5 minutes read
 minutes read
Reader Comments 0
Sign in with email or Google to join the discussion.