How to disable the uninstall app option in the Windows 11 Start menu.
You can right-click on an application you want to uninstall in the Start menu and select Uninstall. However, there are times when you might accidentally click the wrong button, or your computer mouse might lag, leading to erratic actions..
By default, you can right-click on an application you want to uninstall in the Start menu and select Uninstall. This makes uninstalling applications on Windows 11 faster. However, there are times when you might accidentally click the wrong button, or your mouse might lag, leading to erratic actions. Below are instructions on how to uninstall applications from the Windows 11 Start menu.
Instructions on how to uninstall applications from the Windows 11 Start menu.
Step 1:
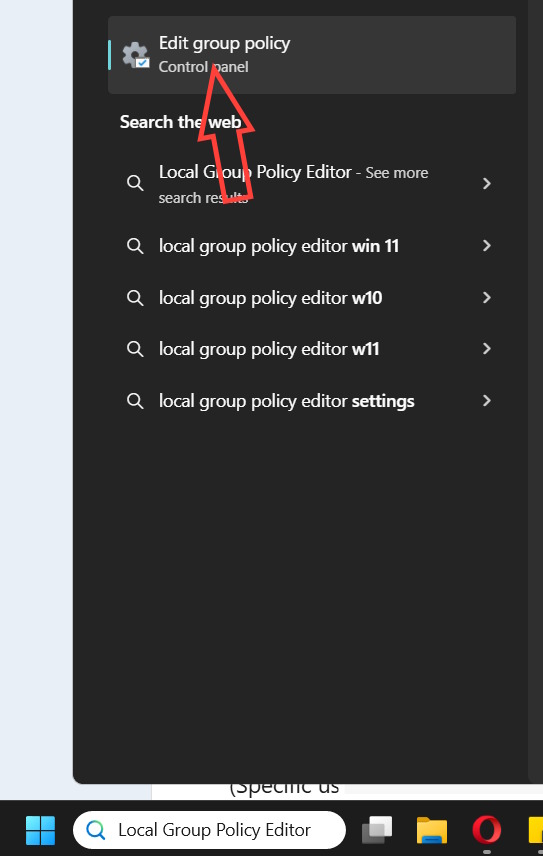
First, open the Local Group Policy Editor on your computer by typing it into the search bar.
Step 2:
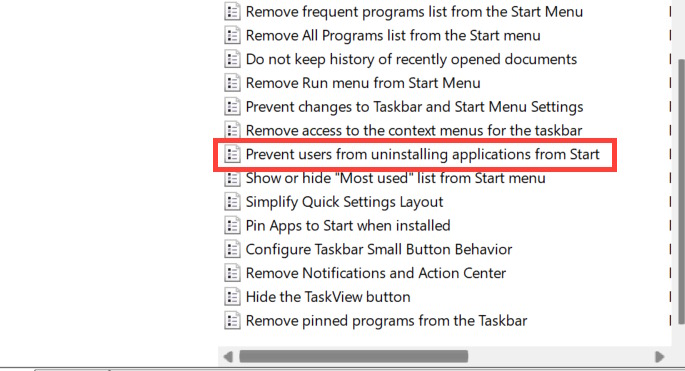
To access the new interface, navigate to Computer Configuration > Administrative Templates > Start Menu and Taskbar .

Step 3:
Looking at the content next to it, double-click on "Prevent users from uninstalling applications from Start" to customize the application uninstallation options in the Start menu on Windows 11.
Step 4:
Now, click on Enabled to activate the block from uninstalling applications from the Start menu on your computer. Finally, click Apply and then OK to save the changes.
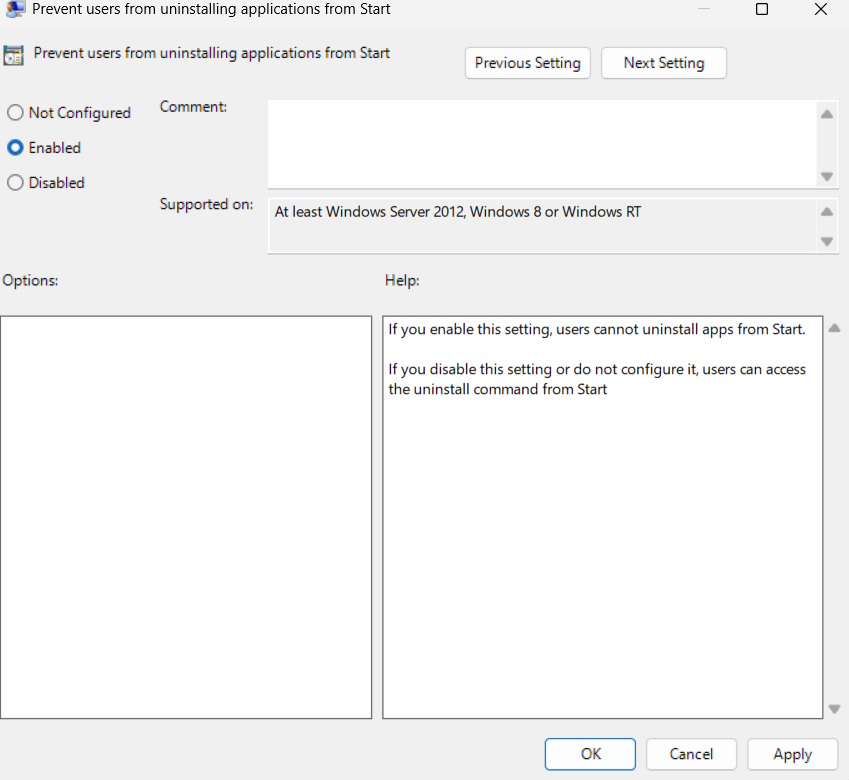
If you want to restore the option to uninstall apps from the Start menu, simply click on Not Configured.