How to create Windows PE rescue disk
Rescue Disk Windows Preinstallation Environment (PE) is a customized Windows recovery environment that comes with computer repair tools such as data backup and restore tools, password utilities, protection tools and types. remove malware, etc.
There are some great Windows PE-based rescue discs you can download and use, but it's even better to create your own Windows PE rescue disc and choose the recovery tool you want. This article will guide you how to create Windows PE rescue disk offline.
Instructions for creating Windows PE rescue disk
- What is Windows PE?
- Create Windows PE rescue disks using Win10XPE
- 1. The tool needed to create a Windows PE recovery disk
- 2. Run WinBuilder Win10XPE
- 3. Select the recovery tool for Windows 10 PE rescue disk
- 4. Set up Build Core option
- 5. Add custom file to Windows PE recovery disk
- 6. Download Windows PE recovery disc
What is Windows PE?
Windows PE is a lightweight version of Windows 10. You can use Windows PE to install, test and repair the full installation of Windows 10. Basic Windows PE version supports all Windows applications, drivers , network tools, disk management and partitions, etc.
Windows PE-based recovery discs extend this functionality, adding free and open source tools that users can use to restore and analyze their Windows 10 installation.
This article will show you the easiest way to create a Windows PE recovery disc using predefined tools to choose what you want in the rescue disk, even custom folders for your own programs. friend.
Create Windows PE rescue disks using Win10XPE
Win10XPE is a complete custom Windows PE environment developed by ChrisR. It has a wide range of core Windows features, plus you can add a variety of other custom applications.
1. The tool needed to create a Windows PE recovery disk
You need these two tools before starting:
- Win10XPE project
http://win10se.cwcodes.net/Compressed/download.php?loc=Win10X&httploc=win10se.cwcodes.net/Compressed/&file=Win10XPE_2019-04-26.7z&localdlc=Win10XPE_count.txt - A copy of Windows 10 version 1709
https://tb.rg-adguard.net/public.php Win10XPE project files are provided by the developer of the disk recovery based on Windows PE Kyhi. Kyhi stopped releasing the recovery disc but created a system so that users can create their own recovery discs. Download the compressed Win10XPE project file and extract it.
Next, download the Windows 10 ISO file. You can use the drop-down box to select the version and architecture. In this tutorial, we will use Windows 10 1903 Final. After downloading, extract the content into a folder.

2. Run WinBuilder Win10XPE
Go back to the Win10XPE folder, then run the executable file Win10XPE.exe. The WinBuilder customization environment will open.
The first thing you need to do is select the Windows 10 source folder in the Select the Windows 10 Source Folder section by browsing to the location of Windows 10 ISO created in the previous section, selecting the folder and letting WinBuilder update its source file data. .

Now, select the image you want to use for the Windows PE recovery disc. You can use Windows 10 Pro because this is the complete version of the operating system, should not use Windows 10 Home because it has many limitations.
3. Select the recovery tool for Windows 10 PE rescue disk
You can now select the recovery tool for the rescue disk in the left panel, scroll down and select the option you want to use.
Here, you have options such as Accessibility, Components, Network, Office, Security, etc. These options are all applications in Kyhi's customized Windows PE rescue disk but you can choose the tools you want use to add to your disk.

When selecting an application, WinBuilder will provide its functional description. It also gives you some application-specific options such as adding shortcuts, etc.
4. Set up Build Core option
At the top of the application list is the Build Core option. Build Core options allow you to set OS-related options such as language and keyboard formatting, choose to use Explorer or WinXShell (a lightweight open source alternative), background desktop (if you want attach your rescue disk brand), as well as other network and power options.
One option you should consider is to change that to WinPE Cache Size . Increasing the size of WinPE Cache Size can help speed up the Windows PE recovery disk. However, if you want to use the recovery disk on multiple systems, you should leave it at 1GB, this is the best option.
Another important option to consider is to change from Microsoft .NET Framework 4 to Network Additions so that Windows PE-based rescue disks can access Wifi.
5. Add custom file to Windows PE recovery disk
You can also add a custom folder to the Windows PE rescue disk. On the Build Core options page, you will see the Add Your Custom Folder option, select this option and click the Open Custom Folder button, then open Program Files .

You can copy any portable applications you want to add to the recovery disk in this folder. You need to choose a portable application because otherwise it will not be able to run from the disk when repairing your computer.
6. Download Windows PE recovery disc
When adding custom portable applications to your Windows PE recovery disc, it's time to download and try it out.
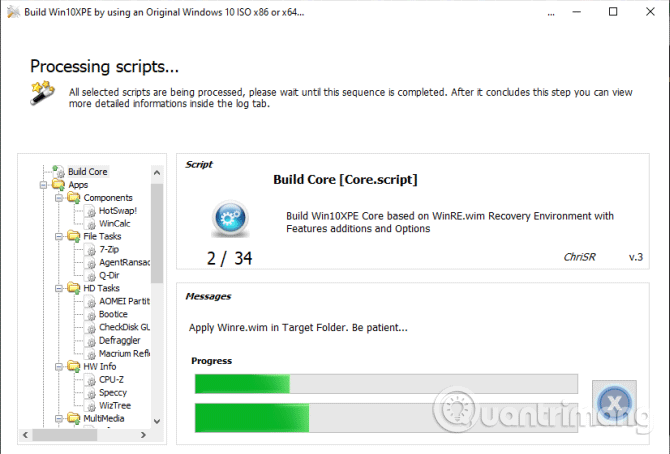
Click the blue Play button to the right of WinBuilder. Your Windows PE recovery disk may need to download some files during ISO creation. Accept these files and continue. If your anti-virus or malware suite prevents this file from being downloaded, create an exception for WinBuilder.

When you finish downloading the Windows PE ISO recovery disc, you need to burn it to a USB flash drive. If you don't know which tool to use, you can refer to the article 20 best USB boot software.
I wish you all success!