How to create animations with 3D effects on Windows 10
Windows 10 Photos app can create amazing animated 3D effects.
Previously, Network Administrator showed you a lot of ways to create animations such as using online gif services, or using gif image creation software. And if you want to create more unique 3D effects for your animations, you can immediately use the Photos app on Windows 10.
The Windows 10 Photos app has a lot of useful features, especially video editing like cropping videos, creating slow motion videos. Recently the manufacturer has updated the feature to add 3D effects to the animation on the application. Accordingly users can create animations from still images and add unique 3D effects to the image. The following article will guide you how to create gif images on Windows 10.
- Instructions for creating animated GIF images in Adobe Photoshop
- Instructions for creating GIF images on Youtube do not need software
- How to create animations from videos using Imgur.com
Instructions for creating GIF animation 3D Windows 10
Step 1:
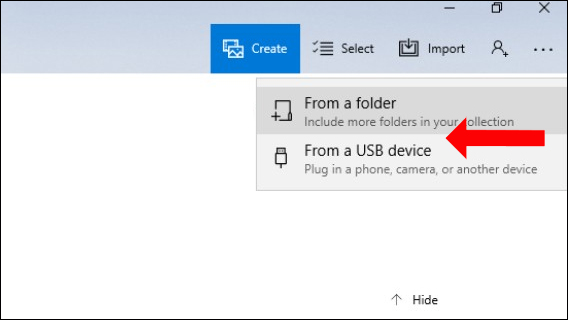
You open the Photos app on Windows 10 and then click the Import button in the right corner, then select the photo you want to add a 3D effect. Select From a folder or From a USB device to get the image.
Step 2:
In the user editing tools interface, click the Edit & Create button at the top, select Add 3D effects in the list that appears.

Step 3:
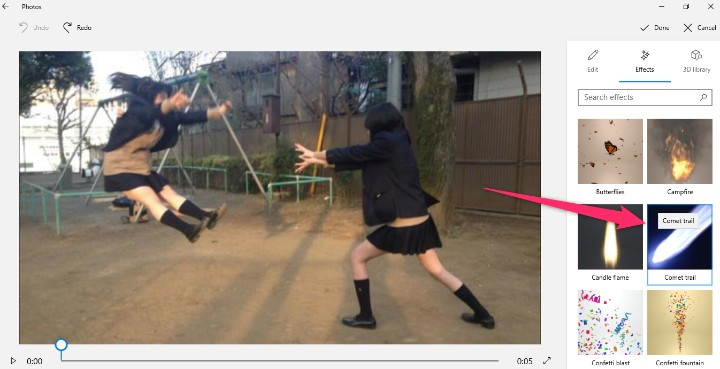
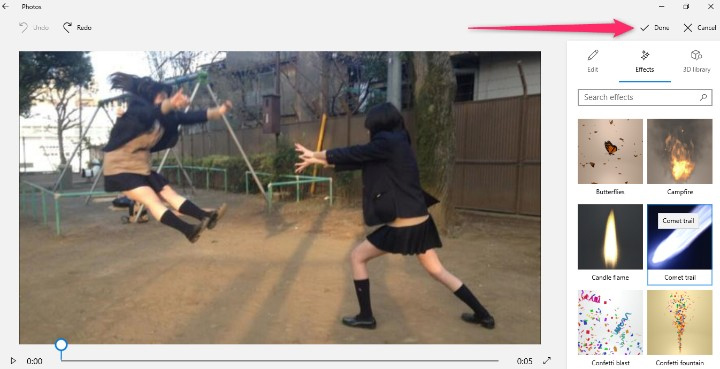
The photo editing interface will then appear with 3D effects that the Photos app supports users. You can select animated effects, with sound.
Click on the 3D effect on the screen to the right of the screen. Users can also enter keywords in the Search effects frame.
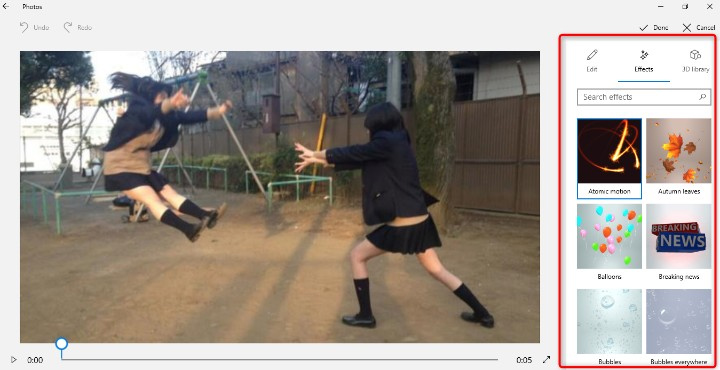
The effect when selected will automatically be applied to the image when the user clicks select.Note that the effects in 3D Library will need to be downloaded for use because it is not available to apply to images.
Step 4:
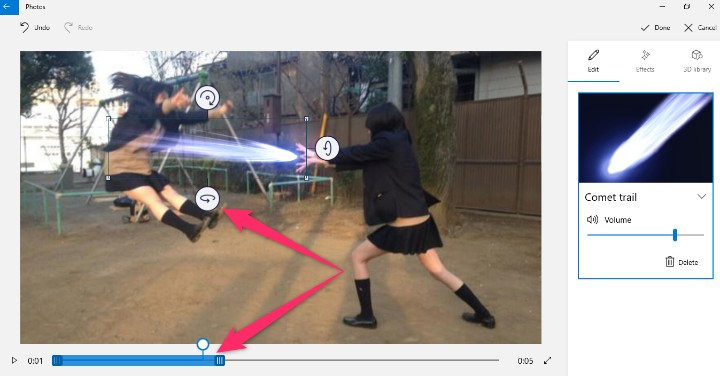
After adding effects to the user image can be customized by moving, resizing, changing the direction of the effect, . Use the adjustment buttons that appear in the effect.
The horizontal bar below is used to change the time the effect appears, by clicking on the blue slider.
Step 5:
When you have finished editing the 3D effect for the image press the Done button to save it.
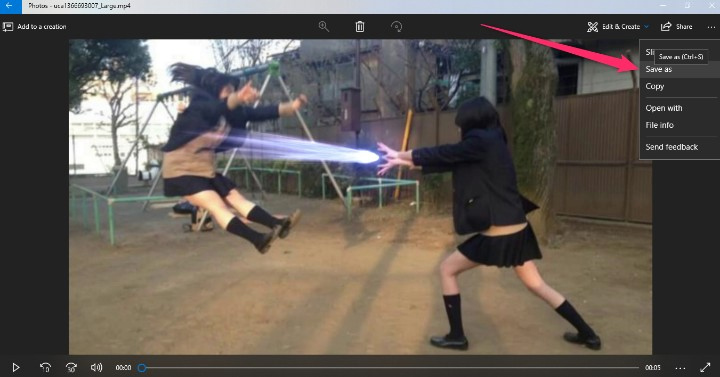
To save the image press the dot icon on the right corner and select Save as . The image will be saved in MP4 format and saved with the original photo folder. Thus users will have 2 photos, 1 original image and 1 3D effect animation.
Step 6:
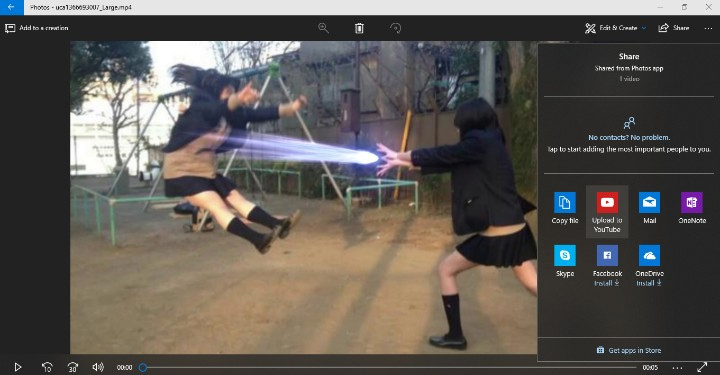
To share photos with friends, click the Share button on the toolbar and select the application you want to share.
So there is no need to install the support tool, we can create extremely vivid 3D effect animations, with Photos app on Windows 10. In case the Add 3D effects button is blurry, you can log out and login back to the Microsoft account is okay.
See more:
- Top software to create videos from quality images
- How to create a vanish effect with Picsart application
- Tutorial to create a photo-crumbling image in Photoshop
I wish you all success!
- How to create beautiful effects with Mo.JS
- How to create 2D effects in Godot with AnimatedSprite
- How to edit GIF images using EZGIF tool online
- How to turn off animations on Windows 11
- How to create animated effects on iPhone
- Instructions for creating simple infinite animations with Cliplets
- How to create GIF animations in Photoshop
- How to create motion effects on PowerPoint
- 6 best free GIF creation apps for Mac
- Turn ordinary photos into GIFs with the PLOTAGRAPH + app on the iPad
- How to create GIF images with Google's Gboard keyboard on iPhone and Android
- How to make photos on PhotoScape?
- How to create online animations on Imgflip
- How to create animations with Beneton Movie GIF
- How to edit GIF images using EZGIF tool online
- 5 effective online Gif image creation tools
- Instructions for creating GIF images on YouTube do not need software
- 'Turn' YouTube videos into GIFs


-
 Instructions on how to use AI models to create images in Civitai
-
Guide to inserting images under text in PowerPoint - Changing image position
-
Transform any text and image into a coloring page.
-
Instructions for combining photos using Google Flow
-
How to create AI images on Microsoft AI Playground
-
Top free AI image creation tools in 2026: Ultimate graphics solutions that cost nothing.
 Instructions on how to use AI models to create images in Civitai
 Guide to inserting images under text in PowerPoint - Changing image position
 Transform any text and image into a coloring page.
 Instructions for combining photos using Google Flow
 How to create AI images on Microsoft AI Playground
 Top free AI image creation tools in 2026: Ultimate graphics solutions that cost nothing.
-
Application
-
Web Email
-
Website - Blog
-
Web browser
-
Support Download - Upload
-
Software conversion
-
Social Network
-
Simulator software
-
Online payment
-
Office information
-
Music Software
-
Map and Positioning
-
Installation - Uninstall
-
Graphic design
-
Free - Discount
-
Email reader
-
Edit video
-
Edit photo
-
Compress and Decompress
-
Chat, Text, Call
-
Archive - Share
-
-
System
-
Mac OS X
-
Hardware
-
Game
-
Tech info
-
Technology
-
Science
-
Life
-
Electric
-
Program
-
Mobile