Instructions for creating animated GIF images in Adobe Photoshop
To create an animation (.gif) on Photoshop software is not easy, but it is not difficult. The following article will guide you on the basic steps to create an animated image as you like. Please pay attention and follow. Good luck!.
To create an animation (.gif) on Photoshop software is not easy, but it is not difficult. The following article will guide you to the basic steps to create a desired animation, pay attention and follow. Good luck!
- How to create Gif images quickly with Giphy
- Link to download Adobe Photoshop CS6 software
- Or download the Photoshop CS2 version is free (but if you want to make a GIF, you must switch to Image Ready tool)
Here we will show you how to create an animated image using Photoshop CS6 software, it is very simple to go through 3 steps, you can create your own animated image!

Instructions for creating animations using Adobe Photoshop CS6
Create animation from scratch on Photoshop CS6
Step 1: Create layers to make animations
Prepare image layers to create an animation ( for each layer, the character in the image moves with a different posture or a different action ).
Step 2: Create a frame for the animation
Go to Window > Timeline at the bottom of the screen ( Double-click on the Timeline then click on the drop-down arrow and select Create Frame Animation . at first, the number of frame frames will be 1 . we will have to create more numbers The frame is equal to the number of layers currently available to an animation by clicking on the Duplicates selected frames item .
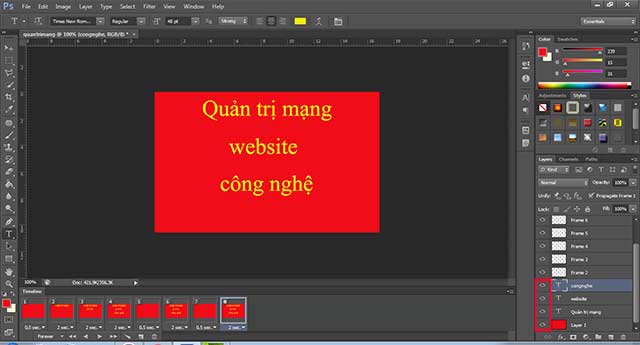
Step 3: Place the layer in the correct position
After having all the layers like in step 1 we begin to apply each layer to its frame position by turning on the eyes of the layers for each frame that appears.
Create animations from the photo folder available in Photoshop CS6
You already have a folder full of photos and want to put them into frames to create animated GIFs? There are many online animation applications that can help you do that like Giphy, but with Adobe Photoshop CS6 and some of its new features, this is quite simple and fast.
How to create an animation with an existing photo folder is as follows:
- Gather all the images you want to appear in the animation into a folder (yes already).
- Open Photoshop CS6
- Select File> Scripts> Load Files into Stack. When the Load Layers window appears, select Browser to select and open the image files of step 1, then click OK . This will import the selected image files into individual layers. Rearrange classes in the correct order, if needed.
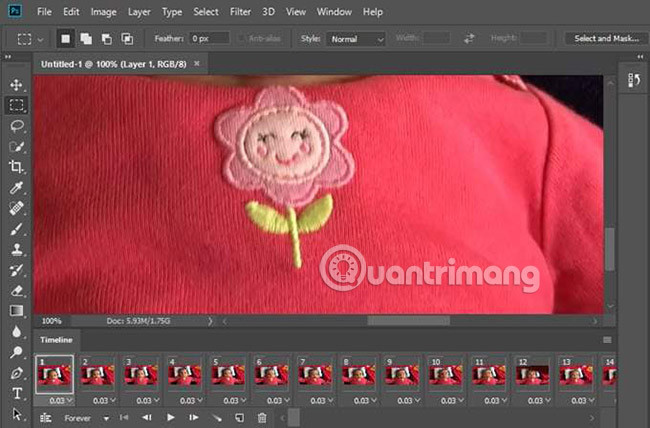
- The next step is to open the Timeline control panel by going to Windows> Timeline , (on CS5 is Windows> Animation). In the middle of the table, a drop-down arrow button will appear, allowing you to choose between 'Create Video Timeline' or 'Create Frame Animation'. Click Create Frame Animation .
- In the Animation / Timeline menu (appears below this button in the upper right corner of the palette:
 ), click Make Frames From Layers . You can also click on Reverse Frames if needed. This will place each layer on each frame in the animation.
 - Change the time interval for each frame. Make sure you are in frame view and not timeline. If you don't see the thumbnail icons of all layers in the Animation / Timeline panel, click on the icon in the lower right corner, which will hover over it and display "Convert to Frame Animation". Now go back to the Animation / Timeline menu and select Select All Frames .
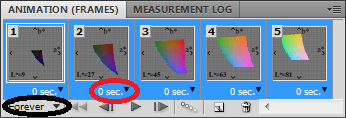
- Click the arrow below each frame to set the time interval for each frame. Since the above step has selected all frames, they will be set to the same time interval. Each frame can be changed individually, if desired, just uncheck all the steps above and proceed to set the time for each frame with a short length of your choice.
- The arrow is circled in the black line used to select the number of times the animation repeats, you can choose the number of times or leave it as Forever (give it a repeat of the lifetime).
9. When the frame order and appearance time of each frame has been set, you will save the image. Click File> Save for Web & Devices , select the format to save to GIF, change the other options of the image if needed and save the image.
Video tutorial for creating animated images, GIF images using Adobe Photoshop CS6 software:
Instructions for creating GIF from videos in Photoshop CC
Have you ever wondered how long GIFs you see on websites like Imgur are created? Many times, creators shoot videos, convert the entire content of the video into animated GIF and then insert the text for entertainment purposes.
Here, this tutorial will show you how to record video and convert it into animated GIF using Photoshop CC because it allows you to have more control over the final product in terms of size, quality, frame, etc. .
Convert the video before putting it in Photoshop CC
- Download Photoshop CC
Before you start, you may need to convert your video to the file format that Adobe Photoshop will support. For example, you take a video from iPhone and upload it to your computer. Then open the video in Photoshop, but there is the following error:
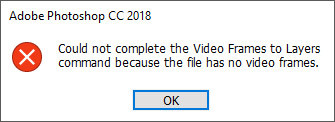
Không thể thực hiện khung ảnh vào lệnh này vì tập tin có không có khung ảnh.
This video is an MOV file, but the format Apple uses is not supported in Photoshop. To fix this problem, you need to download a program like HandBrake to convert videos.
It's easy to use HandBrake. Just click File - Choose Source and select your video file. At this point, all you really have to do is click the Start Encode button . By default, it will use the Fast 1080p30 preset that you see listed on the right. There are many presets, so you have to choose one of them. Note that you can reduce the resolution of GIF in Photoshop later, so you don't have to do it in HandBrake.

Once the video is converted to an MP4 file using H.264 video codec, you can open it in Photoshop.
Open the video and create GIF in Photoshop
Open Photoshop CC and click on File , then click Import and then Video Frames to Layers .

Select your video file and click Open . This will bring up a dialog with a small preview of the video and a few options.
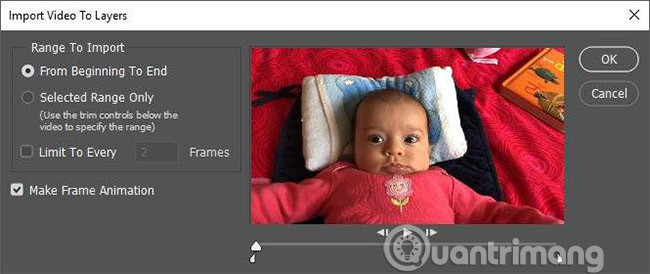
Now, if you want to convert the entire video into animated GIF format, continue and select From Beginning to End . If you only need a part, select the Selected Range Only and then use the cut control buttons below the video to select the range.
In addition, to reduce the size of GIF as much as possible, you can also limit the number of frames. For example, if you select Limit to every and leave it on two frames, that means Photoshop will delete all other frames from the video.
Finally, select the Make Frame Animation box. Click OK and your video will be imported as a series of frames in Photoshop. If the program crashes, you may need to reduce the quality of the video further before trying to import again.
Now all you have to do is save the frames in animated GIF format. To do this in Photoshop CC, you need to click on File - Export - Save for Web . Note that before saving it as a GIF, you can edit and delete the desired frames.

On this dialog, there are a variety of options that you will have to work. Most of them will affect the quality of GIF, which you can see in the preview area on the left. The right pane is where you will make the most adjustments.

At the top, you will see the Preset menu. You can click on it and select one of the presets or you can manually adjust the value. Selecting one of the presets will reduce the quality of the GIF, but will make it smaller. Make sure that GIF is selected in the Preset menu below.
At the bottom of the Image Size, you can adjust the final product resolution for your GIF. So if your video is 1920 × 1080 or 4K, you may want to significantly reduce the resolution in this section. In the Animation section, you can choose the options Forever, Once or Custom for Looping . By default, GIF will loop continuously. You can use the control buttons at the bottom to try to see what GIF looks like.
Click Save and select a location to save your GIF. Everything is complete.
Photoshop makes it easy to create animated GIFs from video and allows you to fine-tune the settings to make it moderate.
Good luck!
See more:
- How to combine photos in Photoshop from 2 different images
- How to sharpen images in Photoshop in 2 ways
- 3 tips to improve low-resolution image quality