How to create animations with Instagiffer on computer
Instagiffer is software to create animations on computers, with the ability to create gif images from various sources, such as from YouTube videos, images, ...
It won't be too difficult for us to find online software or services that create animations. For example, you can use the service Giphy, Gickr or install Beneton Movie GIF software. In the article below, Network Administrator will introduce you to the animation software is Instagiffer.
The program supports creating gif images from various sources, such as creating animations from Youtube videos, screenshots, or videos available in computers. In addition, Instagiffer also provides more options for animation such as cutting gif images, adding text, filters, . The following article will guide you how to use Instagiffer to create gif images on your computer.
How to use Instagiffer to create gif images on your computer
- Download the Windows Instagiffer software
Step 1:
First of all, click on the link above to access the homepage of Instagiffer. Software provides download links for Windows or Mac. Click on the icon of the operating system you are using to download the software.

Step 2:
Next, click on the .exe installation file to run the program. In the first interface, if you want to change the Instagiffer program installation folder, click Browse. Then click Next to continue.

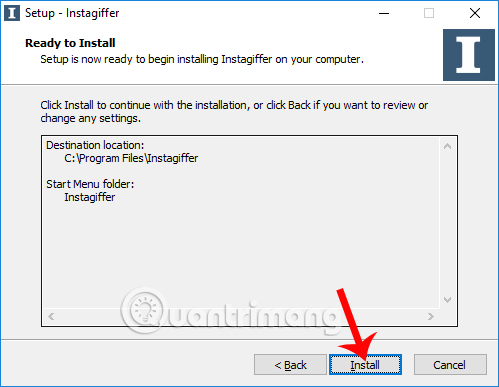
Step 3:
Click Install to install the software.
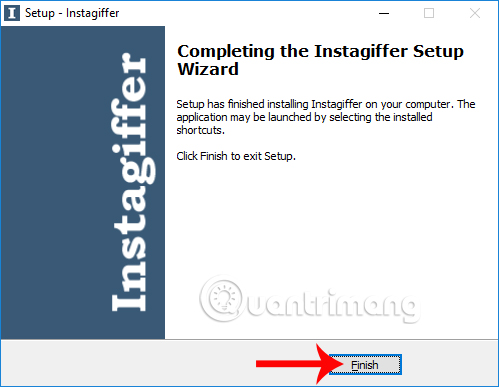
The process of installing the program is quite fast, you just need to click Next to finish. When the Instagiffer installation is complete, click Finish to finish.
Step 4:
At the main interface of the program, the Step 1 part will get the animation source. Here the program provides us with 3 different image sources.
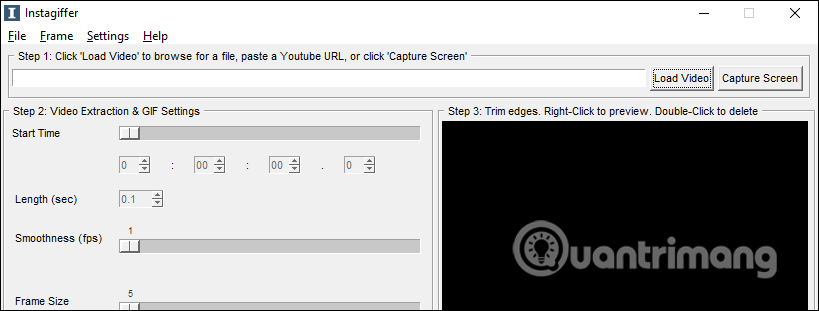
Capture Screen : use screenshots. You drag the window that appears to select the shooting position as well as the size. At Length, you choose the shooting time, the default is 5 seconds. If you want to capture both the mouse cursor, select Show cursor. Then, click Start and let the software work. Any action taken on the shooting window location will be taken again.
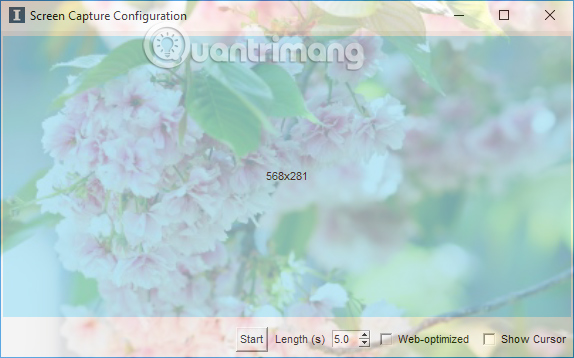
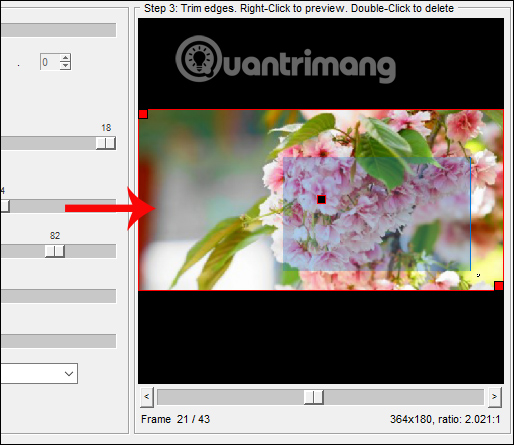
The screen of the recorded screen will look like the image below.
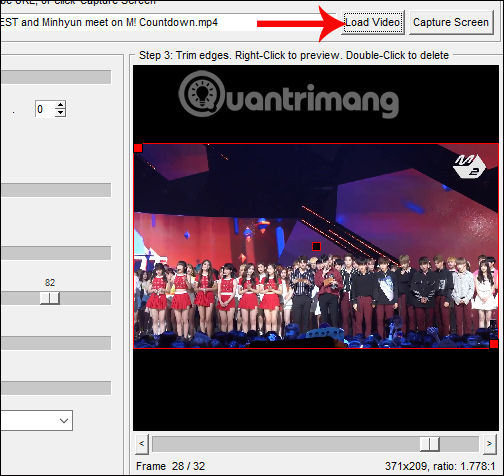
Load video : use file available on computer, support MP4, MKV format video, .
YouTube URL : paste the URL of the YouTube video to create an animation on the white frame in Step 1.

Step 5:
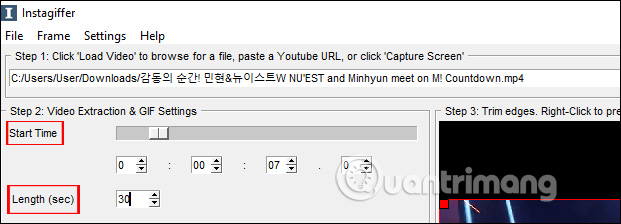
After selecting the source as an animation, here I will get the video available on the computer, we will proceed to set up to create the animation in Step 2 .
At the Start Time , we move the slider to select the start time to make an animation, or we can enter the specific time below.
Next to Length (sec) select the length for the animation, calculated from the selected Start time mark above.
Step 6:
The Smoothness section (FPS) selects the animation display, in frames per second. If you create an animation from a screenshot, Smoothness (FPS) will not work.
Frame size will be used to adjust the frame size for the animation. When dragging the horizontal bar to the right, the larger the image size and vice versa.
Next at Quality will adjust the image color quality. At Brightness will adjust the brightness and darkness for the animation being created.

Step 7:
Go to the Playback Rate section, if you want to use the slow motion effect on the image, drag the slider to the left.
To add content to the animation, in the Captions section click Click here to add new a caption and enter the content then select the location, text size, color, and time that appear in the separate content input interface.

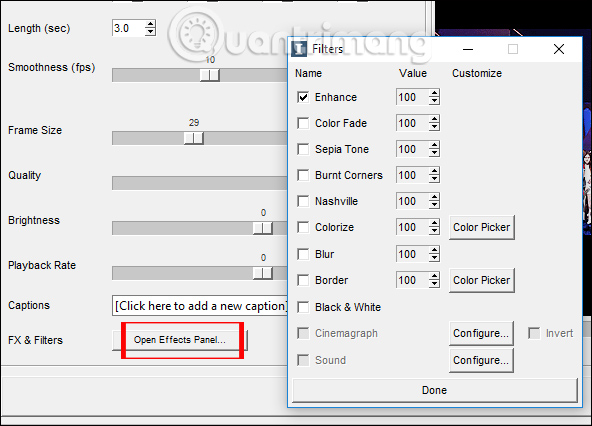
At FX & Filters there will be more effects as well as filters for animations. Click Open Effects Panel to open the photo effects import window.
Step 8:
If you want to insert the logo into the animation, click Settings> Configure Your Logo to do it.
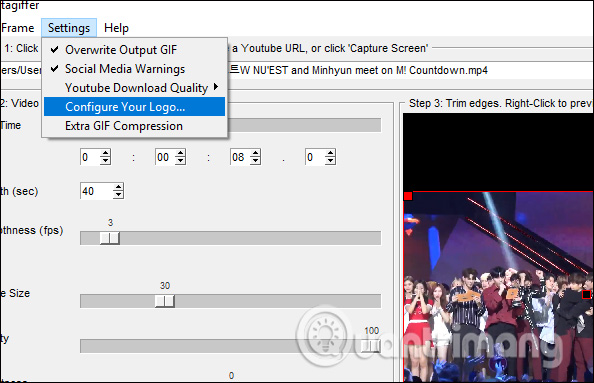
Then a small dialog box appears to insert the logo. Logo will be taken with images available on the device. Click Browse to get the logo image and make some customizations below. Finally click OK to save.

Step 9:
After completing the custom items, users press the Create GIF button ! below to proceed with animation.
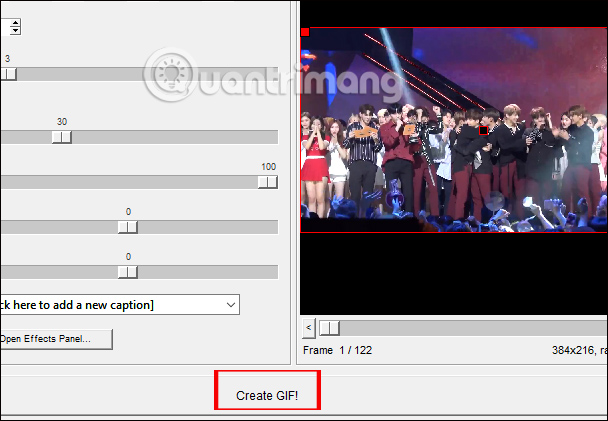
Immediately after that the program will proceed to cut frames and process images, apply the settings that users have selected in the above steps.

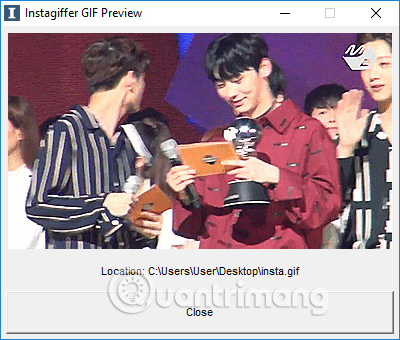
When the animation process ends, Instagiffer will display the Preview preview frame of the animation. The image will default to the Desktop.
Step 10:
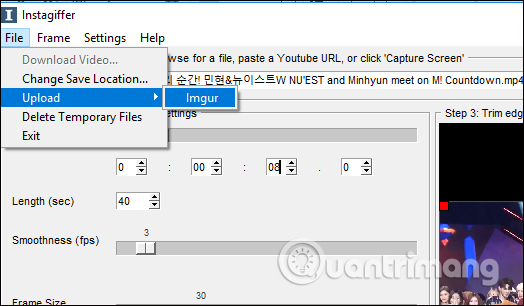
In case you want to upload the animation to Imgur after creating it, click File> Upload> Imgur . Note that the image uploaded to Imgur will be under 2MB.
Step 11
Finally you just need to change the name for the animation and save them to another folder location.

The image will be opened with the image viewer on the computer as usual.
Above is a tutorial on how to create animated images using Instagiffer software. The program provides you with professional animation creator, with quality image processing capabilities, along with many basic to advanced animations for animations. The image after downloading is saved to Imgur if desired. A useful animation software that you should not ignore.
I wish you all success!
- How to create GIF animations in Photoshop
- How to create GIF Online
- Instructions on how to create animations online with the Gickr website
- Create GIF animations from Youtube videos
- Instructions on how to create 3D effects and objects in Photoshop
- Instructions for creating animated GIF images in Adobe Photoshop
- How to edit GIF images using EZGIF tool online
- How to create Gif Christmas images with Jibjab fun application
- How to cut a circle image on Paint
- How to create A3 and A4 paper sizes in Photoshop
- How to create a table in Photoshop
- How to change the image background color with the Paint 3D application
- How to create a 3x4 photo in Paint
- How to delete text in photos with Paint
- How to create SVG from PNG or JPG in Photoshop
- How to blur photos in Paint
- How to create X-ray effects in GIMP
- How to create clipping mask in GIMP


-
 PowerPoint 2019 (Part 18): Adding Animations to Text and Objects
-
The best anime for Gen Z
-
Enjoy these 4 seconds of AI animations from this cool still image by Meta!
-
Top 5 Simple, Professional Animation Software
-
How to animate photos, text, and graphics in Adobe Express
-
PowerPoint 2016: Animate text and objects
 PowerPoint 2019 (Part 18): Adding Animations to Text and Objects
 The best anime for Gen Z
 Enjoy these 4 seconds of AI animations from this cool still image by Meta!
 Top 5 Simple, Professional Animation Software
 How to animate photos, text, and graphics in Adobe Express
 PowerPoint 2016: Animate text and objects
-
Application
-
Web Email
-
Website - Blog
-
Web browser
-
Support Download - Upload
-
Software conversion
-
Social Network
-
Simulator software
-
Online payment
-
Office information
-
Music Software
-
Map and Positioning
-
Installation - Uninstall
-
Graphic design
-
Free - Discount
-
Email reader
-
Edit video
-
Edit photo
-
Compress and Decompress
-
Chat, Text, Call
-
Archive - Share
-
-
System
-
Mac OS X
-
Hardware
-
Game
-
Tech info
-
Technology
-
Science
-
Life
-
Electric
-
Program
-
Mobile